
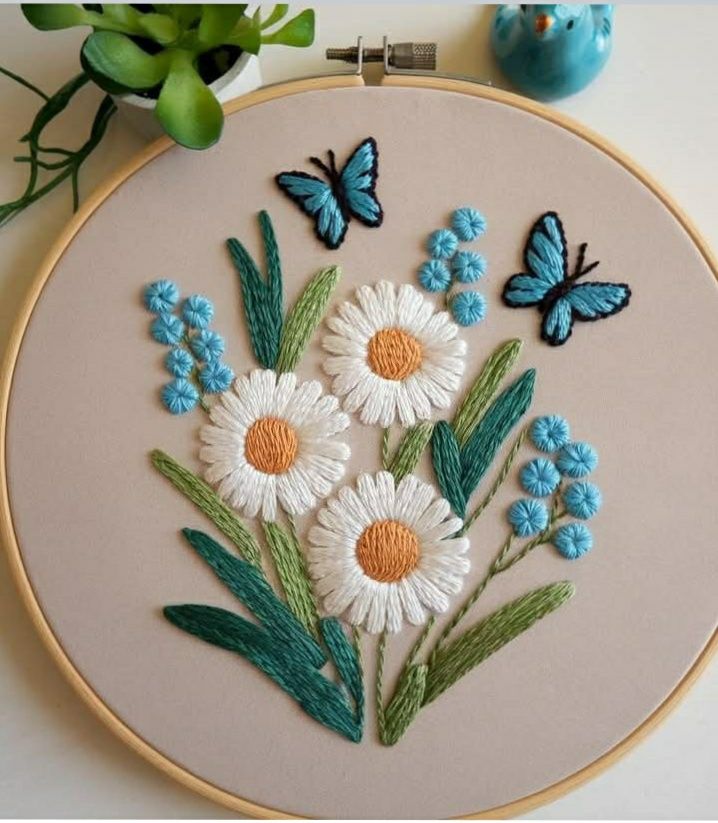
Embroidery has long been a beloved craft, blending creativity and technique to produce stunning textile art. One of the most captivating trends in the world of embroidery is the 3D Rose flower embroidery design. Unlike flat stitching, 3D embroidery brings your floral patterns to life, offering texture, dimension, and realism that pop right off the fabric.
This article serves as a step-by-step guide and inspirational resource for beginners and experienced stitchers alike. Whether you’re enhancing a piece of clothing, decorating home textiles, or designing artwork, learning how to create a 3D Rose flower embroidery design will transform your embroidery projects.
Using essential embroidery patterns and advanced techniques, we’ll walk you through the tools, fabrics, and stitches needed to produce this beautiful floral effect. Let’s dive into the blooming world of 3D embroidery and master this popular art form.
Why Choose 3D Rose Flower Embroidery Design?
The 3D Rose flower embroidery design stands out because of its visual impact and lifelike aesthetic. Traditional embroidery lies flat on the fabric, while 3D embroidery mimics the natural texture and shape of a real rose. This makes it perfect for adding elegance to garments or as a centerpiece in framed textile art.
Beyond its beauty, this design allows embroiderers to express creativity through color combinations, petal layering, and unique placements. Each rose becomes a work of art, personalized to the crafter’s vision. This creative flexibility is why so many enthusiasts are turning to 3D embroidery patterns.
Lastly, mastering this design can elevate your overall embroidery skills. The technique involves layered stitching, dimension control, and delicate thread manipulation. Learning how to make a 3D Rose flower embroidery design opens doors to other advanced embroidery methods and innovations.
Essential Materials and Tools
Before beginning your 3D Rose flower embroidery design, you’ll need the right tools. Basic materials include an embroidery hoop, fabric (such as cotton or linen), embroidery needles, and quality embroidery floss or threads. Choose a fabric that holds structure well to support the raised design.
For the rose petals, consider using silk ribbon, organza, or thick embroidery floss. These materials help form the voluminous, curved petal look that defines 3D embroidery. A water-soluble fabric marker is also helpful for sketching your embroidery patterns before stitching.
Scissors, a thimble, and a pattern guide are essential, too. If you’re a beginner, printable or downloadable embroidery patterns for 3D roses can help you learn petal placement and stitch direction. With the right tools on hand, you’re ready to begin crafting your blooming masterpiece.
Preparing the Pattern
Start by transferring your 3D Rose flower embroidery design onto the fabric. Use a light pencil or water-soluble pen to draw the rose shape, stem, and leaves. Consider placing your design slightly off-center if you’re working on clothing or decorative items to create visual interest.
Select a rose embroidery pattern that suits your desired rose size and shape. You can find templates online or create your own based on rose illustrations. Keep your design simple if this is your first time working with 3D embroidery to avoid overwhelming yourself with intricate details.
Once the outline is ready, secure your fabric tightly in an embroidery hoop. This tension is crucial for keeping your fabric flat as you work on the raised elements. A well-stretched fabric base ensures precise stitching and a neater final appearance.
Stitch Techniques for Petals
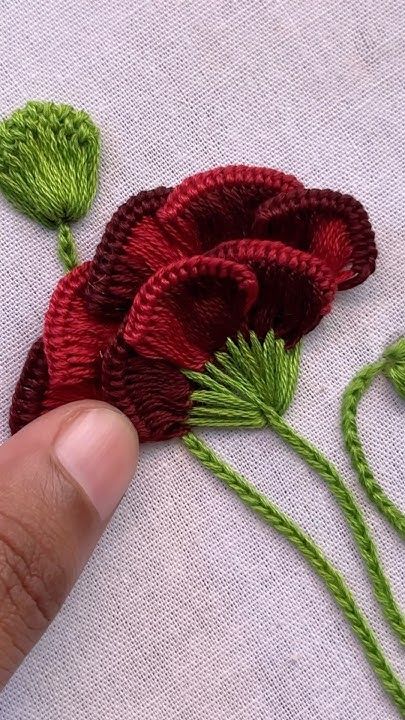
The magic of the 3D Rose flower embroidery design lies in the petals. The most commonly used stitch for 3D petals is the “detached petal stitch” or “looped detached chain stitch”. These stitches allow you to create raised petals by sewing them individually and attaching them in layers.
Start at the center of the rose with tight, small petals using satin stitch or French knots. As you move outward, switch to larger petals using ribbon stitch or long-and-short stitch. This gradation in size and texture gives the rose its realistic look and depth.
Use a mix of pink, red, or even multicolored threads to create shadow and light effects. Blending different shades gives your rose embroidery more visual richness. Don’t forget to fluff and shape the petals gently with your fingers after stitching to enhance the 3D effect.
Adding Leaves and Stems
Leaves and stems complement your 3D Rose flower embroidery design, making it more complete and visually balanced. While the petals are dimensional, leaves can be either flat or slightly raised using padded satin stitch or fishbone stitch.
Use green shades that contrast slightly with your flower color to make the design stand out. You can also add veins to the leaves with backstitch or split stitch to provide more detail and texture. This additional layer of detail brings realism to your embroidery patterns.
Stems can be done with stem stitch or wrapped backstitch. Keeping the stitches consistent and smooth is key to making the stem appear natural. For added 3D realism, consider padding the stem with a few layers of floss before stitching over it.
Finishing Touches and Presentation
After completing your 3D Rose flower embroidery design, gently remove your fabric from the hoop and rinse away any pattern markings if you used a water-soluble pen. Let it dry naturally and avoid ironing directly over the embroidery to preserve the raised effect.
If you’re framing your work, consider mounting it on a canvas or in a shadow box to protect the petals from being flattened. For wearable embroidery, hand-wash the item carefully and avoid heavy contact that might crush the rose’s 3D form.
Adding embellishments like small beads, pearls, or gold threads can enhance the luxurious feel of your finished piece. These tiny accents can catch light and give your embroidery an artistic and sophisticated appearance.
Tips for Beginners
If you’re new to embroidery patterns, start with a single, medium-sized rose on a neutral background. This makes your stitches easy to see and correct as needed. It also allows you to practice layering petals without dealing with too many complicated design elements.
Patience is essential when learning how to make a 3D Rose flower embroidery design. Take breaks when needed, and don’t rush through the layering process. The beauty of 3D embroidery comes from the meticulous attention given to each petal and stitch.
Lastly, join online embroidery communities or forums where you can share progress, get feedback, and ask questions. These groups often share free embroidery patterns and tutorials that can help you improve quickly and stay inspired.
Where to Use 3D Rose Embroidery
3D Rose flower embroidery designs are incredibly versatile. You can add them to pillow covers, tote bags, denim jackets, or even create standalone wall art. Their textured beauty draws attention and adds a handcrafted elegance to any item.
Brides often choose 3D floral embroidery for handkerchiefs, veils, or ring pillows. The romantic and delicate appearance of the rose fits perfectly with wedding themes. These pieces often become cherished keepsakes for years to come.
Additionally, designers use 3D embroidery for fashion shows and haute couture garments. The luxurious detail created by embroidery artists adds a level of sophistication and exclusivity to handmade fashion pieces.
3D Rose Flower Embroidery – Free Pattern
Approximate Finished Size:
4 in x 4 in (adjustable)
Materials:
- Cotton, linen, or lightweight fabric (8 in x 8 in)
- 5-inch (or larger) embroidery hoop
- Embroidery needle (size 7 or 9)
- Embroidery floss in the following colors:
- Dark red (for inner petals)
- Medium and light red (for outer petals)
- Leaf green (for leaves)
- Moss green (for stem)
- Embroidery scissors
- Water-soluble pen or fabric pencil
- Tracing paper or dressmaker’s carbon paper
Recommended Stitches:
- Center Petals: French knot or small lazy daisy
- Middle & Outer Petals: Detached chain stitch or loose lazy daisy
- Leaves: Fishbone stitch or satin stitch
- Stem: Stem stitch
Quick Instructions:
- Transfer the design onto your fabric using a water-soluble pen or carbon paper.
- Place the fabric into the hoop, pulling it tight.
- Start with the center using French knots or small lazy daisy stitches.
- Add outer petals using larger and looser stitches for 3D volume.
- Finish with the stem and the two side leaves.
- Gently shape the petals with your fingers to emphasize the 3D texture.
Conclusion
The 3D Rose flower embroidery design is a captivating blend of artistry and skill, offering a beautiful way to express creativity. With the right materials, patience, and practice, anyone can bring these embroidered roses to life in stunning detail.
As you explore different embroidery patterns and techniques, you’ll discover a world of possibilities beyond the traditional. From intricate petals to flowing leaves, 3D embroidery adds texture and emotion to every piece you create.
Whether you’re embellishing clothing or making décor, the blooming beauty of 3D Rose flower embroidery will surely make your creations stand out. Grab your needle, thread, and hoop—and start stitching your garden of roses today.