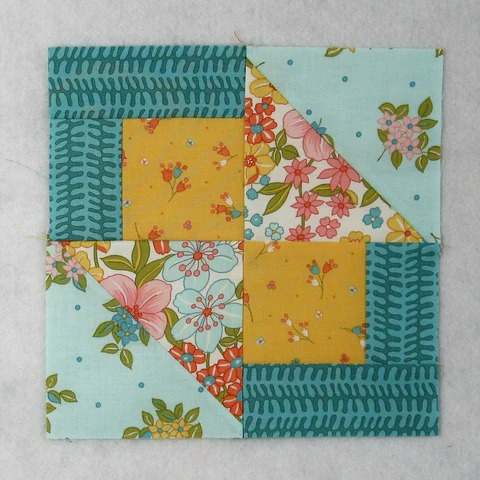
Quilting enthusiasts often search for new and exciting quilt patterns to add to their projects. One such classic and versatile design is the Picket Fence Quilt Block. Its clean lines and straightforward construction make it a favorite among quilters of all skill levels. This tutorial will guide you step-by-step through creating your very own Picket Fence Quilt Block, including precise fabric cuts and detailed assembly instructions.
What is a Picket Fence Quilt Block?
A Picket Fence Quilt Block is a simple yet elegant quilt design that mimics the look of a traditional wooden picket fence. The block features alternating strips of fabric, creating a visually striking linear pattern.
This quilt block is an excellent choice for beginners, as it involves basic straight-line sewing and requires only a few different cuts of fabric. Moreover, it can be easily customized by using different fabric colors and prints to create unique designs.
Experienced quilters also appreciate the versatility of the Picket Fence pattern. It can be incorporated into larger quilts, table runners, or wall hangings, making it a go-to option for many quilting projects.
Materials Needed for the Picket Fence Quilt Block
Before starting your project, gather all the materials required. Having everything ready will make the process smoother and more enjoyable.
- Fabric: You will need two contrasting fabrics—one for the fence strips and one for the background.
- Cutting tools: A rotary cutter, cutting mat, and quilting ruler are essential for precise cuts.
- Sewing machine: Ensure your sewing machine is in good working condition with a fresh needle.
Additionally, having coordinating thread, a pressing iron, and pins will help maintain accuracy and consistency throughout the project.
Cutting Instructions for the Picket Fence Quilt Block
Accurate fabric cutting is key to achieving a polished quilt block. Below are the recommended measurements for a standard 12-inch finished block.
- Fence strips: Cut 5 strips of Fabric A, each measuring 2.5 inches by 12.5 inches.
- Background strips: Cut 4 strips of Fabric B, each measuring 2.5 inches by 12.5 inches.
- Border (optional): If you want to add a border around the block, cut strips measuring 2 inches wide.
Always double-check your measurements before cutting. Consistency in strip width ensures that the block will fit together seamlessly when assembled.
Assembling the Picket Fence Quilt Block
Now that you have all your fabric pieces cut, it’s time to start assembling your Picket Fence Quilt Block. Follow these steps carefully to ensure a clean, professional finish.

Step 1: Arrange the Strips
Lay out the fence and background strips in alternating order. Start with a fence strip (Fabric A), followed by a background strip (Fabric B), and continue this pattern until all strips are laid out.
This step helps you visualize the final look of the block. Make any necessary adjustments to the fabric arrangement before sewing.
Using contrasting fabrics creates a striking design, while using similar shades results in a more subtle, elegant look.
Step 2: Sew the Strips Together
Begin by sewing the first fence strip to the first background strip, right sides together, using a ¼-inch seam allowance. Press the seam to one side with a hot iron.
Continue sewing the remaining strips in the same manner until all strips are joined. Be sure to maintain an even seam allowance for a neat, uniform block.
Pressing the seams as you go helps prevent puckering and keeps the quilt block flat, making it easier to handle during later stages.
Step 3: Trim the Block
Once all the strips are sewn together, use your rotary cutter and ruler to trim the edges of the block. Ensure that the block measures 12.5 inches square.
Trimming removes any uneven edges and ensures that your block will align perfectly with others when piecing a larger quilt.
If you plan to add a border, sew it around the block before trimming. This step will give your Picket Fence Quilt Block a finished look.
Tips for Customizing Your Picket Fence Quilt Block
One of the best things about the Picket Fence Quilt Block is its versatility. Here are a few ideas to customize your project:
- Use different fabric patterns: Instead of solid colors, try using patterned fabrics to add more visual interest.
- Play with strip widths: Varying the widths of the fence and background strips can create a unique look.
- Combine multiple blocks: Sew several Picket Fence blocks together to create a large quilt. Alternate the direction of the blocks for a dynamic design.
Experimenting with different variations of the Picket Fence pattern can lead to beautiful, personalized quilts that showcase your creativity.
Finishing Your Picket Fence Quilt Block
After completing your block, you may want to turn it into a finished project. Here are a few finishing ideas:
- Quilt top: Combine multiple Picket Fence blocks with sashing in between to create a quilt top.
- Table runner: Sew a row of blocks together for a beautiful table runner.
- Pillow cover: Use a single block to create a decorative pillow cover.
Whatever project you choose, the Picket Fence Quilt Block is sure to impress with its clean lines and timeless design.
Conclusion
The Picket Fence Quilt Block is an excellent addition to any quilter’s repertoire. Its simple construction, combined with endless customization possibilities, makes it a versatile and rewarding pattern to work with. Whether you’re a beginner looking for an easy project or an experienced quilter seeking inspiration, this tutorial provides everything you need to get started.
By following the steps outlined above and using high-quality materials, you can create a stunning Picket Fence Quilt Block that will be a cherished part of your quilting collection. Happy quilting!
