
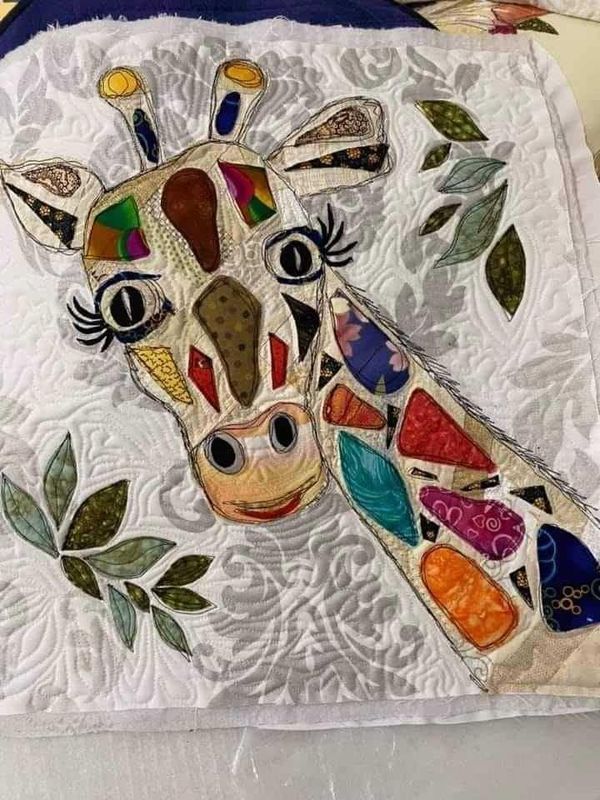
Creating a Giraffe Patchwork Quilt is a delightful project for quilting enthusiasts of all skill levels. This tutorial will guide you through each step, from selecting fabrics to assembling your quilt. Using quilt patterns, you’ll learn how to bring a beautiful giraffe-themed design to life with precise fabric cuts and seamless stitching.
Materials and Fabric Selection
Choosing the right materials is essential for a successful quilt. Opt for 100% cotton fabrics, as they are durable and easy to work with. You will need giraffe-themed prints, solid background colors, and accent fabrics to highlight different sections of your design.
Consider using a mix of warm tones like brown, beige, and yellow to mimic a giraffe’s natural pattern. If you prefer a modern twist, you can incorporate bold colors like teal or deep orange. Your fabric choices will determine the final aesthetic of your quilt patterns.
Aside from fabric, you will also need quilt batting, backing fabric, a rotary cutter, a quilting ruler, and matching thread. Having the right tools ensures clean fabric cuts and even stitches throughout the project.
Cutting the Fabric Pieces
Precise cutting is crucial to achieving a well-aligned quilt. Below are the measurements needed for your Giraffe Patchwork Quilt:
- Giraffe body pieces: Cut 6″ x 8″ rectangles from brown or giraffe-print fabric.
- Neck and head: Cut 4″ x 12″ strips for the neck and 6″ x 6″ squares for the head.
- Ears and ossicones: Cut two 3″ x 3″ squares for the ears and two 1″ x 3″ strips for the ossicones.
- Background fabric: Cut several 8″ x 8″ squares from a neutral shade (white, beige, or sky blue).
Always use a rotary cutter and quilting ruler to ensure accurate cuts. Lay out all pieces before stitching to visualize the final look of your quilt patterns.
Piecing the Quilt Blocks
Start by sewing together the giraffe’s body pieces. Align each 6″ x 8″ rectangle edge to edge, using a ¼-inch seam allowance. Press seams open for a smooth finish.
Next, attach the neck and head pieces to the body. Use pins to hold pieces in place before sewing to maintain accuracy. Gradually build the giraffe shape by stitching each section together.
Once the giraffe silhouette is assembled, sew the background squares around the figure to frame it within the quilt. This step ensures that the design remains centered and well-balanced.
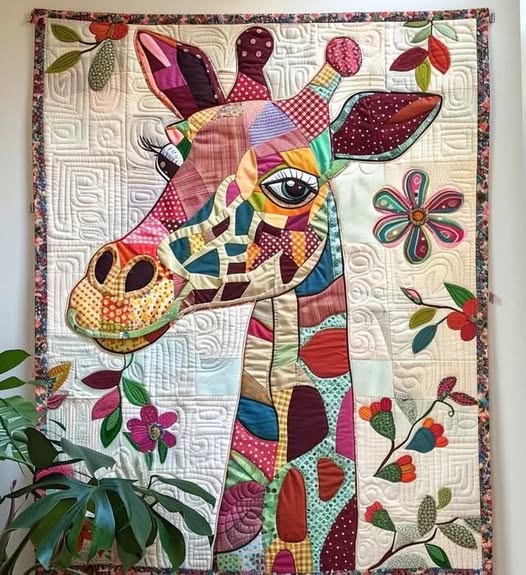
Giraffe Patchwork Quilt – Tutorial
Quilt – Tutorial
FULL PATTERN ACCESS
You will be redirected to another site
Assembling the Quilt Top
Arrange the completed giraffe blocks into your desired layout. A quilt pattern with alternating giraffes and solid fabric squares creates a balanced composition.
Sew the quilt blocks together row by row, pressing seams after each step. Once all rows are complete, join them to form the entire quilt top. Double-check alignment to ensure each section remains symmetrical.
Adding sashing (narrow fabric strips) between blocks can enhance the design’s clarity. Choose a color that complements your giraffe print while maintaining contrast with the background.
Quilting and Binding
After assembling the quilt top, it’s time to quilt the layers. Sandwich your quilt top with batting and backing fabric, ensuring all layers are smooth and wrinkle-free.
Choose a quilting technique that suits your design. Straight-line quilting along the seams highlights the patchwork effect, while free-motion quilting can add intricate details to the giraffe’s shape.
To finish, trim excess fabric and attach the binding. Fold binding strips over the quilt edges and sew them in place using a neat, even stitch. This step secures the layers and gives your quilt a professional appearance.
Final Touches and Care Instructions
Once the quilt is fully assembled, inspect it for any loose threads or uneven stitching. Press the quilt gently with an iron to remove wrinkles and set the seams.
For long-term care, wash your quilt in cold water on a gentle cycle. Air drying is preferable, but if using a dryer, set it to low heat to prevent shrinkage.
Displaying your Giraffe Patchwork Quilt on a wall or using it as a baby blanket will showcase your craftsmanship beautifully. This project not only enhances your quilting skills but also adds a personalized touch to any space.
Conclusion
Creating a Giraffe Patchwork Quilt is a rewarding experience that combines creativity with precise quilting techniques. By following this step-by-step tutorial, you’ll craft a stunning quilt featuring adorable giraffe designs using high-quality quilt patterns.
Whether you’re making it as a gift or for personal use, this unique quilt will undoubtedly become a cherished keepsake. Get started on your quilt today and enjoy the process of bringing this charming giraffe patchwork to life!