
he Disappearing Nine Patch quilt block is a favorite among quilters for its simplicity and stunning visual appeal. This pattern creates a dynamic design with minimal effort, making it perfect for beginners and experienced quilters alike. In this tutorial, we will go through the step-by-step process of creating a Disappearing Nine Patch quilt block, including fabric selection, cutting measurements, and assembly techniques.
Understanding the Disappearing Nine Patch Quilt Pattern
The Disappearing Nine Patch quilt block is based on a traditional nine-patch design. However, a simple cutting technique transforms the block into a more intricate layout. This makes it an excellent pattern for scrap quilts or coordinated fabric collections.
This technique allows for a variety of quilt designs with just a few simple cuts and rearrangements. By shifting the position of the cut pieces, quilters can create unique patterns and textures. The end result is a quilt that looks complex but is surprisingly easy to assemble.
Using this pattern, quilters can experiment with color placement and fabric contrast. The beauty of this method lies in its flexibility—it works well with solids, prints, or a combination of both.
Materials and Tools Needed
To create a Disappearing Nine Patch quilt block, you will need some basic quilting supplies. Gather the following materials before you begin:
- Fabric squares (5-inch charm squares or custom-cut pieces)
- Rotary cutter and cutting mat
- Quilting ruler
- Sewing machine with coordinating thread
- Iron and ironing board
Having high-quality quilting tools ensures precision in cutting and stitching. A rotary cutter with a sharp blade makes it easier to achieve clean and accurate cuts. Additionally, a quilting ruler helps maintain even measurements throughout the process.
Choosing the right fabric is also essential. Cotton fabrics are recommended due to their durability and ease of sewing. Pre-cut charm squares are convenient, but cutting your own fabric allows for more customization.
Cutting and Preparing the Fabric
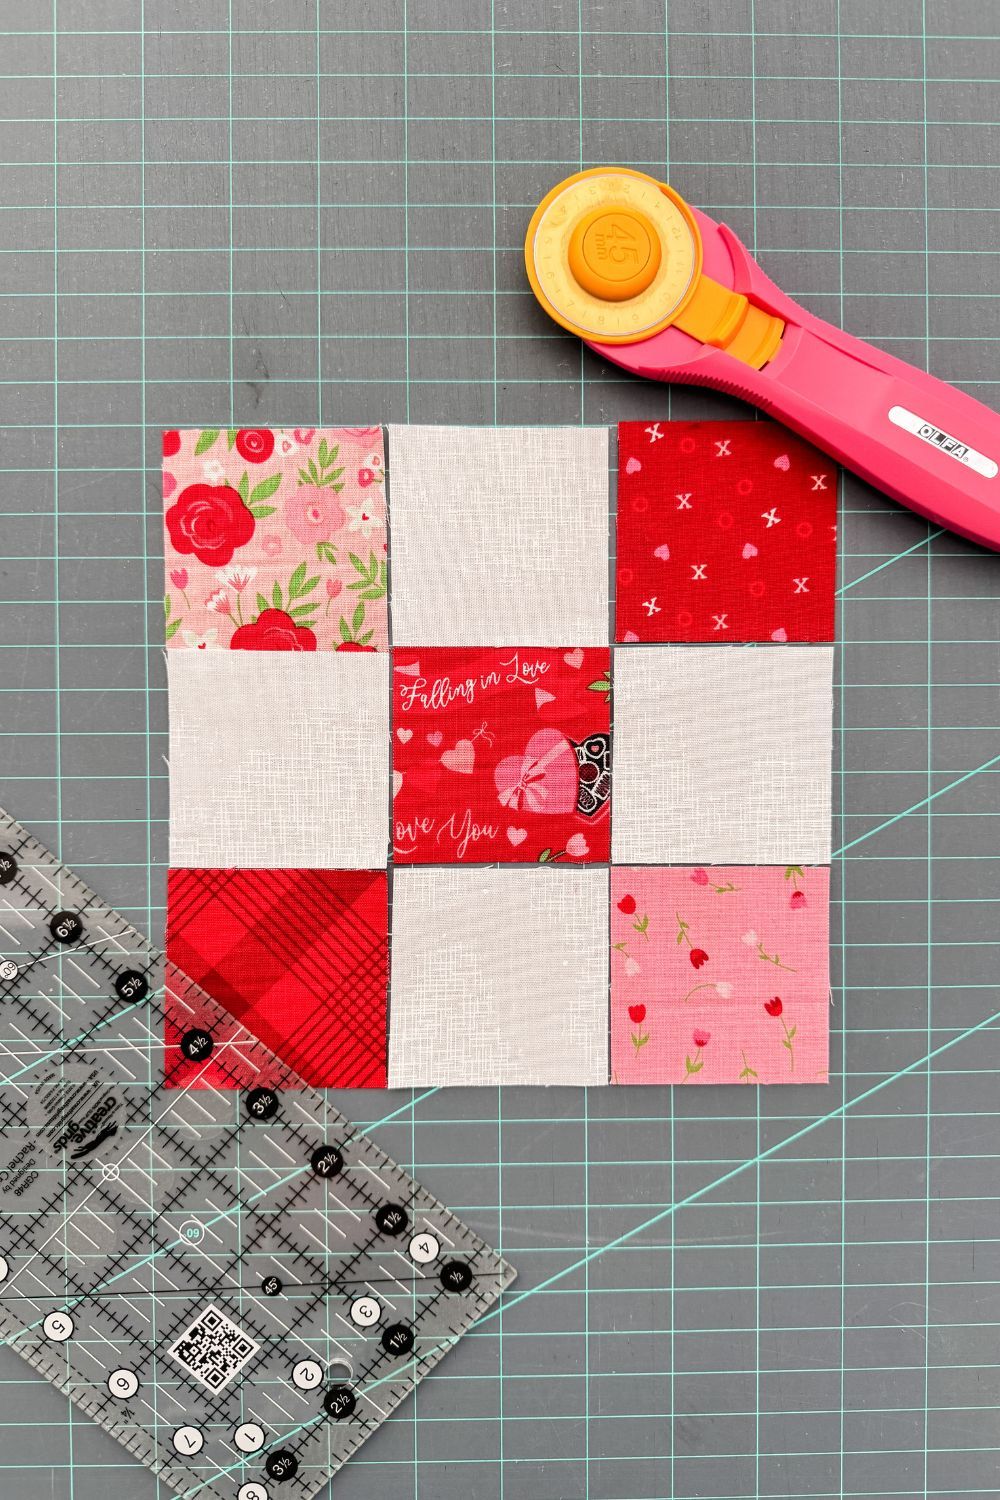
To begin, you will need nine fabric squares measuring 5 inches each. These squares will form the foundation of your nine-patch block. Select a mix of light and dark fabrics for contrast.
Arrange the squares in a 3×3 grid, ensuring that colors and patterns are balanced. This step is crucial as it will determine the final appearance of your quilt block. Pay attention to the positioning of different fabrics to achieve a visually appealing layout.
Once arranged, sew the squares together row by row using a ¼-inch seam allowance. Press the seams open or to one side to reduce bulk. Then, sew the rows together to complete the nine-patch block.
Transforming the Nine Patch Block
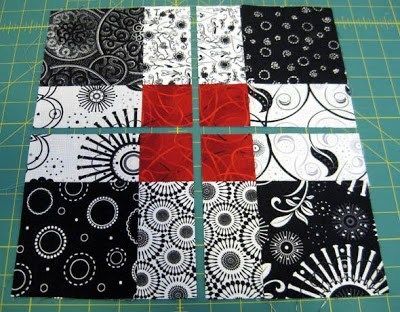
Now comes the exciting part—turning your nine-patch block into a Disappearing Nine Patch. Using a rotary cutter and ruler, cut the completed block in half vertically and horizontally.
This step results in four smaller squares, each containing different fabric combinations. Be careful to keep the pieces in order to maintain the design balance. If the fabric shifts, carefully reposition the sections before proceeding.
Once cut, rotate two of the squares to create a new layout. Experiment with different arrangements to find the one that best suits your quilt design. The transformation adds a modern touch to the traditional pattern.
Sewing the New Block Layout
After finalizing the new arrangement, sew the four squares together to form a larger block. Use a ¼-inch seam allowance and ensure that seams align properly for a polished look.
Press the seams carefully to avoid bulkiness. Ironing the seams in one direction helps the quilt lie flat and makes the final assembly easier. Taking the time to press properly enhances the overall quality of the quilt.
Repeat this process with multiple nine-patch blocks to create a full quilt. Each block will have a unique arrangement, adding variety and interest to the finished piece.
Assembling the Quilt Top
Once you have made several Disappearing Nine Patch blocks, arrange them in a pleasing layout. Experiment with different orientations to achieve a dynamic quilt design.
When satisfied with the arrangement, sew the blocks together row by row. Be mindful of seam alignment to maintain a professional finish. Using pins or clips can help keep the blocks in place while sewing.
After assembling the quilt top, press all seams and prepare for the next steps, including adding a border or sashing if desired. A well-pressed quilt top ensures easier quilting and a more polished final result.
Finishing the Quilt
The final steps involve layering the quilt top with batting and backing fabric. Use safety pins or basting spray to secure the layers before quilting.
Choose a quilting technique that complements the Disappearing Nine Patch pattern. Straight-line quilting enhances the geometric design, while free-motion quilting adds a decorative touch. Experiment with different stitching styles to achieve the desired effect.
After quilting, trim any excess fabric and bind the edges using a coordinating fabric strip. Binding gives the quilt a finished look and ensures durability. Once completed, your Disappearing Nine Patch quilt is ready to be enjoyed!
Final Thoughts
The Disappearing Nine Patch quilt pattern is a fantastic choice for quilters of all skill levels. Its simple yet effective transformation creates a visually stunning design with minimal effort.
This pattern allows for endless creativity. By varying fabric choices and block arrangements, each quilt becomes a unique work of art. Whether making a small wall hanging or a large bed quilt, this technique offers versatility and charm.
If you’re looking for a beginner-friendly yet impressive quilt pattern, the Disappearing Nine Patch is an excellent option. Give it a try and enjoy the process of creating a beautiful handmade quilt!