
Crochet is a joyful expression of creativity, and what better way to welcome spring or add a floral touch to your home than with a Crochet Tulip Coaster or Applique? Whether you’re making a set of coasters for your coffee table or a charming applique to decorate bags, blankets, or wall hangings, this simple yet elegant tulip design is a delightful project for any crochet enthusiast.
In this guide, we’ll walk you through everything you need to know to create your own tulip-themed piece—from gathering the right tools to following a beginner-friendly crochet pattern. With clear steps and helpful tips, you’ll be able to add this floral motif to your collection in no time.
Materials You’ll Need to Crochet a Tulip Coaster or Applique
Before we begin crafting, it’s essential to have the right materials on hand. A well-prepared work area and quality supplies will make your crochet project smoother and more enjoyable.
Yarn Selection
Choose cotton yarn for your tulip coaster to ensure durability and absorbency, especially if you plan to use it functionally.
Cotton also holds its shape well, making it a great choice for appliques. For more decorative uses, acrylic yarn offers a wider range of vibrant colors and a soft finish.
You’ll typically need three colors:
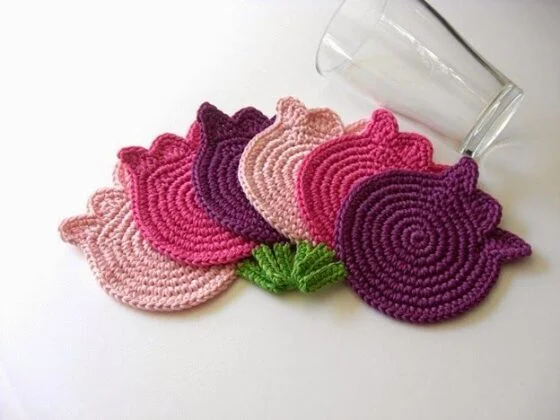
- Green for the stem and leaves
- Red, pink, yellow, or purple for the tulip petals
- Optional accent color for the background or edging
Crochet Hook and Tools
The right hook size is essential for achieving the desired stitch tightness and size. A 3.5 mm to 4.5 mm crochet hook is ideal for DK or worsted weight yarn.
Also, make sure you have:
- Scissors for trimming yarn ends
- Yarn needle for weaving in loose ends
- Stitch marker (optional, for beginners)
- Blocking mat and pins (optional, to shape your applique)
Having these supplies ready will make your process efficient and enjoyable, even for your first tulip project.
Why Make a Crochet Tulip Coaster or Applique?
Decorative and Functional
A tulip coaster doesn’t just look beautiful—it’s practical, too. It protects your surfaces from watermarks and heat while adding a cheerful, handcrafted touch to your décor. The applique version can be sewn onto pillows, bags, or even framed for wall art.
Crochet tulips also make wonderful handmade gifts. Whether as part of a larger project or a standalone piece, their vibrant design is sure to brighten anyone’s day.
Great for Practicing Shape and Color
Creating a crochet tulip helps you practice working with color changes and shaping, which are both essential skills in crochet. You’ll learn how to form distinct parts (like petals and leaves) and assemble them into a cohesive design.
For beginners, this project is a great step beyond basic squares and circles, introducing the joy of design and layering without being too complex.
Quick and Satisfying
One of the best parts of making crochet tulips is how fast you can complete them. Most tulip coasters or appliques take under an hour, making them perfect for a relaxing evening project or weekend craft session.
The small size also makes them perfect for using up leftover yarn, giving scrap materials new life in a beautiful form.
Step-by-Step: Crochet Tulip Coaster or Applique Pattern
Let’s get into the heart of the project! Below is a simple crochet pattern for a tulip applique or coaster, perfect for beginners.
Part 1: Tulip Petal
Step 1: With petal color, chain 6.
Step 2: In the second chain from the hook, work 1 single crochet (sc), then 1 half double crochet (hdc) in the next stitch, 1 double crochet (dc) in the next, 1 treble crochet (tr) in the next, and 1 dc in the last.
Step 3: Chain 1, turn your work, and mirror the stitches on the opposite side of the chain. You’ll now have a petal-shaped oval.
Repeat this for 2 or 3 petals, depending on how full you want your tulip to look.
Part 2: Tulip Stem and Leaf
Stem:
- With green yarn, chain 12.
- Slip stitch into each chain stitch down the chain. Fasten off.
Leaf:
- Chain 10.
- Work 1 single crochet, 1 hdc, 1 dc, 1 tr, 1 dc, 1 hdc, 1 sc into successive stitches.
- Chain 1, turn, and mirror these stitches back down the other side to form a long leaf shape. Fasten off.
You can make 1 or 2 leaves, depending on your preference. Position them near the stem for a natural look.
Part 3: Assemble the Tulip
- Sew or glue the petals together, slightly overlapping at the base.
- Attach the stem to the base of the petals.
- Add leaves along the sides of the stem.
- For a coaster, sew the tulip design onto a plain circular or square base. For an applique, leave it as is or attach it directly to another project.
Use a yarn needle and matching thread to sew the pieces securely. For display-only items, fabric glue may be used as a quicker alternative.
Tips for Personalizing Your Crochet Tulip
Add Layers or Texture
For a fuller look, make extra petals and stack them. Use different stitches (like puff stitches) for added texture. A layered look gives your tulip depth and can help it stand out when used on clothing or bags.
Experiment with different yarn weights and textures—fuzzy yarn can create a soft, whimsical flower, while mercerized cotton gives it a sleek finish.
Play With Color
Crochet tulips are ideal for experimenting with bold or pastel colors. You can even create a gradient tulip by changing colors between petal rows or blending two yarns.
Try seasonal palettes—yellows and oranges for autumn, or pinks and purples for spring. Matching your colors to holidays or home themes adds extra charm.
Turn It Into a Full Project
Once you master one tulip, consider making a set of coasters, a garland, or a table runner filled with flowers. Combine multiple appliques into a larger scene or integrate them into clothing items like cardigans or hats.
Use your creativity to turn a small pattern into a meaningful, multi-piece creation.
Creative Uses for Crochet Tulip Appliques
For the Home
Sew tulips onto pillowcases, kitchen towels, or fabric baskets. A few scattered across a crochet blanket can create a cheerful spring or garden-themed look.
Hang them as a bunting banner in windows, nurseries, or craft rooms for a cozy and colorful atmosphere.
As Fashion Accents
Attach a tulip applique to a hat, tote bag, or headband. These small touches add handmade flair and let your personal style bloom.
For kids’ clothing or accessories, tulips bring a sweet, playful vibe.
As Gifts and Embellishments
Crochet tulips make thoughtful gifts—especially when paired with cards, tags, or small pouches. Use them as gift toppers, bookmarks, or decorative accents on handmade packaging.
A bouquet of crochet tulips in a jar is a long-lasting, heartfelt gift idea!

PATTERN HERE
Crochet – Tutorial
FULL PATTERN ACCESS
You will be redirected to another site
Conclusion: Bloom Your Creativity with Crochet Tulip Patterns
Crochet tulip coasters and appliques are not only beautiful but also beginner-friendly and versatile. With just a few basic stitches and a little creativity, you can create handmade treasures that brighten your home, wardrobe, or gifts.
Now that you’ve learned how to make your own tulip, why not explore more crochet pattern ideas? From roses to daisies and beyond, there’s a whole garden of possibilities waiting for your hook. Let your inspiration bloom—one stitch at a time.
Happy crocheting!