
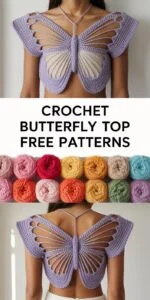
The Crochet Butterfly Top is one of the most eye-catching and trendy summer garments you can make with yarn. Inspired by the delicate and whimsical shape of butterfly wings, this top blends fashion, creativity, and craftsmanship. Whether you’re heading to a music festival, the beach, or just want to make a bold handmade fashion statement, this top is a perfect choice.
In this detailed blog post, you’ll learn how to make a Crochet Butterfly Top from start to finish. The tutorial includes a list of all materials needed, clear step-by-step instructions, and helpful styling tips. This project is suitable for advanced beginners and intermediate crocheters ready to try shaping techniques and garment construction.
Using the right crochet patterns, you can create a Butterfly Top that’s perfectly tailored to your size and color preferences. Let’s dive into what you’ll need and how to begin this beautiful wearable project.
Materials Needed for the Crochet Butterfly Top
Before picking up your hook, it’s important to gather all the materials required to complete this vibrant and flattering top. This pattern is versatile and can be adjusted in both size and color, depending on your style.
Here’s what you’ll need:
- Yarn: DK or light worsted weight cotton yarn (3–4 colors recommended for a butterfly effect)
- Crochet hook: 3.5 mm (E) or 4.0 mm (G), depending on your yarn and gauge
- Scissors, stitch markers, tapestry needle
- Measuring tape and optional beads or charms for embellishment
Cotton yarn is breathable, lightweight, and offers great stitch definition—making it ideal for summer tops. You can choose color gradients that mimic butterfly wings, such as purples, pinks, oranges, or blues. Even monochromatic versions look elegant and stylish.
Gauge isn’t critical for this pattern, but checking your measurements against your desired fit is always a good idea. This top is usually constructed in one or two panels and then tied at the back and neck, allowing flexibility in sizing.
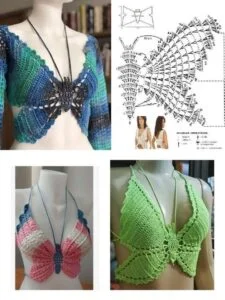
Understanding the Butterfly Design
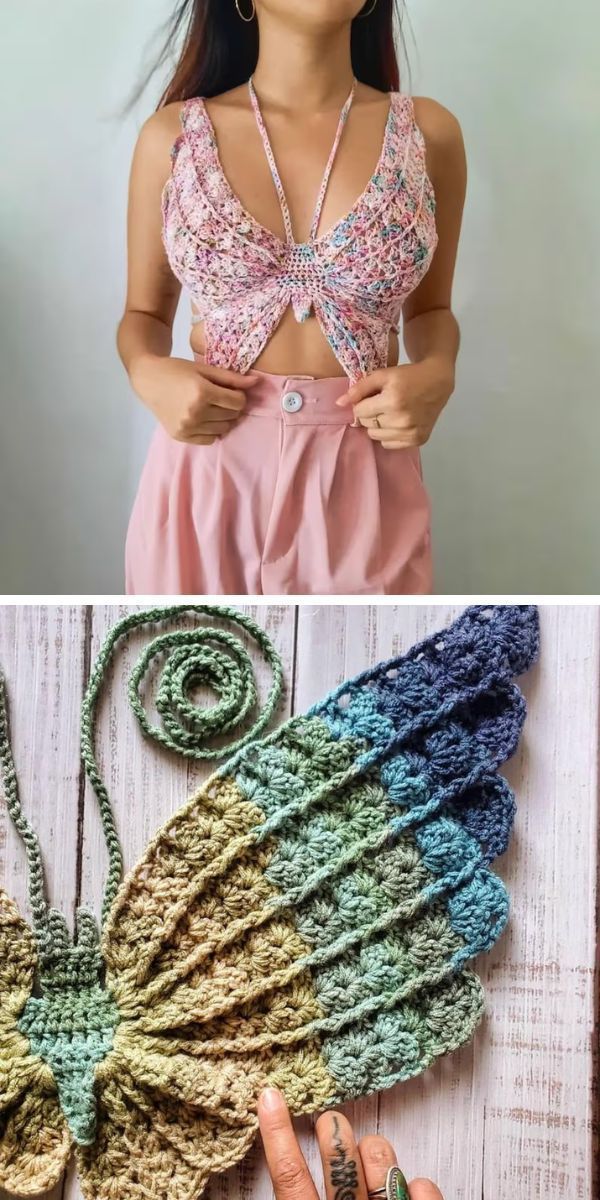
The unique charm of the Crochet Butterfly Top lies in its design, which mirrors the wings of a butterfly. The top consists of two mirrored triangles or diamond shapes, worked from the center outwards. The shaping and color changes create the “wings,” while straps help form the wearable structure.
Each wing is crocheted using a combination of chain spaces, double crochet (dc), and shell or fan stitches to create soft curves and openwork. The symmetrical increases give it a flowing, winged appearance that looks flattering when worn.
Once both wings are completed, they are joined at the center. Straps are crocheted to connect the top at the neck, back, and underbust. This design offers adjustability, comfort, and freedom of movement—perfect for summer!
Starting the First Wing – Center Outward
To begin, make a magic ring or chain 4 and slip stitch to form a ring. Into this ring, work a series of double crochets and chains to form the foundation for your first butterfly wing. Chain spaces will help shape the flare of the wing.
Work in rows using a pattern like: Row 1: Chain 3, 2 dc into the ring. Row 2: Chain 3, dc into same stitch, chain 1, 2 dc into last stitch. From here, you’ll continue expanding the triangle by increasing at the edges and incorporating decorative stitches.
Shell stitches, chain spaces, and clusters can be introduced as you go to create texture and openness. Alternate your yarn colors every few rows if you’re going for a multicolored butterfly look. This section should start resembling one half of butterfly wings.
Mirroring the Second Wing
The second half of the top mirrors the first. You can either repeat the exact same rows and stitch pattern or use your first triangle as a visual guide. Accuracy in shape and size is key to achieving a balanced look.
To mirror it properly, begin your second triangle from the center point again. You may join both triangles at the center as you go, or wait until both pieces are finished to seam them together. Use a whip stitch or slip stitch method for clean joining.
Remember to use the same stitch count and row structure for both sides. If you’re color-blocking, align your color changes so that the pattern appears symmetrical when worn. This mirrored design is what truly gives the Crochet Butterfly Top its name.
Creating the Body and Adding Straps
Once both wings are complete and connected at the center, it’s time to form the wearable top. Use chain stitches to create back and neck straps. The halter-style straps give support, while the ties at the back allow for custom sizing.
Use the same yarn to crochet long chains (50–100 chains depending on size and comfort) from the top corners of the butterfly to tie around your neck. For the back straps, attach yarn to the side edges and chain out ties to wrap around your back or underbust.
You can also crochet simple band panels at the bottom to add more coverage and structure. These finishing touches make the top practical and more wearable, allowing you to adjust the fit and feel secure while wearing it.
Blocking and Finishing the Top
Blocking helps the top lay flat and keeps the stitches even and beautiful. Soak your completed Butterfly Top in cool water, gently squeeze out the excess, and lay it flat to dry. Pin it into shape if needed.
Weave in all ends with a tapestry needle and secure knots tightly at the base of your straps. If desired, you can add decorative beads, fringe, or tiny buttons at the bottom edges to enhance the look and personalize the top.
This is a great moment to try the top on and make sure everything is fitting the way you want. Adjust the straps if they’re too loose or too tight. Once everything looks good, your Crochet Butterfly Top is ready to wear!
Tips for Success and Personalization
Use stitch markers to keep track of increases and color changes. It’s easy to lose count when you’re working with shells and fans, so marking your rows will help avoid mistakes. Count your stitches often to ensure symmetry.
If you’re using multiple colors, plan your palette ahead of time. You can sketch your butterfly design on paper or use a digital crochet pattern planner to map out your color transitions. Ombre yarns also work beautifully for this type of project.
Don’t be afraid to add your own twist! Try metallic yarns for a festival vibe or pastel cotton for a soft spring look. Customizing your top makes it even more special and turns your crochet into wearable art.
Styling the Crochet Butterfly Top
This top looks amazing paired with high-waisted jeans, denim shorts, or layered over a swimsuit. It’s the ultimate summer statement piece and can easily transition from beachwear to boho festival style.
You can also layer it with a mesh cardigan, kimono, or long skirt for an elevated bohemian outfit. Add bold accessories like hoop earrings, bangles, or beaded necklaces to complete the look.
Since it’s handmade, your top is one of a kind. Wear it with confidence and let people know you made it yourself—your creativity and craftsmanship will always stand out!
Exploring More Crochet Patterns for Fashion
If you loved making the Crochet Butterfly Top, there’s a wide world of crochet fashion waiting for you. Try patterns for crop tops, bralettes, cardigans, or halter neck tops to continue developing your wearable crochet skills.
Websites like Ravelry, Etsy, and Pinterest are great sources for high-quality crochet patterns. You can also follow crochet designers on Instagram or YouTube for video tutorials and step-by-step guidance.
There are also crochet apps available that let you store your patterns, track your progress, and even help you calculate sizing. These tools are especially helpful when crafting garments for yourself or others.
Final Thoughts
The Crochet Butterfly Top is more than just a summer garment—it’s a canvas for creativity, color, and self-expression. With a few simple materials and a bit of patience, you can make a top that’s uniquely yours.
PATTERN HERE
Crochet – Tutorial
FULL PATTERN ACCESS
You will be redirected to another site
This tutorial has walked you through every step of the process, from gathering materials to shaping the butterfly wings and finishing the final piece. Whether you’re an experienced crocheter or just getting started, this is a rewarding and stylish project.
So grab your hook, choose your colors, and bring your own butterfly to life. With the right crochet pattern and your imagination, the possibilities are endless.