
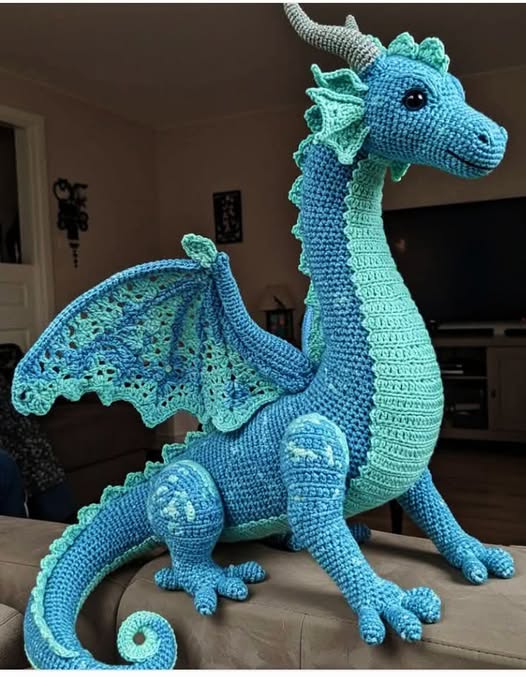
Discover the Magic of the Amigurumi Dragon
If you love fantasy creatures and the world of handmade crafts, this Pattern – Amigurumi Dragon will instantly spark your imagination. Dragons have fascinated humans for centuries, and now you can bring your very own mini dragon to life using just yarn, a hook, and a bit of patience.
This project blends creativity and technique, making it a rewarding experience for both beginner and advanced crocheters. With this guide, you’ll learn how to make your own dragon plushie step by step, using one of the most beloved crochet patterns in the fantasy category.
Whether you want to make a playful baby dragon or a fierce mythical guardian, the crochet process allows for endless customization. From horn shapes to tail spikes and wing sizes, you can design a dragon that’s uniquely yours.
Materials Needed to Crochet Your Dragon
Before starting your amigurumi dragon, make sure you have all the necessary materials. Choosing the right yarn and tools will make a big difference in the outcome of your plushie.
You’ll need worsted-weight or DK yarn in at least two colors: one for the body and another for accents like the wings, horns, or belly. Popular dragon colors include green, purple, blue, and red. Use a 2.5mm or 3.0mm crochet hook for tight, neat stitches that will hold the stuffing well.
Additional tools include polyester fiberfill, stitch markers, safety eyes or embroidery thread for the face, a yarn needle, and scissors. Optional extras like felt for wing membranes, fabric glue, or glitter yarns can give your dragon an extra touch of magic.
Step 1: Creating the Dragon’s Head
Begin your amigurumi dragon pattern by crocheting the head. Use the magic ring technique to create a tight, hole-free start. Begin with six single crochets in the ring, and increase evenly in each round until the head reaches the desired width.
Once the head shape is large enough, continue crocheting even rounds to build its length. This will form a snout or muzzle, depending on your dragon design. If you want a longer snout, add extra rounds before starting to decrease.
Place safety eyes between rows 7 and 9, spaced appropriately. If you plan to embroider the eyes or create dramatic facial features, wait until the entire dragon is assembled for precise positioning.
Step 2: Shaping the Body
The dragon’s body is typically created directly after the head or as a separate piece that you sew on later. Begin by increasing from a small circle, then work even rounds to form the torso. Gradually decrease to shape the dragon’s lower body or tail base.
The dragon’s body can be slim or bulky depending on the style you prefer. A chunky body makes your dragon look playful and cute, while a thinner build creates a more agile and fierce creature.
Stuff the body firmly as you go, paying attention to neck shaping. If the dragon has a long neck, use pipe cleaners or wire inside the stuffing for added structure, but be cautious if the toy is for children.
Step 3: Making Legs and Claws
Your amigurumi dragon will need four limbs—two front legs and two back legs. Start each leg with a magic ring, then increase to form the paw. Work even rounds to make a tube for the leg shaft.
You can add small claws by using a contrasting yarn or attaching felt shapes. Clawed feet give your dragon an adventurous look, while round, soft feet add to its cuteness. Customize according to your style.
Stuff each leg and attach it securely to the body. Place the front legs closer to the neck and the hind legs near the tail. Proper leg placement helps your dragon sit or stand without tipping over.
Step 4: Tail and Spikes
The tail adds balance and personality to your amigurumi dragon. Start with a small magic ring and work in continuous rounds, gradually increasing and then decreasing to shape the tail’s tapering end.
Once the tail is long enough, you can choose to add spikes, scales, or a tuft at the tip. Spikes are usually made with chains and picot stitches or crocheted triangles sewn onto the tail’s spine.
For added structure, insert a pipe cleaner inside the tail so it’s poseable. Alternatively, stuff it lightly and curve it before attaching to give your dragon a natural look.
Step 5: Wings That Soar
The wings are the most iconic part of the dragon. You can crochet solid wings or use wire and fabric/felt to mimic real wing membranes. Most wings start as flat triangles or half-ovals and are shaped with rows or rounds of single crochet.
To give your dragon wings with structure, use wire outlines and crochet around them, or stiffen your wings with starch. If you prefer soft wings, add a second layer of contrasting yarn or felt for thickness.
Attach the wings symmetrically to the dragon’s back. Pin them in place before sewing to ensure proper alignment. Wings can be floppy, upright, or even folded down, depending on your chosen dragon posture.
Step 6: Ears, Horns, and Facial Features
Add personality with ears, horns, and facial details. Ears can be as simple as small triangles or as elaborate as elf-like fins. Horns are usually created with tight, narrow spirals or cones, and can be placed on the head or back.
Use embroidery to add eyebrows, nostrils, or fangs. You can also crochet tiny details like scales or cheek patches. A bit of blush or soft fabric paint on the cheeks can make your dragon more expressive.
All these features bring your dragon to life. Think about whether you want a cute baby dragon or a fierce mythical beast, and adjust the facial details accordingly.
Final Assembly and Finishing Touches
Once all the parts are crocheted, it’s time to assemble your amigurumi dragon. Use a yarn needle to sew each piece together. Start with the head and body, then attach legs, tail, wings, ears, and other features.
Take your time to position each piece properly. Use pins or stitch markers to test placements before sewing. Make sure your dragon sits or stands steadily, and that its face looks symmetrical.
Add any final embellishments like glitter, decorative yarn, or mini accessories. You might want to make a tiny treasure chest, a castle base, or other fun props to complete the fantasy vibe.
Customizing Your Crochet Dragon
One of the best parts of this project is how easily you can customize your dragon. Change colors to match your favorite fantasy themes, or create a rainbow dragon, an ice dragon, or even a galaxy-themed one.
You can also adjust the size by changing your hook or yarn thickness. A mini dragon makes a great keychain or desk toy, while a large dragon is perfect for cuddles or room décor.
Add storytelling elements by giving your dragon a name, a background, or even crocheting little eggs or baby dragons. The possibilities are endless with these fantasy crochet patterns.
Why Amigurumi Dragons Are Great Projects
Amigurumi dragons are more than just adorable crafts—they’re creative expressions of fantasy and fun. They make wonderful gifts for kids, teens, fantasy fans, or even as mascots for a tabletop RPG group.
This project teaches essential crochet skills like shaping, stitching in the round, and creating texture. It also builds your confidence as you bring together multiple complex parts into one harmonious design.
Whether you’re selling on Etsy, gifting to a friend, or making it just for fun, a crochet dragon is always a hit. It combines the love of handmade crafts with the universal appeal of mythical creatures.
Conclusion
Making your own amigurumi dragon is an exciting adventure in yarn. With a few tools and a bit of patience, you can create a magical creature that embodies creativity, imagination, and skill.
PATTERN HERE
Crochet – Tutorial
FULL PATTERN ACCESS
You will be redirected to another site
This Pattern – Amigurumi Dragon combines structure with flexibility, allowing you to craft a plushie that’s truly your own. From color choices to wing design, each step gives you space to explore your personal style.
Start today and bring your dragon to life—one stitch at a time. Whether it’s guarding a treasure or curling up in your hand, your crochet dragon will be a creature of legend.