
If you’re looking for a quilt project that’s both visually striking and surprisingly easy to create, Bargello quilts are a fantastic option. Known for their mesmerizing waves and color transitions, Bargello quilts might look complex, but they’re built using a simple strip-piecing technique that even beginners can master. In this tutorial, we’ll walk you through a straightforward, three-step process to create your very own Bargello quilt using a beautiful and accessible quilt pattern.
This guide is designed to help quilters of all experience levels dive into the world of Bargello quilting. Whether you’re new to quilting or just looking for a fresh, creative project, this pattern delivers impressive results with minimal frustration. Let’s get started and discover how easy it is to make a stunning Bargello quilt in just three steps.
Step 1: Gather Your Materials and Prepare Your Fabric
Before diving into any quilt project, it’s important to gather all your materials in advance. For a Bargello quilt, you’ll need fabric strips in a variety of colors that flow from one shade to the next. This color progression is what creates the signature movement in the Bargello quilt pattern. Solid colors or subtle batiks work beautifully, but feel free to mix prints and tones for a more eclectic look.
Materials You’ll Need:
- Rotary cutter and mat
- Quilting ruler
- Sewing machine and matching thread
- Iron and ironing board
- Cutting mat
- At least 20 fabric strips (2.5″ x WOF – Width of Fabric) in color gradation
- Backing fabric and batting (size depending on your final quilt size)
- Quilting pins or clips
Once you’ve selected your fabrics, organize them in a sequence from light to dark or by color transitions (e.g., red to orange to yellow). This order is crucial, as it determines the flow of your quilt. Iron your strips before you begin cutting to ensure accuracy in your measurements and smooth seams later in the process.
Step 2: Create the Tube and Cut Your Segments
Now that your fabrics are ready, it’s time to start sewing! The unique construction of a Bargello quilt starts with sewing all your fabric strips into a large panel, often referred to as a “strip set.” From there, you’ll sew the edges together to create a fabric tube, which will then be sliced into segments of varying widths to create the iconic wave-like effect.
Begin by sewing your strips together along their long edges, using a consistent 1/4″ seam allowance. Keep your fabric order intact throughout this process. After all the strips are sewn into a single panel, press all the seams in one direction. Next, take the final strip and sew it to the first strip to create a loop or tube. Press again.
Using your quilting ruler, cut the tube into vertical segments of different widths. These widths—such as 1″, 1.5″, 2″, etc.—will create the movement in your quilt pattern. Label your strips or lay them in order so you don’t lose track. This part of the process might seem a bit intimidating, but it’s where the magic really begins to happen.
Step 3: Seam-Ripping and Stitching Your Design
Here’s where your quilt starts to take shape! To create the classic staggered effect of a Bargello quilt, you’ll carefully seam-rip one seam from each vertical strip to open up the tube at different points. Each strip will begin on a different row of the fabric color sequence, creating the flowing look Bargello quilts are famous for.
Take your first strip and seam-rip between two colors—this will be your reference strip. For the next strip, seam-rip the next seam down from your reference. Continue this process, moving one seam further down for each consecutive strip. This results in a staircase of color that, when sewn together, forms the distinctive wave or zigzag of the Bargello quilt.
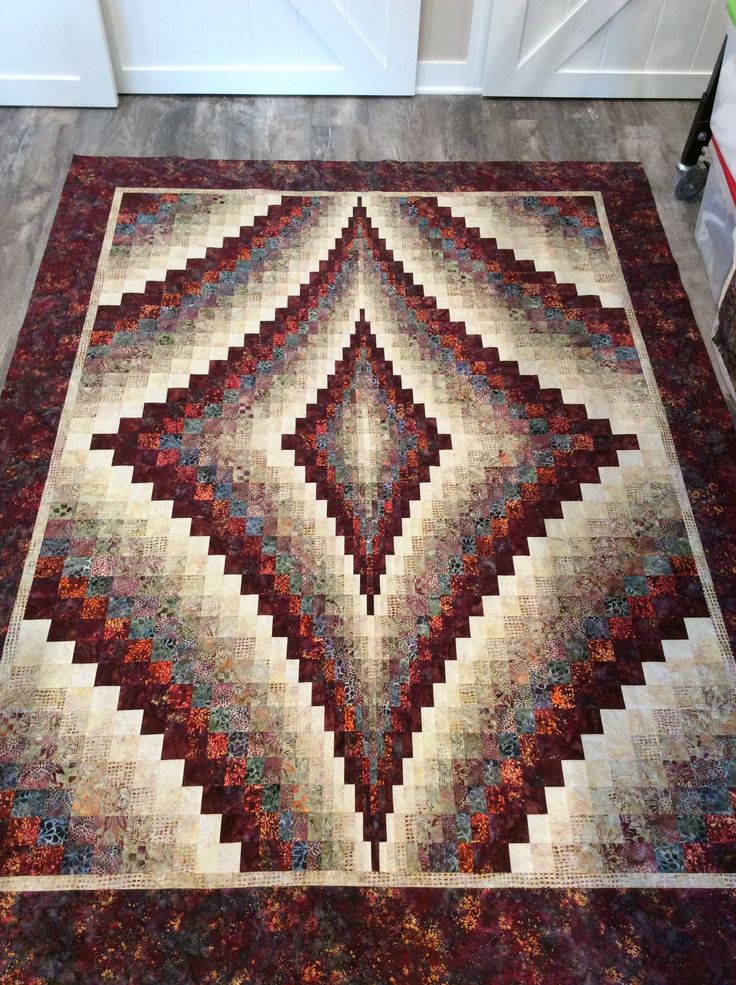
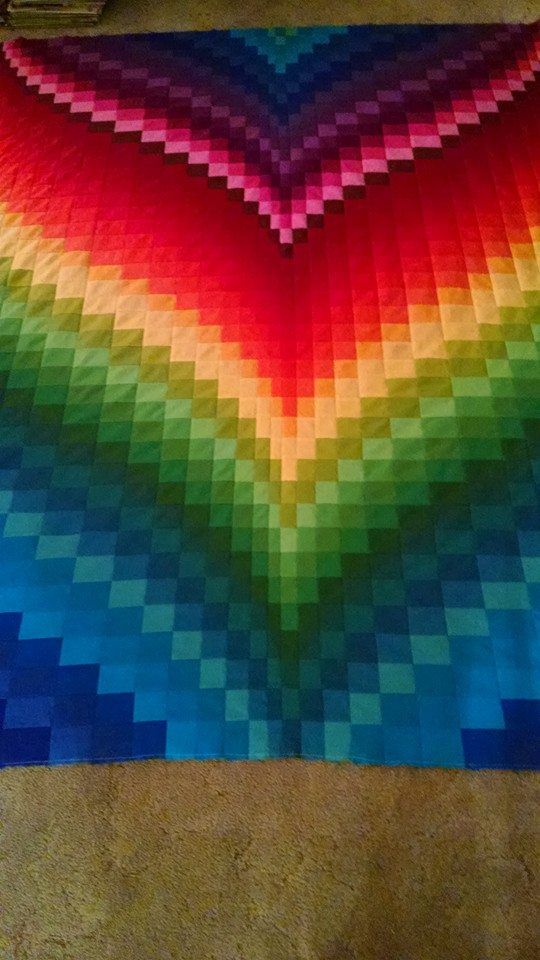
Once you’ve opened the tubes and lined up your strips in the correct order, sew them together along the long edges, just as you did before. Take your time aligning seams and matching color points. After sewing all the segments, press the quilt top and admire the stunning design you’ve created. The quilt pattern now reveals a gorgeous sense of movement and rhythm that makes Bargello quilts so eye-catching.
Personalization Ideas for Your Bargello Quilt
While the traditional Bargello quilt features flowing waves or flame-like patterns, there’s a lot of room to get creative. Try changing the direction of your seam-ripping to create peaks and valleys, or experiment with different width segments for a bolder look. You can even incorporate background fabric between your strips for a more modern twist.
Play around with color palettes to match different seasons or moods—think cool blues and greens for a calming ocean theme, or warm reds and golds for an autumn vibe. Another fun idea is to use themed fabrics (like florals, stars, or even novelty prints) to make your Bargello quilt extra unique.
You can also use the Bargello technique on a smaller scale to create quilted pillows, wall hangings, or table runners. It’s a great way to use leftover jelly roll strips or charm squares while still producing a stunning visual effect.
Tips for Beginners and Common Mistakes to Avoid
If you’re new to quilting or tackling a Bargello quilt for the first time, here are a few helpful tips to keep your project smooth and frustration-free. First, double-check your strip sequence before sewing. A single misplaced fabric can disrupt the flow of your quilt pattern. Laying out your design in advance or snapping a reference photo can help prevent errors.
Use a fresh rotary blade and take your time with cutting to ensure your strips are accurate. Inaccurate cutting can lead to misaligned seams and a distorted quilt top. Also, be gentle when seam-ripping the tubes—try not to stretch the fabric, as this can affect how the strips align.
Finally, don’t stress if your points aren’t perfect. Bargello quilts are all about movement and flow, so slight inconsistencies are rarely noticeable in the final product. The most important thing is to enjoy the process and celebrate your creativity.
Share Your Bargello Quilt with the Community
You’ve just created a stunning quilt using one of the most visually captivating techniques in the quilting world! Whether you made a wall hanging, lap quilt, or a full-sized bedspread, your Bargello quilt is a true work of art. Be proud of your accomplishment and don’t be shy—share your quilt with the world!
We’d love to see what you create! If this tutorial helped you, leave a comment or share your photos. Your project could inspire someone else to take the leap into Bargello quilting. Happy quilting!