
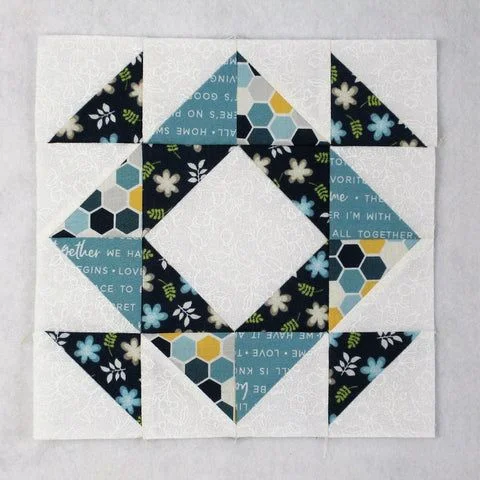
The Hourglass Variation Quilt Block is a timeless and versatile design that adds charm and movement to any quilt. Whether you’re creating a full quilt or incorporating this block into a larger quilt pattern, the result is always beautiful and dynamic. This variation offers extra visual interest by playing with color placement and creative fabric combinations, making it perfect for quilters who love both tradition and a touch of innovation.
In this tutorial, we will walk through every step you need to make your own Hourglass Variation Quilt Block from scratch. From gathering your materials to stitching the final seams, you’ll find clear instructions and helpful tips. This guide is designed for beginners, but even experienced quilters will enjoy the possibilities this block offers for customization.
By the end of this article, you’ll not only have a completed Hourglass Variation Quilt Block but also the confidence to use it in different quilt patterns. Let’s dive into this creative journey and bring your quilting vision to life!
Materials You Will Need
Before starting, it’s important to gather all your supplies so you can enjoy a smooth quilting experience. The Hourglass Variation Quilt Block requires only a few basic tools and materials, many of which you might already have in your sewing space. By preparing in advance, you’ll avoid interruptions and keep the creative flow going.
For this project, you will need:
- Assorted cotton fabrics (two or more contrasting colors or prints)
- Rotary cutter and self-healing cutting mat
- Quilting ruler for precise measurements
- Sewing machine with a ¼-inch foot (or hand sewing supplies)
- Thread to match or contrast your fabrics
- Iron and ironing board
- Pins or fabric clips
These materials are easy to find at most fabric or craft stores, and you can adapt the colors and prints to match your quilt pattern’s overall theme. Choosing high-quality fabrics and sharp cutting tools will help ensure crisp edges and neat seams, giving your block a polished, professional look.
Cutting Your Fabric Pieces
Precision is key when creating any quilt block, especially one with geometric designs like the Hourglass Variation. For this block, accuracy in cutting ensures that all your pieces fit together perfectly without stretching or distortion.
To make one 12-inch finished Hourglass Variation Quilt Block, cut:
- Four squares of Fabric A: 6 ½” x 6 ½”
- Four squares of Fabric B: 6 ½” x 6 ½”
These measurements will produce oversized half-square triangles (HSTs) that we will later trim for precision. If you want a smaller or larger block, simply adjust the square sizes proportionally. Using a rotary cutter and ruler will give you the clean, straight lines you need for perfect piecing.
When selecting fabrics, consider high-contrast colors to highlight the “hourglass” shape. You can also experiment with subtle tone-on-tone prints for a softer look that blends beautifully with other quilt blocks.

Sewing the Half-Square Triangles (HSTs)
The Hourglass Variation Quilt Block begins with half-square triangles, which are easy to make and very versatile in quilt design. By pairing two different fabrics, you create dynamic shapes that will come together into the signature hourglass layout.
To make the HSTs:
- Pair one Fabric A square with one Fabric B square, right sides together.
- Draw a diagonal line from corner to corner on the back of one square.
- Stitch a seam ¼ inch away from both sides of the drawn line.
After sewing, cut along the drawn diagonal line to create two HST units. Press the seams open or toward the darker fabric, depending on your preference. Repeat for all fabric pairs until you have eight HSTs. Trimming each HST to 6″ x 6″ will ensure accuracy in the final assembly.
Creating the Hourglass Units
Now that you have your HSTs, it’s time to transform them into the hourglass units that form the core of this quilt block. The magic happens when you combine two HSTs in a specific way to create the illusion of movement and symmetry.
Take two HST units with opposite color placement and place them right sides together. Align the seams so that the contrasting colors are on opposite sides. Draw a diagonal line that runs perpendicular to the seam, then sew ¼ inch on both sides of this line.
Cut along the drawn line, press open, and you’ll have two hourglass units. Trim them to 5 ½” x 5 ½”. Repeat this process until you have all the hourglass units needed for your block. This method ensures crisp points and balanced proportions in your quilt pattern.
Arranging the Block Layout
One of the best parts of working with the Hourglass Variation Quilt Block is arranging the pieces before sewing them together. The arrangement can dramatically change the look of the block, giving you endless creative options.
Lay out your trimmed hourglass units in a 3×3 or 4×4 grid, depending on your desired block size. Rotate some units to create diamond shapes, star-like designs, or a pinwheel effect within the quilt block. Play around until you find a layout that excites you.
Don’t hesitate to take photos of different arrangements so you can compare them later. This step is also a good time to check color balance and ensure that your fabrics distribute evenly across the block. A thoughtful arrangement can turn a simple quilt pattern into a stunning centerpiece.
Sewing the Block Together
Once you’ve decided on the layout, it’s time to piece the block together. This step requires careful attention to seam matching to achieve a clean, professional finish.
Start by sewing the units in each row together, using a ¼-inch seam allowance. Press the seams in alternating directions for each row to reduce bulk and make it easier to match points when joining rows. After the rows are complete, sew them together to form the full block.
Give the finished block a final press, making sure the seams lie flat. At this stage, your Hourglass Variation Quilt Block should measure exactly the size you planned. Accurate sewing here will make assembling the full quilt much easier later on.
Ideas for Customization
The Hourglass Variation Quilt Block offers endless opportunities for customization. You can easily adapt the block to fit your personal style or match a specific quilt pattern you’re working on.
For a modern look, try using solid fabrics in bold colors, arranging the blocks in a minimalist layout. If you prefer a vintage feel, choose reproduction prints or soft pastels and add sashing between the blocks. You can also play with scale by making larger or smaller hourglass units within the same quilt.
Another creative option is to alternate Hourglass Variation blocks with plain squares or other quilt blocks. This approach breaks up the design and creates visual interest while allowing you to showcase special fabrics or quilting techniques.
Finishing and Next Steps
Once your Hourglass Variation Quilt Block is complete, you can decide whether to make more blocks for a full quilt or incorporate it into a mixed-block design. This block works beautifully for bed quilts, table runners, wall hangings, and even decorative pillows.
To finish your project, add batting, backing, and quilting stitches. You can choose straight-line quilting for a clean, modern finish or free-motion quilting for a more artistic touch. Don’t forget to bind the edges neatly for durability and style.
Taking the time to label your quilt with your name and the date can add a personal touch and preserve the memory of your work for years to come.
Share Your Creation
Quilting is more than just a craft—it’s a community. Once you’ve made your Hourglass Variation Quilt Block, consider sharing your progress and finished quilt online or with local quilting groups. Posting photos and tips can inspire others and connect you with fellow quilt enthusiasts.
Whether you’re using this block as part of a larger quilt pattern or making it as a stand-alone project, your creativity will shine through in every stitch. The beauty of quilting lies in the way each maker puts their own spin on a traditional design.
So gather your fabrics, set up your sewing machine, and start creating your own Hourglass Variation Quilt Block today. Happy quilting!