
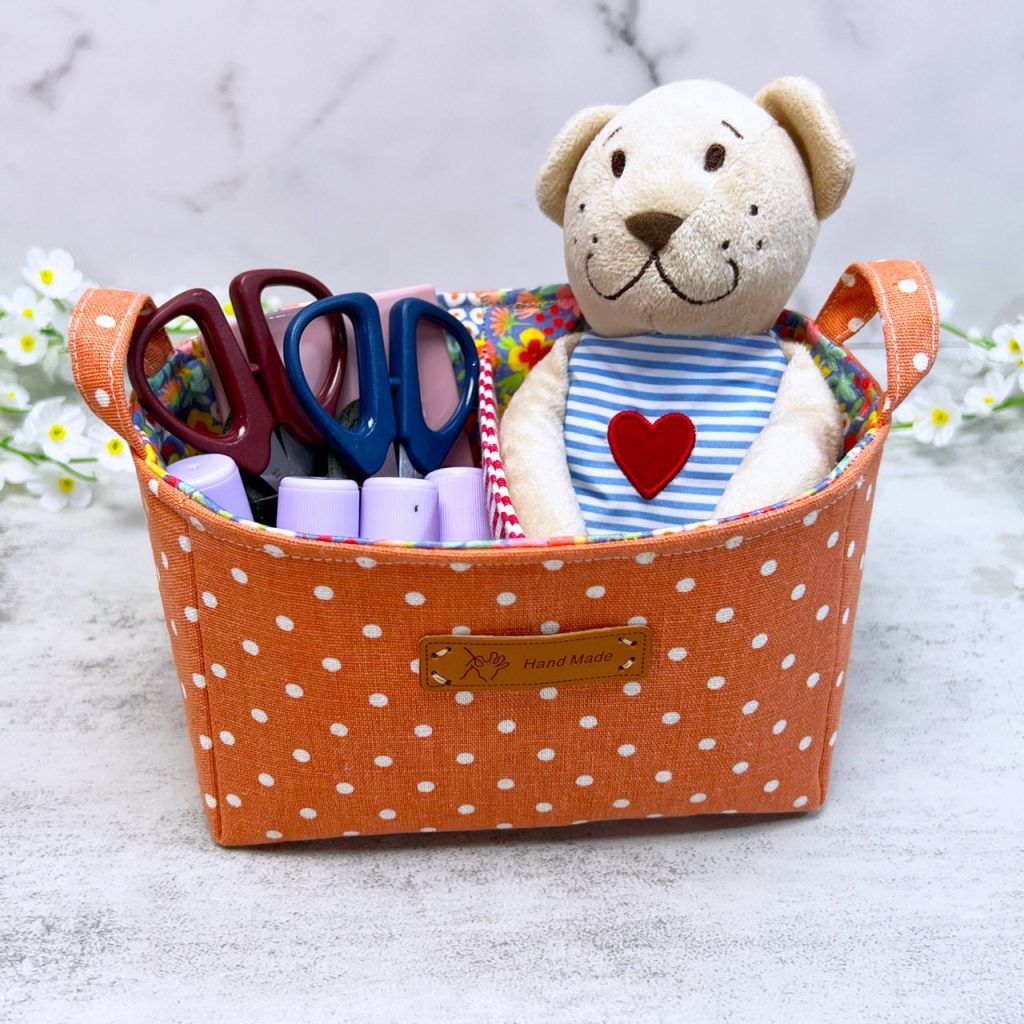
Fabric baskets are one of the most delightful and practical sewing projects you can create at home. Whether you want to organize small items, store craft supplies, or simply add a cozy handmade touch to your home décor, a fabric basket is a perfect choice. The best part? This project is beginner-friendly and requires only basic sewing skills. With a simple sewing pattern, you can create a basket that is not only functional but also stylish.
In this tutorial, we’ll walk through everything you need to know to make an adorable fabric basket from start to finish. From gathering your materials and cutting fabric to sewing and personalizing your creation, you’ll discover how rewarding and fun it is to transform fabric into something useful. If you’ve been searching for a project that’s simple yet satisfying, this is it. Let’s get started!
Materials You’ll Need
Before diving into the sewing steps, let’s gather the materials. Having everything prepared will make the process smoother and more enjoyable. Here’s a simple list of what you’ll need to create your fabric basket:
- Two coordinating fabrics (one for the outer basket, one for the lining)
- Fusible interfacing or batting for structure
- Fabric scissors or rotary cutter
- Sewing machine and matching thread
- Pins or fabric clips
- Measuring tape or ruler
- Iron and ironing board
You don’t need expensive materials for this project; scraps and leftover fabrics work perfectly. For example, a floral cotton fabric combined with a plain lining can make a charming basket. Adding fusible interfacing or batting helps give the basket its shape and sturdiness. Beginners often find this part especially satisfying because it’s when the basket starts to hold its form.
Don’t worry if you don’t have all the tools right away. Sewing is a hobby where creativity often shines through improvisation. What matters most is having two types of fabric, something to give structure, and your sewing machine ready. Once you’ve gathered everything, you’re already halfway there.
Cutting Your Fabric Pieces
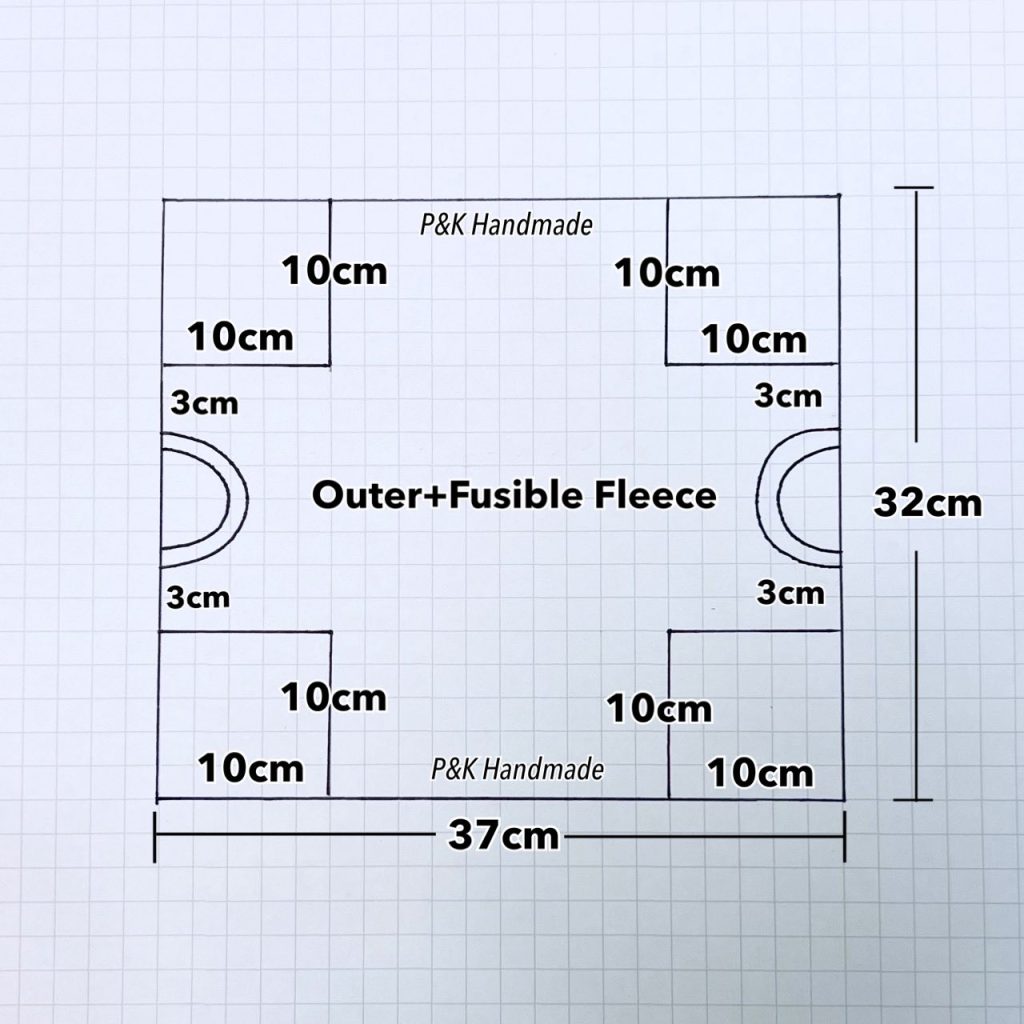
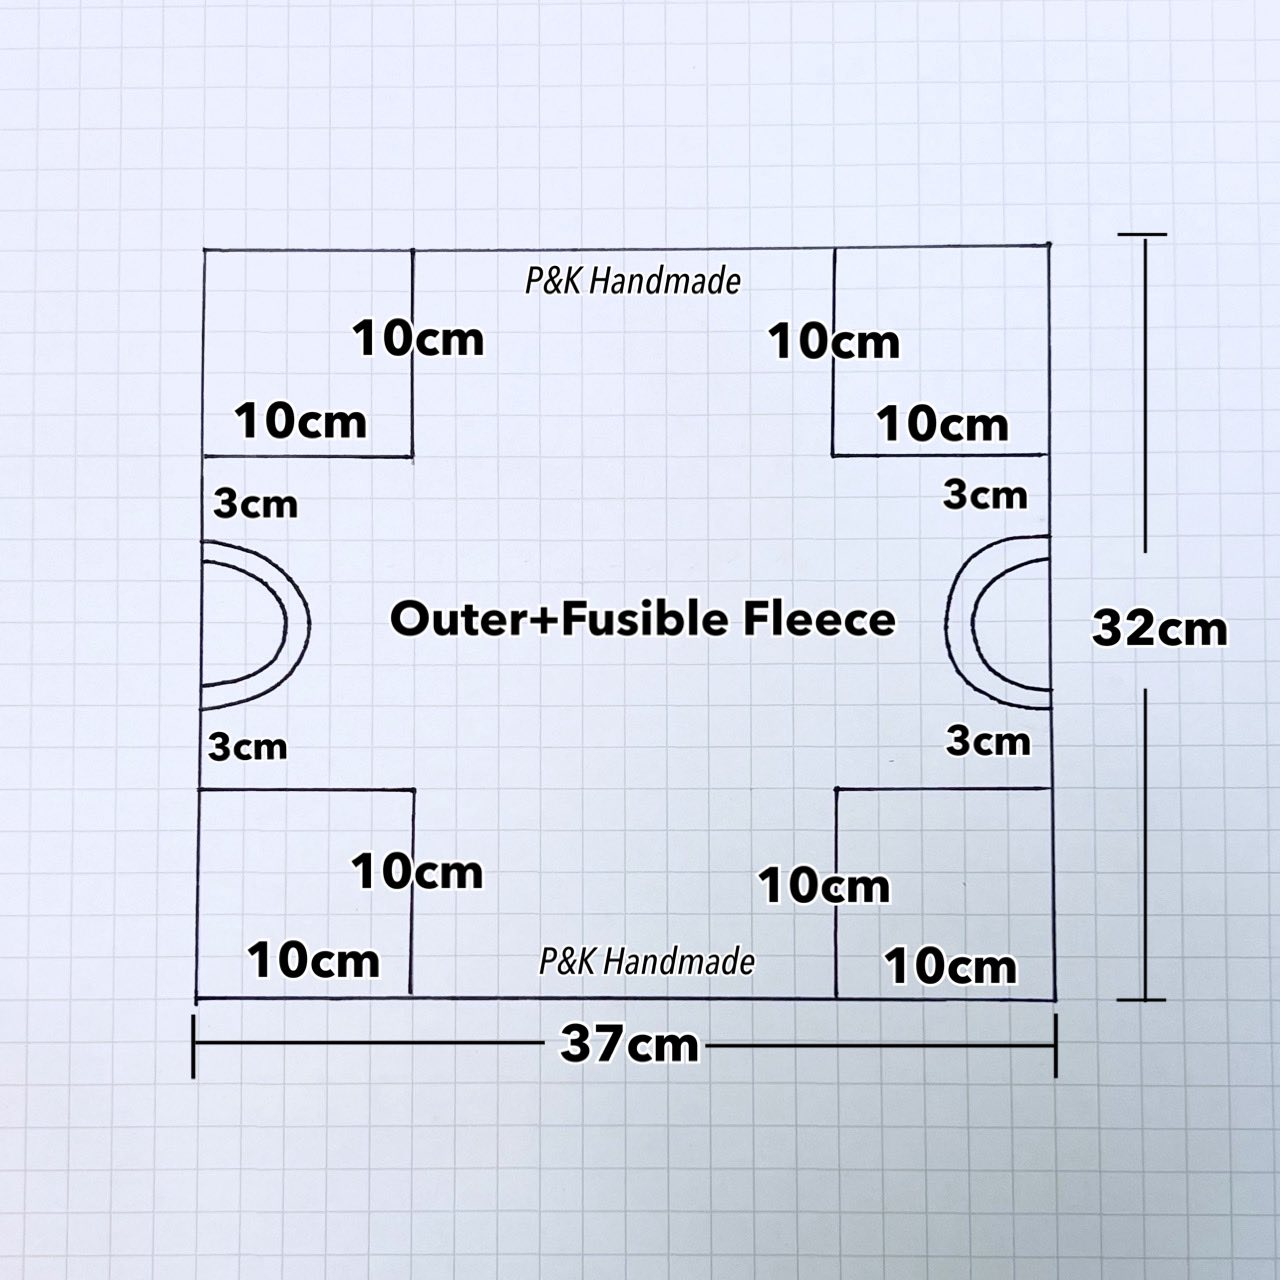
The first step in making your fabric basket is cutting the fabric. Precision matters here, as it will help your basket look neat and professional. For a small to medium basket, cut the following pieces:
- Outer fabric: two rectangles measuring 12” x 14”
- Lining fabric: two rectangles measuring 12” x 14”
- Interfacing: two rectangles measuring 12” x 14”
Once your rectangles are cut, you’ll also need to cut out small squares from the bottom corners to create depth. A 2” x 2” square removed from each bottom corner works well. When sewn together, this will give the basket its boxy shape.
Take your time with this step and use a rotary cutter if possible—it ensures clean edges and makes the sewing process easier. If you’re a beginner, don’t stress about perfection. Fabric baskets are forgiving, and a little unevenness won’t ruin your project. This is where sewing pattern templates can also help, giving you a guide to cut accurately.
To make your basket sturdy enough to stand on its own, interfacing or batting is essential. Lay your interfacing on the wrong side of your outer fabric pieces, making sure the edges align. Then, with your iron set according to the manufacturer’s instructions, press the interfacing onto the fabric.
Fusing might feel like an extra step, but it makes all the difference in the final product. Skipping it can leave your basket floppy, while a good layer of interfacing gives that adorable, structured finish. Take your time and press carefully so everything bonds smoothly.
Sewing the Basket Body
Now comes the fun part—sewing! Start with the outer fabric pieces. Place them right sides together, pin the sides and bottom, and sew using a ½” seam allowance. Do the same with your lining pieces, but remember to leave a 3” opening at the bottom for turning later.
Once the sides and bottom are sewn, it’s time to create the boxy corners. Take one of the cut-out corners, pinch the fabric together so the side seam aligns with the bottom seam, and sew across. Repeat this step for all corners on both the outer fabric and lining. This is where your basket starts to take shape.
Beginners often find this moment magical—suddenly, flat pieces of fabric become a 3D container. Don’t worry if your seams aren’t perfectly straight; practice will improve your sewing skills over time. The key is to enjoy the process and see your sewing pattern come to life.
Assembling Outer and Lining
With both the outer basket and lining complete, it’s time to join them together. Place the outer basket right side out and the lining inside out. Then, slide the outer basket into the lining so that the right sides are facing each other. Line up the top edges and pin or clip in place.
Sew all around the top edge with a ½” seam allowance. Make sure everything stays aligned as you sew, especially the side seams. Once you’ve stitched around the top, turn the basket right side out through the opening you left in the lining. Push out the corners gently to make them neat.
This step can feel a little tricky, but it’s also very rewarding. When you pull everything through and see the lining inside your outer fabric, it suddenly looks like a real fabric basket. Smooth out the edges with an iron before moving to the finishing touches.
Finishing Touches
Now it’s time to close the lining opening. Simply fold in the raw edges of the gap, press with an iron, and stitch it closed either by hand with a slip stitch or on the sewing machine with a straight line close to the edge. Then tuck the lining inside the basket and press the top edge to keep it crisp.
For extra polish, you can topstitch around the upper edge of the basket. This step adds durability and makes the basket look professionally finished. A simple straight stitch about ⅛” from the top edge is enough to give it that clean look.
At this point, your adorable fabric basket is complete! Stand it up, admire the structure, and take pride in your sewing skills. It’s amazing how a few pieces of fabric, a sewing pattern, and some thread can transform into something so charming and useful.
Personalization Ideas
One of the best parts of making fabric baskets is the endless personalization options. You can adjust the size by altering the sewing pattern—larger for storing blankets, smaller for trinkets or keys. The choice of fabric also makes a huge difference. Bright prints make playful baskets, while neutral tones create chic storage solutions.
You can also add handles for practicality. Simply sew two fabric strips, attach them to the sides before assembling, and voilà—you have a tote-style fabric basket. For an even cozier look, try quilting your fabric pieces before sewing them together. This adds texture and charm while practicing your quilting skills.
Embellishments like lace trim, buttons, or even embroidery can give your basket a unique touch. Handmade items shine brightest when they reflect your personality. Don’t be afraid to experiment—sewing is a journey, and every project helps you grow more confident.
Share Your Fabric Basket
Congratulations! You’ve just completed your own adorable fabric basket. This simple yet satisfying sewing project is perfect for beginners and a great way to practice following a sewing pattern. The result is not only functional but also a handmade treasure you’ll be proud to display or gift.
If you enjoyed this tutorial, why not share your creation? Take photos of your finished basket and show them to friends, family, or on social media. Sharing your work inspires others to try sewing and builds a supportive community where creativity can flourish.
Remember, every stitch tells a story, and your basket is proof of your growing skills. Keep experimenting with fabrics, sizes, and designs—you’ll soon have a collection of beautiful handmade baskets. Happy sewing!