
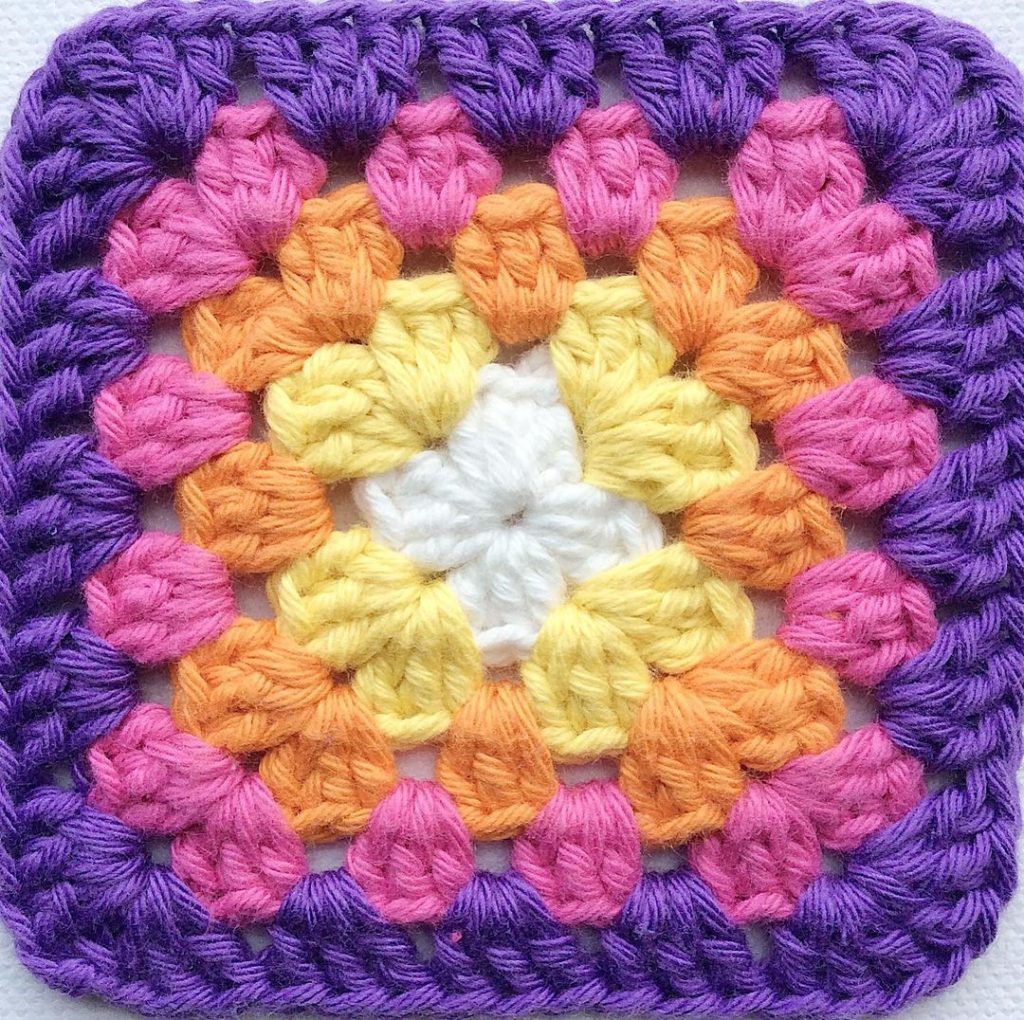
Granny squares are one of the most iconic and beginner-friendly projects in the world of crochet. With their timeless design, versatility, and ease of learning, they are the perfect project for anyone starting out with a hook and yarn. Whether you dream of making a cozy blanket, a colorful pillow, or even a stylish bag, the granny square is the foundation of countless crochet creations.
This tutorial will guide you step by step through the process of creating a basic crochet granny square. We’ll cover the materials you need, the stitches involved, and how to assemble your squares into larger projects. By the end, you’ll not only have your very first square completed but also the confidence to start experimenting with colors, patterns, and textures. Let’s dive into this fun and rewarding crochet pattern together!
Why Start with a Granny Square?
The granny square is more than just a crochet pattern—it’s a building block. Many beginners find it to be the perfect introduction to crochet because it combines repetitive stitches with a beautiful end result. Once you learn how to make one square, you’ll quickly realize how easy it is to multiply them and create something much larger.
Another reason granny squares are so popular is their flexibility. You can use just one color for a clean, minimalist look, or choose multiple shades to make your square vibrant and eye-catching. There’s no strict rule on how to use them, which makes it a wonderful canvas for creativity. Whether you enjoy classic designs or love experimenting with bold color combinations, the granny square welcomes your personal style.
And let’s not forget the practical benefits. Granny squares are small and portable, making them a perfect project to take with you wherever you go. You don’t need a lot of yarn or time to complete one, so you can easily work on them during short breaks, while traveling, or when relaxing at home.
Materials You’ll Need
Before we jump into the steps of this crochet pattern, let’s gather the materials. The great thing about granny squares is that they don’t require expensive supplies—you can often make them with leftover yarn from other projects.
Here’s what you’ll need:
- Yarn: Medium-weight yarn (like worsted weight) is ideal for beginners. Cotton or acrylic yarns work perfectly.
- Crochet Hook: Check the yarn label for the recommended hook size. For worsted weight yarn, a 5 mm (H/8) hook is common.
- Scissors: For trimming yarn ends.
- Yarn Needle: To weave in the ends neatly after finishing your square.
Optional supplies include stitch markers (to keep track of your rounds) and a blocking mat if you want your squares to have crisp, even edges.
Step 1: Make the Foundation Ring
To begin your granny square, you’ll start with a small ring in the center. This will be the base that everything builds upon. There are two common methods: the chain and slip stitch method, or the magic circle. For beginners, the chain and slip stitch method is often the easiest.
Start by chaining 4 stitches. Then, insert your hook into the first chain you made and join it with a slip stitch. This creates a tiny circle or ring. Don’t worry if it feels small—it will expand as you work into it.
Now, you’re ready to crochet into that ring. Think of it as the heart of your granny square. From here, each round will grow outward, creating the recognizable square shape. Take a deep breath and get ready—the fun part is about to begin!
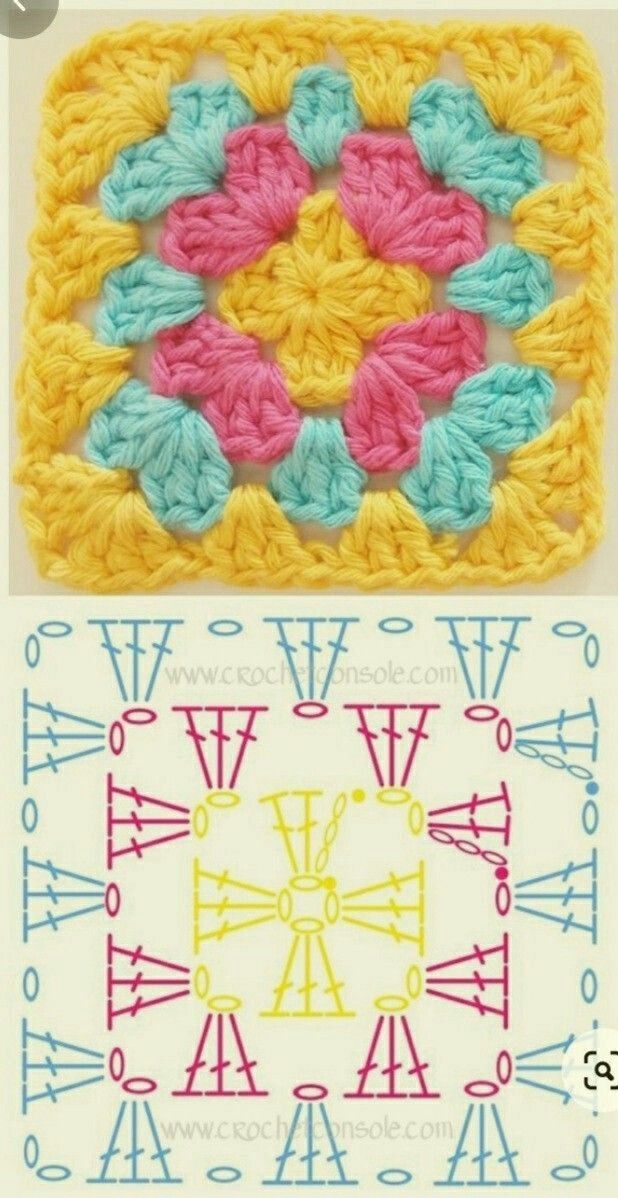
Step 2: The First Round
The first round sets the stage for your granny square. Begin by chaining 3 (this counts as your first double crochet). Then, work 2 double crochets into the center of the ring. This forms your first cluster of stitches.
Next, chain 2. This creates the corner of your granny square. Now, work 3 more double crochets into the center of the ring, followed by another chain 2. Repeat this until you have four clusters of 3 double crochets, each separated by chain-2 spaces.
To finish the round, slip stitch into the top of the starting chain-3. You should see the beginnings of a small square with four corners. It may look a little wonky at first, but don’t worry—that’s completely normal. As you add more rounds, the square will start to take shape beautifully.
Step 3: Expanding with More Rounds
The second round is where your granny square really begins to grow. Start by slip stitching into the next chain-2 corner space. Chain 3, then work 2 double crochets into that space. Chain 2, and add 3 more double crochets into the same space. Congratulations—you’ve just made your first corner of the second round!
Continue around the square by working clusters of 3 double crochets into each corner space, always separated by chain-2 stitches. With each round, your granny square will expand outward. The process is repetitive and soothing, which makes it perfect for beginners who want to practice their tension and stitch consistency.
You can keep going for as many rounds as you like. A small granny square with just a few rounds might be perfect for a coaster, while a larger square with more rounds could become part of a blanket. That’s the beauty of this crochet pattern—it adapts to your needs.
Step 4: Finishing and Weaving in Ends
Once your granny square reaches the size you want, it’s time to finish it off neatly. Cut your yarn, leaving a tail about 6 inches long. Yarn over and pull the tail through the loop on your hook to fasten off.
Next, grab your yarn needle and weave the tail through the stitches on the back of your square. This step is important because it prevents your work from unraveling and gives it a professional finish. Repeat this with the yarn tail from the starting chain.
At this stage, you can also block your square if you want it to be perfectly even. Simply pin it to a blocking mat, spray lightly with water, and let it dry. Blocking isn’t required, but it can make your squares easier to join later.
Ideas for Personalization
One of the best parts of working with granny squares is how easy they are to customize. You can change the look of your crochet pattern simply by switching colors every round. Try alternating bright and neutral shades for a striking effect, or create a gradient by moving from dark to light tones.
Another fun idea is to play with yarn textures. Cotton yarn gives your squares a crisp, clean finish, while acrylic creates a softer, warmer feel. You can even use variegated yarns that change color automatically as you crochet—this adds variety without having to switch skeins.
Finally, consider the possibilities of joining your granny squares. Seam them together to create blankets, scarves, table runners, or even clothing items like cardigans and bags. Each project becomes a reflection of your creativity, and no two will ever look exactly alike.
Troubleshooting for Beginners
If you’re new to crochet, don’t be discouraged by little mistakes—they’re part of the learning process. Sometimes beginners find that their granny square doesn’t lay flat, or that it curves slightly. This usually happens if your tension is too tight or too loose. With practice, your stitches will become more consistent.
Another common issue is losing track of stitch counts. Always remember that each corner needs two clusters of 3 double crochets, separated by a chain-2. If you accidentally skip a cluster, your square may look uneven. Keep a close eye on your stitches, and don’t be afraid to unravel a section if needed—it’s all part of learning.
Finally, don’t compare your first granny square to the polished photos you see online. Every crocheter starts somewhere, and your first square is an accomplishment to be proud of. Over time, your skills will grow, and your squares will become more even and precise.
Wrapping Up and Sharing Your Project
You’ve now learned how to make a basic crochet granny square, from the first chain to the final weave-in. This simple yet versatile crochet pattern is the foundation of countless projects, and you’re officially on your way to creating something beautiful. Whether you stop at one square or create a hundred, the joy is in the process.
Remember, crochet is about more than just the finished product. It’s a mindful activity that allows you to relax, focus, and express your creativity. Take pride in each stitch and enjoy the journey as much as the result.
PATTERN HERE
Crochet – Tutorial
FULL PATTERN ACCESS
You will be redirected to another site
If you make your own granny squares, don’t keep them to yourself! Share your creations with friends, family, or on social media. Not only will you inspire others to try crochet, but you’ll also join a community of makers who love this timeless craft. Happy crocheting!