
Crochet projects are always more fun when they mix creativity with a touch of whimsy. And what could be more whimsical than combining the charm of Disney’s Mickey Mouse with the cozy, seasonal vibe of a pumpkin? This Crochet Mickey Pumpkin pattern is perfect for fall, Halloween, or anyone who loves unique handmade décor. Whether you’re a beginner in crochet or already comfortable with hooks and yarn, this tutorial will guide you step by step.
In this post, you’ll learn what materials you need, the basic stitches involved, and how to bring your Mickey Pumpkin to life. We’ll also explore ways to personalize your creation, so you can make it truly your own. By the end, you’ll not only have a cute pumpkin but also a delightful crochet project to display or gift. So grab your yarn, and let’s begin!
Materials You’ll Need
To get started on this Crochet Mickey Pumpkin pattern, gather all the essentials. You won’t need anything too complicated, but having the right supplies will make your project much smoother. Choose yarn in pumpkin orange for the body, green for the stem, and black if you’d like to add extra details such as a face. Acrylic yarn works well because it holds shape nicely, but cotton yarn can also be a great option for a softer look.
You’ll need a crochet hook that matches your yarn weight—usually a 4.0mm to 5.0mm (G/H) works perfectly. Don’t forget a yarn needle for sewing, stitch markers if you like keeping track of your rounds, and some fiberfill stuffing to give your pumpkin its plump shape. A pair of scissors will also be essential for cutting yarn ends.
Optional extras include felt pieces or safety eyes if you want to give your Mickey Pumpkin a face. Some crafters even like to use hot glue to attach embellishments like bows or leaves. Once you have all your materials ready, you’ll be fully equipped to dive into the crochet process.
Getting Started – Crochet Basics
If you’re new to crochet, don’t worry—this project is a fantastic way to practice simple stitches while making something adorable. You’ll primarily be working in the round, which is a technique used in amigurumi crochet. This involves creating a small loop and crocheting continuously around it to form a circular shape. The body of the pumpkin and the ears will both use this method.
The stitches you’ll need to know are chain (ch), slip stitch (sl st), single crochet (sc), and increase (two single crochets in one stitch) or decrease (single crochet two stitches together). If you’ve mastered these, you’re already set for this pattern. Beginners may want to practice a small swatch before diving into the full project.
Remember, tension matters. Keep your stitches tight enough to prevent stuffing from peeking out but loose enough so that your hook can slide through easily. Once you’re comfortable, you’ll find the rhythm of crochet relaxing and satisfying.
Step 1 – Making the Pumpkin Body
The pumpkin body is the main part of this Crochet pattern. Start with an adjustable magic ring using your orange yarn. Work six single crochets into the ring and tighten. From here, you’ll increase evenly in each round until your circle measures the width you’d like your pumpkin to be. This usually takes around 6–7 rounds depending on your desired size.
Once you’ve reached the widest point, continue crocheting evenly around without increasing. This creates the middle section of your pumpkin. Work about 5–6 rounds, keeping the stitches neat and consistent. This is where your pumpkin begins to take on its recognizable shape.
To close off the top, start decreasing evenly each round until only a few stitches remain. Before the final closure, be sure to add fiberfill stuffing. Don’t overstuff—just enough to give the pumpkin a plump, rounded appearance. Fasten off, leaving a long tail for sewing, and weave in the end securely.
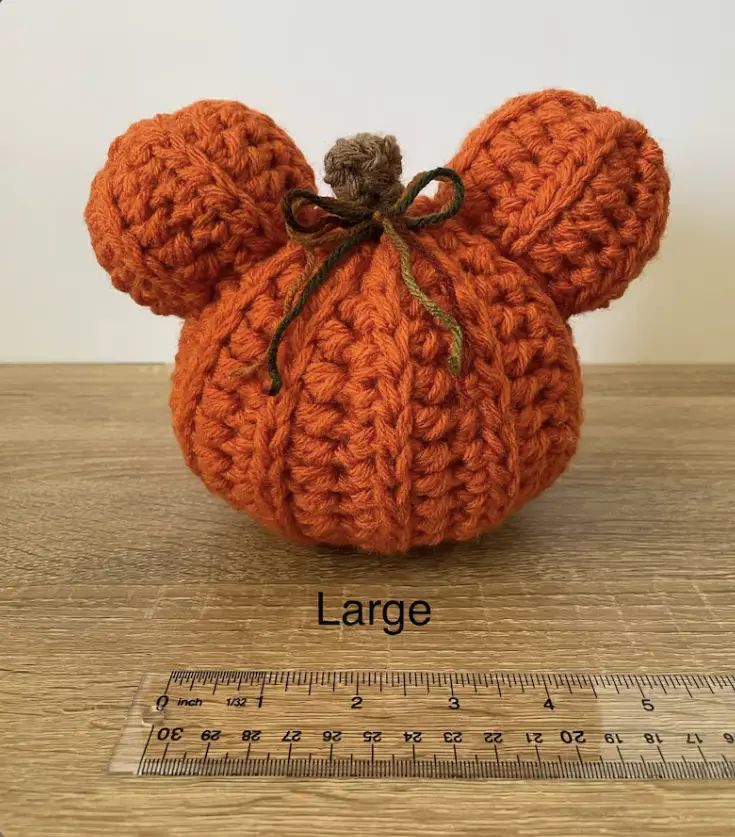
Step 2 – Creating the Mickey Ears
Every Mickey-inspired project needs those iconic ears! For this Crochet pattern, the ears are made as two smaller pumpkins that attach to the larger one. Using the same orange yarn, create a magic ring and work six single crochets into it. Increase in each round until you have a small circle about half the size of your pumpkin body.
Crochet a few even rounds to give the ears some thickness, then begin decreasing to close them up. Stuff them lightly before finishing, just like with the main pumpkin. Repeat this process for the second ear, making sure both are the same size and shape.
Once finished, sew the ears onto the top sides of the pumpkin body using your yarn needle and leftover tails. Position them evenly to create that classic Mickey silhouette. Now your pumpkin is instantly recognizable as a Mickey Pumpkin!
Step 3 – Adding the Stem and Details
To complete your Crochet Mickey Pumpkin, you’ll need a stem. Use green yarn and make a small tube by chaining 6 stitches and joining into a loop. Work single crochets in the round for about 5–6 rows, then fasten off. You can also add a small curly vine by chaining 15–20 stitches and working two single crochets into each chain for a spiral effect.
Sew the stem securely to the top of the pumpkin, between the ears. Adjust it so it sits upright or leans slightly for a natural look. Add the curly vine if you like, letting it drape playfully to one side.
For personalization, you can embroider a face using black yarn, attach safety eyes, or even glue on felt shapes. Some crafters add a bow between the ears to create a Minnie Pumpkin instead. The options are endless, so let your imagination run wild!
Ideas for Personalization
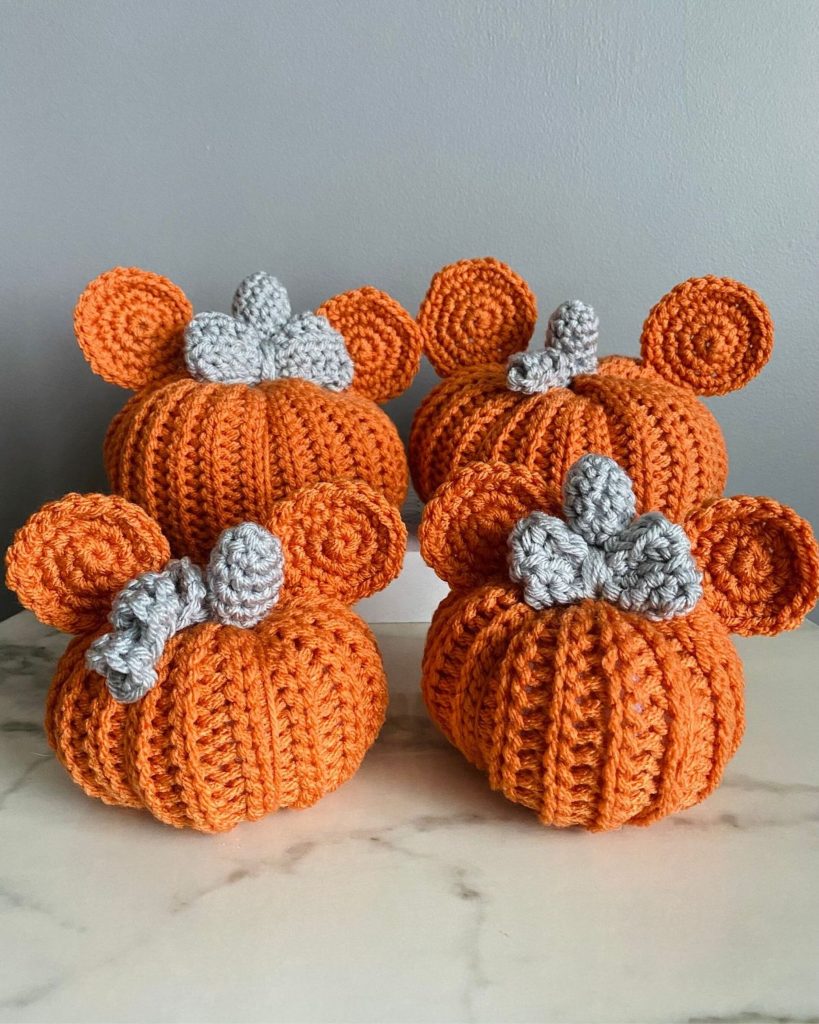
One of the best parts about crochet projects is the ability to customize them. Your Crochet Mickey Pumpkin doesn’t have to look exactly like everyone else’s. For example, you could make it in white yarn for a “ghost pumpkin” version or use glittery yarn for a sparkly touch. Adding embroidered names makes it a thoughtful seasonal gift.
Consider making a whole set of Mickey Pumpkins in different sizes. A large one could serve as a centerpiece, while smaller ones look adorable on a mantel or shelf. You could even string tiny versions together to make a crochet garland for Halloween decorations.
If you want your project to have a practical use, turn your pumpkin into a small pouch by leaving an opening and adding a zipper. This way, your cute crochet project doubles as storage. Creativity is key—there’s no wrong way to personalize!
Finishing Touches and Display Ideas
Once your Crochet Mickey Pumpkin is finished, think about how you’d like to display it. These pumpkins look fantastic as part of a fall-themed centerpiece, paired with candles, leaves, or other handmade decorations. They’re also perfect for a child’s room, adding a touch of seasonal magic without being scary.
If you’re planning to gift your creation, consider packaging it with tissue paper inside a small basket. Handmade items always feel special, and this pumpkin makes a unique present for Disney lovers. Adding a tag that says “Handmade with Love” can make it even more personal.
And don’t forget that your Mickey Pumpkin can make an adorable photo prop. Whether for social media, family pictures, or seasonal décor inspiration, it’s sure to catch attention. Be proud of your handmade work and show it off!
Share Your Crochet Mickey Pumpkin
Now that you’ve completed your Crochet Mickey Pumpkin, it’s time to celebrate your creativity! Crochet is all about sharing joy and connecting with others who love handmade crafts. Post your finished pumpkin on social media, join crochet groups, or gift one to a friend who needs a little seasonal cheer.
Remember, each handmade project is unique—even if you follow the same crochet pattern, your pumpkin will have its own character and charm. That’s what makes crochet so rewarding: the blend of skill, creativity, and personal touch.
PATTERN HERE
Crochet – Tutorial
FULL PATTERN ACCESS
You will be redirected to another site
So, grab your yarn and hook, start your Mickey Pumpkin today, and don’t forget to share your work. Let your handmade creation bring smiles, spark inspiration, and maybe even encourage someone else to pick up a crochet hook for the first time. Happy crocheting!