
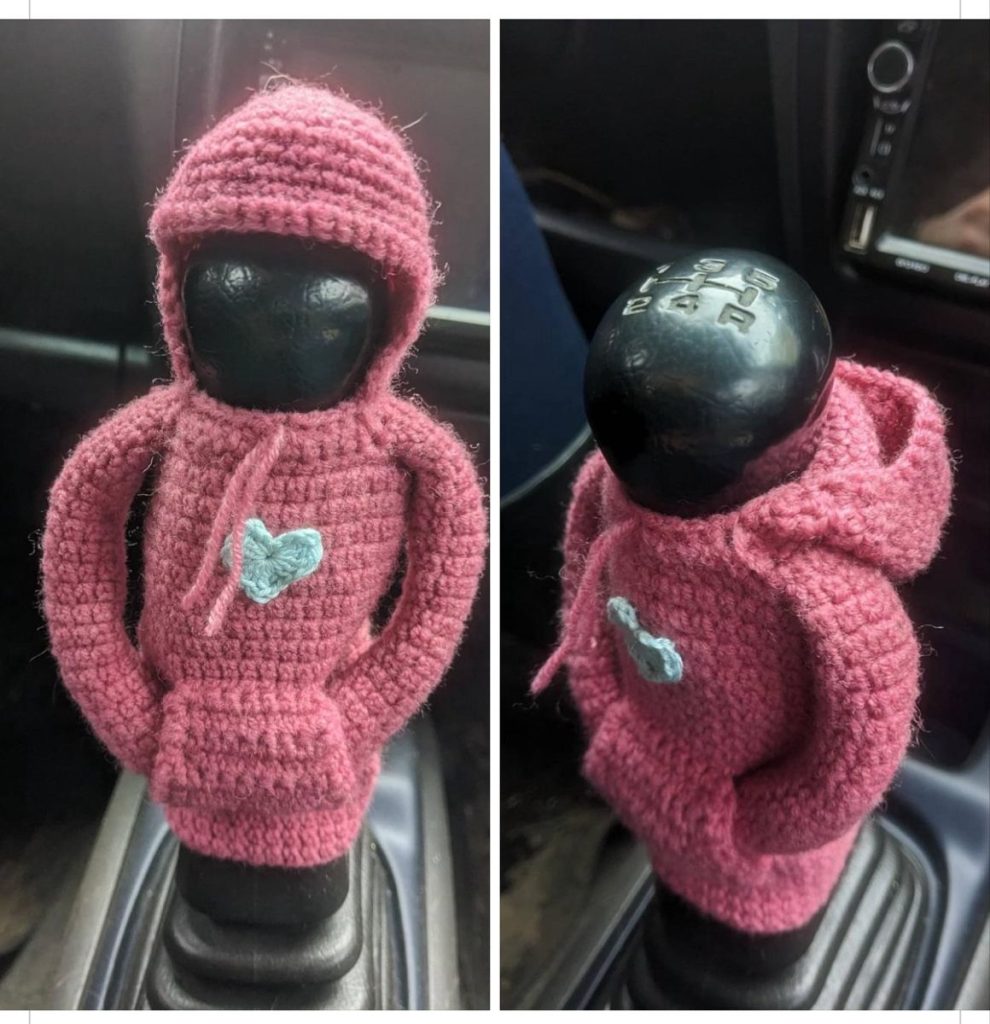
Crochet is an art that allows creativity, comfort, and style to blend seamlessly. If you’re looking for a cozy yet stylish addition to your wardrobe, the Gearshift Hoodie is the perfect project. This easy crochet hoodie pattern is beginner-friendly, offering a balance of simplicity and charm. By following this tutorial, you’ll create a wearable piece that’s not only practical but also showcases your crochet skills.
The Gearshift Hoodie stands out because of its unique design inspired by casual streetwear. With a slightly oversized fit, it allows for layering, making it versatile for different seasons. The hoodie includes a classic hood, a front pocket, and simple stitch patterns that are easy to follow even if you are new to crochet.
Throughout this tutorial, we’ll guide you step by step, from choosing the right yarn to finishing touches. You’ll also discover ideas for personalizing your hoodie, making it truly one-of-a-kind. By the end, you’ll have a cozy garment that combines functionality with your personal touch.
Materials Needed
Before starting, it’s important to gather all the materials for your crochet hoodie. Having everything ready will make the process smoother and more enjoyable.
You will need:
- Worsted weight yarn (approx. 1200–1500 yards depending on size)
- Crochet hook size H/8 (5 mm)
- Yarn needle for weaving ends
- Stitch markers
- Scissors
- Optional: Drawstring for the hood
Choose yarn that feels soft against the skin, especially for a hoodie that will be worn often. Cotton blends or acrylic yarns work well for this type of garment.
Stitch markers will help keep track of your rows, especially around the armholes and hood shaping. The optional drawstring adds an extra touch of style and functionality, allowing you to adjust the hood to your liking.
Understanding the Pattern
This crochet hoodie pattern uses basic stitches, making it accessible for beginners. The main stitches include chain (ch), single crochet (sc), half double crochet (hdc), and double crochet (dc). Familiarity with these stitches will make following the pattern a breeze.
The hoodie is constructed in pieces – front, back, sleeves, and hood – which are later joined together. Working in pieces ensures better shaping and a professional finish. Each section is explained step by step, with tips to adjust the size if needed.
Take your time to read through each section before starting. Understanding the pattern structure is key to achieving a well-fitted hoodie. Don’t worry if you need to practice stitches on a small swatch first – it’s all part of the fun of learning crochet!
Step-by-Step Instructions: Back Panel
- Foundation Chain: Start by chaining a length that matches your desired width (approx. 50–60 chains for a medium size).
- Row 1: Work a row of half double crochet (hdc) across, starting from the second chain from the hook.
- Rows 2–30: Continue working in hdc until the back panel reaches the desired length (around 24–26 inches).
Make sure to count your stitches at the end of each row to ensure uniformity. This will help the panels line up perfectly when you assemble the hoodie.
Remember, the beauty of crochet is its flexibility. You can adjust the width and length to suit your personal style or body measurements. Adding a few extra rows or stitches can make your hoodie more oversized and cozy.
Step-by-Step Instructions: Front Panel
- Foundation Chain: Match the length of the back panel for consistency.
- Work Rows: Crochet in hdc for about half the total length. This section forms the bottom of the hoodie.
- Neck Shaping: Divide your stitches into three sections to create the neckline. Decrease slightly at the center stitches over several rows for a subtle V-shape.
As with the back panel, counting your stitches will ensure symmetry. Use stitch markers to mark the points where you’ll decrease for the neckline.
The front panel can also include a kangaroo pocket. Simply crochet a rectangle separately and sew it onto the front panel after finishing all pieces. This adds functionality and style to your hoodie.
Step-by-Step Instructions: Sleeves
- Foundation Chain: Chain the width of the sleeve cuff (approx. 20–25 chains).
- Rows: Work in hdc, increasing slightly every few rows to achieve a tapered shape.
- Length: Continue until the sleeve reaches your desired length (usually 18–20 inches).
Ensure both sleeves are identical by counting rows carefully. Consistency in sleeve length and width creates a polished final piece.
For a fun variation, you can alternate colors for stripes or use a different stitch pattern for the sleeves. This is an easy way to customize your hoodie without changing the overall design.
Step-by-Step Instructions: Hood
- Foundation Chain: Chain the width of the back neckline.
- Rows: Work in hdc or dc, increasing slightly at the first and last stitch of each row to form a curved hood shape.
- Length: Continue until the hood comfortably fits over your head. Optionally, add a drawstring by threading a crocheted chain through the hood edge.
Make sure to try the hood on during construction to ensure a comfortable fit. Adjust length and width as needed.
A personalized hood can include a contrasting border or decorative stitches to make it unique. Even beginners can experiment with simple edging to enhance the look.
Assembly
- Joining Panels: Use a yarn needle to sew the front and back panels at the shoulders.
- Attach Sleeves: Align the sleeves with the armholes and sew using a whip stitch or mattress stitch.
- Sew Side Seams: Join the sides of the hoodie, leaving space for the pocket if added.
Weaving in all loose ends neatly gives the hoodie a professional finish. Take your time with assembly – a well-sewn garment is more comfortable and durable.
For a creative touch, consider using a contrasting color to sew the pieces together. This adds subtle detailing and emphasizes the handcrafted nature of your hoodie.
Personalization Ideas
Crochet is all about creativity, so don’t be afraid to make this hoodie your own. Try adding color blocks, stripes, or textured stitch patterns to reflect your style.
Another idea is to embellish the hoodie with buttons, patches, or embroidery. Even simple details like a crocheted heart on the pocket or sleeves can make a big impact.
Experiment with different yarn types, too. Soft, chunky yarn makes the hoodie warm and cozy, while lighter yarns create a breathable, casual look suitable for layering.
Finishing Touches
After assembly, check all seams and edges. Block your hoodie if necessary to ensure the shape stays true. Add the drawstring to the hood and style it as desired.
Crochet projects like this hoodie are perfect gifts or personal wardrobe staples. Wearing something you’ve crafted yourself brings a special sense of pride and accomplishment.
Finally, take photos of your finished hoodie and share your project with the crochet community. It’s always inspiring to see how one pattern can be interpreted in so many creative ways.
Share Your Project
We hope this Easy Crochet Gearshift Hoodie pattern inspires you to start crocheting your next cozy garment. Remember, every stitch you make is a step toward creating something beautiful and personal.

PATTERN HERE
Crochet – Tutorial
FULL PATTERN ACCESS
You will be redirected to another site
Share your hoodie on social media, tag friends, or join online crochet groups. By sharing, you not only celebrate your work but also inspire others to explore their crochet journey.
Crochet is more than just a craft – it’s a way to express creativity, relax, and connect with a vibrant community. Happy crocheting, and enjoy your new stylish Gearshift Hoodie!