
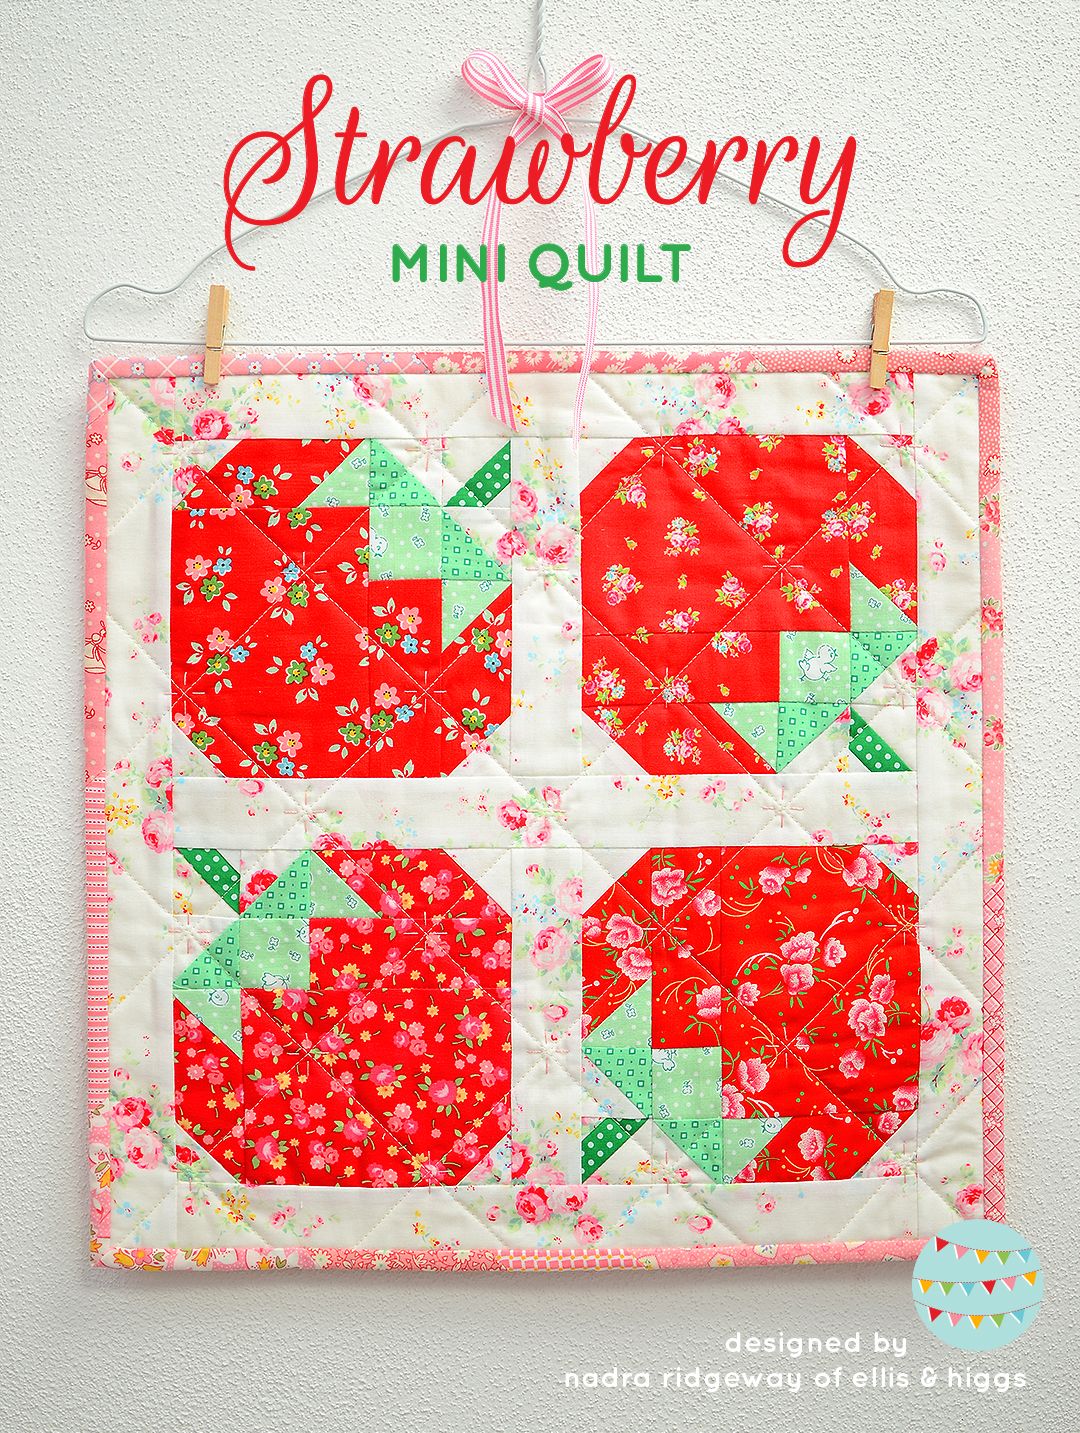
Quilting is an art form that brings together creativity, patience, and love for fabric. If you are looking for a cheerful and charming design, a strawberry quilt is the perfect project to brighten your sewing journey. With its sweet and playful shapes, this pattern is an excellent choice for both beginners and experienced quilters. It blends traditional techniques with a fun, modern twist, making it suitable for cozy throws, children’s quilts, or even decorative wall hangings.
In this tutorial, we will walk through everything you need to know about making a strawberry quilt—from gathering materials and preparing fabrics to sewing your quilt blocks and finishing your project. Each section is designed to be clear, simple, and inspiring so that you feel confident at every step. Whether this is your very first quilt or one of many, this project will add a burst of freshness to your handmade collection.
So, grab your fabric stash, prepare your sewing machine, and let’s dive into the delightful world of strawberry quilts. By the end of this guide, you’ll not only have a finished quilt to show off but also the skills to create endless variations of this sweet pattern.
Materials You Will Need
Before you begin quilting, it’s essential to gather all the materials. Having everything ready will help you enjoy the process without interruptions. For a strawberry quilt, you’ll need a mix of fabrics in reds, pinks, and greens to capture the fresh, fruity look of strawberries. Choose different tones for variety—it makes the quilt more dynamic and eye-catching.
Here’s a suggested list of supplies:
- Fabric: Red and pink cotton fabrics for the strawberries, green fabrics for the leaves, and a background fabric in white, cream, or light pastel.
- Batting: A layer of batting that matches the size of your quilt.
- Backing Fabric: Coordinating fabric for the back of the quilt.
- Thread: All-purpose cotton thread in matching or contrasting colors.
- Sewing Tools: Rotary cutter, cutting mat, quilting ruler, sewing machine, scissors, pins, and an iron.
When choosing fabrics, consider using quilting cotton because it is easy to sew, durable, and widely available. If you love experimenting, mix prints and solids for strawberries with unique personalities. Polka dots, gingham, or tiny floral prints all work beautifully in a strawberry quilt pattern.
Preparing the Fabric
The secret to a successful quilt starts with proper fabric preparation. Begin by washing and pressing all your fabrics. Prewashing removes any chemicals, prevents shrinkage, and avoids color bleeding later. Once dry, press the fabric with an iron to remove wrinkles and make cutting easier.
Next, cut your fabrics into the required pieces. Most strawberry quilt blocks are made of squares, half-square triangles (HSTs), and rectangles, so accuracy is important. Using a rotary cutter and quilting ruler will help you get clean, straight edges. If you are following a specific strawberry quilt pattern, stick to the exact measurements provided. Beginners often find it helpful to label each pile of fabric pieces with sticky notes to stay organized.
Finally, arrange your cut pieces into groups for each strawberry block. This small step saves time and helps you visualize how the final block will come together. Think of it as a mini “preview” of your quilt, and don’t hesitate to swap fabrics around until you’re happy with the combinations.
Sewing the Strawberry Blocks
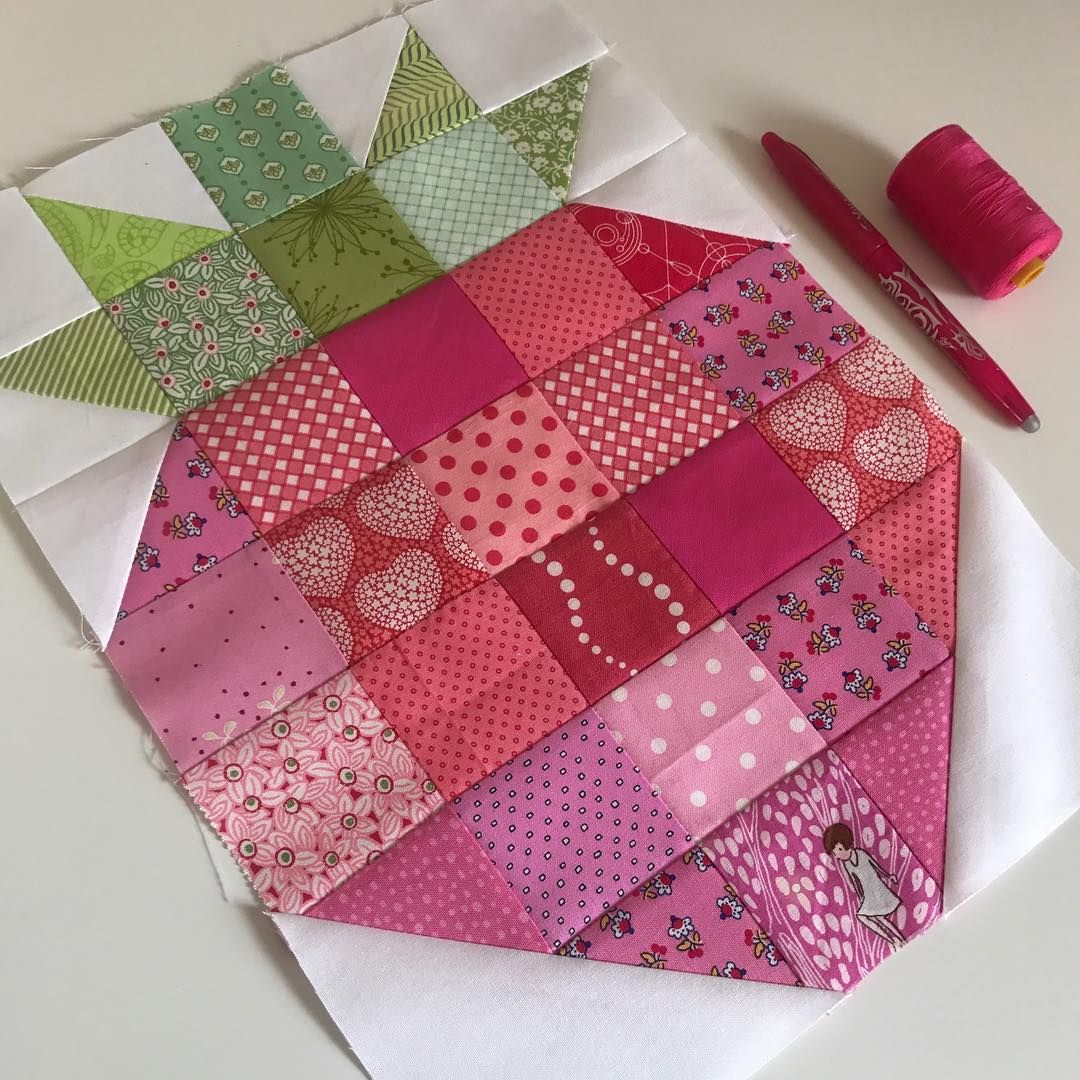
Now comes the fun part—sewing your strawberries! Start with the base of the strawberry by joining together squares and half-square triangles. The HSTs will form the rounded edges at the top of the strawberry, giving it its iconic shape. Carefully align your pieces and sew them with a ¼-inch seam allowance, which is standard in quilting. Press the seams to one side after sewing to keep the blocks flat.
For the leaves, use green fabric and smaller triangle units. Arrange them above the strawberry base so they look like little leafy tops. This small detail adds character and charm to each block. If you’re new to piecing triangles, take it slow and pin the pieces before sewing. Precision at this step ensures the leaves look crisp and balanced.
Once you’ve completed several strawberry blocks, lay them out on a flat surface or design wall. This will help you decide on the quilt’s layout—whether you want a grid pattern, a diagonal design, or even alternating strawberries with plain blocks. Play with the arrangement until it feels just right.
Assembling the Quilt Top
With your blocks completed, it’s time to assemble the quilt top. Sew the strawberry blocks together in rows, taking care to match up seams where the blocks meet. Pinning at the intersections will help maintain alignment. Once the rows are complete, sew them together to form the full quilt top.
Press all the seams as you go along. Pressing not only makes your quilt top look neat but also prevents bulky intersections, which can make quilting later more difficult. A good press will make your quilt top lie flat and look polished.
This stage is where your hard work really shines. Seeing the quilt come together as one large piece is always rewarding. At this point, your quilt top will look like a cheerful strawberry garden ready to be framed with borders, quilted, and finished.
Adding borders is optional but highly recommended, especially for beginners. A border frames your strawberry quilt and gives it a finished look. Choose a border fabric that complements your blocks—light for a soft look, or bold for a striking contrast. Measure your quilt carefully and cut strips to match each side before attaching them with a ¼-inch seam allowance.
Next comes creating the quilt sandwich. This involves layering the quilt top, batting, and backing fabric. Lay the backing fabric on a clean surface with the right side facing down, then place the batting on top, and finally, the quilt top right side up. Smooth out any wrinkles as you go.
To hold everything in place, use quilting pins or basting spray. Pin through all layers every few inches. This step prevents shifting while quilting and makes the sewing process smoother. Taking the time to baste carefully will save you from frustration later.
Quilting Your Strawberry Quilt
Now it’s time to quilt! For beginners, straight-line quilting is an excellent choice. Simply sew along the seams or create diagonal lines across the quilt. This technique is simple yet effective, and it enhances the strawberry shapes without being overwhelming.
If you’re feeling adventurous, try free-motion quilting with loops, swirls, or even strawberry-shaped designs. This adds a personal touch and makes your quilt truly unique. Practice on scrap fabric before working on your quilt to get comfortable with the motion.
Remember to start quilting in the center and work your way outward. This method reduces fabric bunching and ensures an even finish. Take your time, breathe, and enjoy the process—it’s not a race.
Binding and Finishing Touches
The final step is binding your quilt. Cut strips of fabric (usually 2 ½ inches wide), sew them into one long piece, and press them in half lengthwise. Attach the binding around the edges of your quilt, folding it over to encase the raw edges. Sew it in place using a machine or hand stitching, depending on your preference.
Binding can be a wonderful opportunity to add another pop of color or pattern. A red gingham or polka dot binding, for example, would perfectly complement the strawberry theme. If you want something more subtle, choose a solid fabric that matches your background.
Once the binding is secure, give your quilt a final press with the iron. Step back, admire your creation, and take pride in every stitch. You’ve officially completed your strawberry quilt—a sweet and joyful project made by your own hands.
Ideas for Personalization
One of the best things about quilting is the opportunity to personalize your work. For a playful twist, make strawberries in unexpected colors—blueberries, golden strawberries, or even rainbow fruit. This can be especially fun if the quilt is meant for a child’s room or as a whimsical gift.
You can also experiment with different background fabrics. Instead of a plain white or cream, try a sky-blue fabric to make your strawberries look like they’re floating in the summer air. Or, use a patchwork background with low-volume prints for extra texture and depth.
Finally, consider adding embroidery details like little seeds on each strawberry or quilting designs that mimic vines and leaves. These subtle touches can transform a simple quilt into a masterpiece filled with character and charm.
Share Your Strawberry Quilt
Quilting is more than just a craft—it’s a way to connect with others, share creativity, and spread joy. Once you finish your strawberry quilt, don’t keep it to yourself. Share photos with friends, post them on social media, or bring your quilt to local quilting groups. Each quilt tells a story, and yours can inspire someone else to start their own journey.
If you’re a beginner, remember that practice makes progress. Your first quilt may not be perfect, but it will be filled with love and learning. Every quilt you make improves your skills and builds confidence for future projects.
So go ahead—celebrate your accomplishment! Whether you use your strawberry quilt as a picnic blanket, a bed cover, or a wall decoration, it will bring smiles wherever it goes. And who knows? Your next quilt adventure might be just around the corner.