
There’s something magical about quilts that bring comfort, warmth, and a touch of creativity to any space. When that quilt features adorable sea turtles swimming across a colorful background, it becomes even more special—especially for kids! The Sea Turtle Animal Quilt is a fun and engaging project that combines bright fabrics, simple shapes, and playful patterns to create something both cozy and full of personality.
Whether you’re a beginner quilter or someone looking for a joyful weekend project, this quilting pattern is perfect for you. In this tutorial, we’ll walk through every step—from gathering materials to sewing and adding personal touches—so you can make a quilt that will delight any child. Let’s dive in and start stitching your ocean-inspired masterpiece!
Materials You’ll Need
Before you begin, make sure you have everything ready. Having your supplies organized will make the process smoother and more enjoyable. The beauty of quilting is that you can often use what you already have—so don’t worry about perfection!
Fabric Selection
For this Sea Turtle Quilt, you’ll want fabrics in ocean tones like turquoise, aqua, soft blue, and sandy beige. You’ll also need greens and browns for the turtles’ shells and bodies. Choose soft, durable cotton fabrics that are easy to work with and comfortable for kids. You can even mix in some prints with waves, bubbles, or coral reef designs to add depth and whimsy.
Full Supply List
- Fabric for quilt top (various colors and prints)
- Fabric for backing (about 1½ yards for a small kid’s quilt)
- Batting (cotton or polyester)
- Sewing machine and matching thread
- Fabric scissors or rotary cutter
- Pins or fabric clips
- Iron and ironing board
- Turtle applique templates (you can print or draw your own)
- Fusible web for appliqué
- Quilting ruler and cutting mat
Once you’ve gathered all your materials, it’s time to start cutting and planning your layout!
Cutting and Preparing the Pieces
The key to a successful quilt is preparation. Spend a little extra time here, and the rest of your project will come together beautifully.
Cutting the Background Squares
Start by cutting your background fabrics into squares—each one can measure 8×8 inches, but feel free to adjust the size depending on your desired quilt dimensions. You can create a pattern of alternating blues and greens, resembling the sea, or go for a gradient effect that flows from dark to light tones.
Arrange your fabric squares on a flat surface before sewing them together. This will help you visualize how your quilt will look once finished. Play around with color placement until you’re happy with the flow—it’s like painting with fabric!
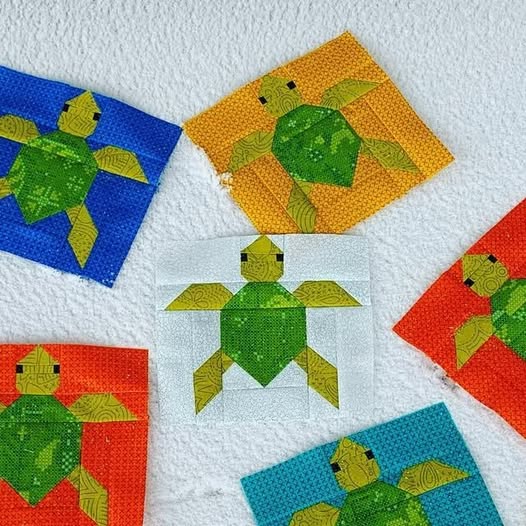
Preparing the Turtle Shapes
Next, print or draw your sea turtle templates. Each turtle can consist of a main body, flippers, and a shell. Trace the shapes onto fusible web, then iron them onto the wrong side of your chosen fabrics. Once fused, cut out each shape carefully. This will make the appliqué process much easier and cleaner later on.
Assembling the Quilt Top
This is where your quilting pattern really starts to come alive! With your background squares and turtle appliqués ready, it’s time to piece everything together.
Sewing the Background Squares
Begin by sewing your squares together row by row. Use a ¼-inch seam allowance to keep your seams consistent. Once you’ve completed all the rows, press them flat with an iron, then join the rows to create the full quilt top. Make sure your seams align neatly for a polished look.
Don’t worry if it’s not perfect—quilting is about progress, not perfection! Even slightly uneven seams can add charm to your finished quilt, giving it that handmade warmth that makes every piece unique.
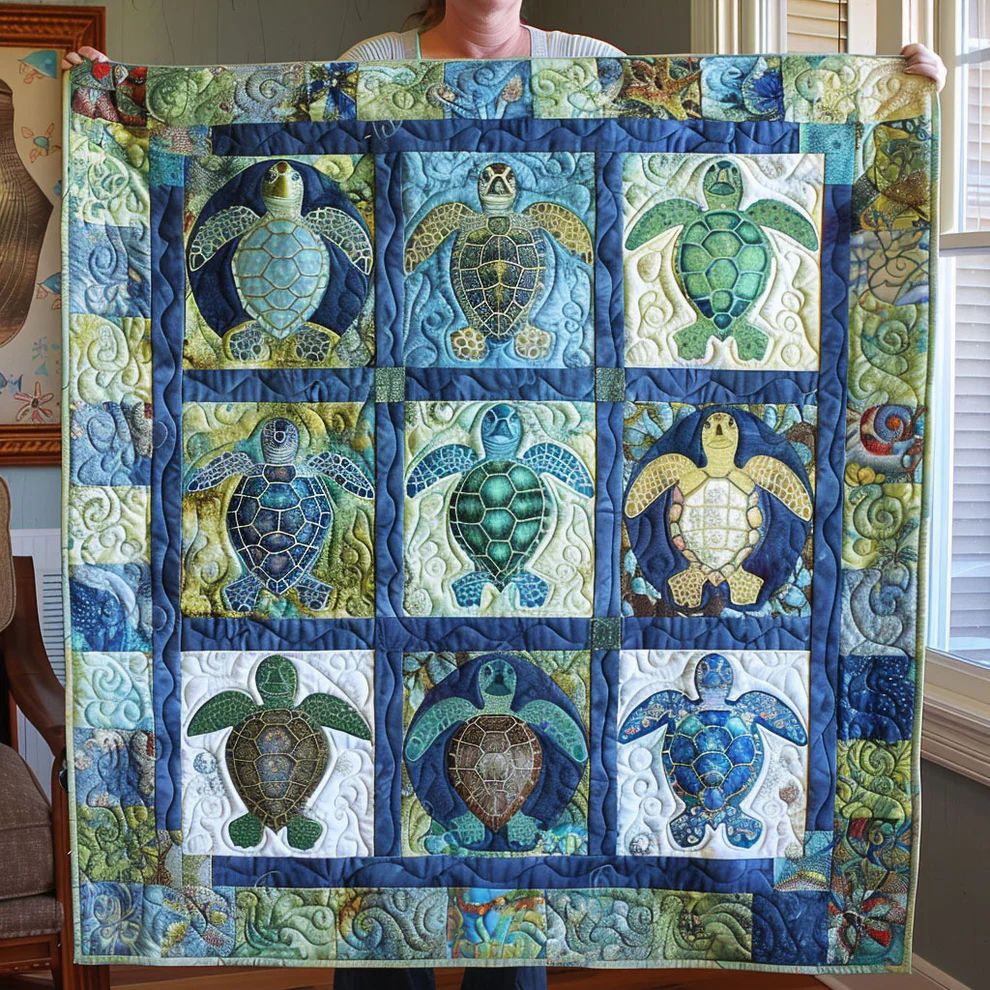
Adding the Turtle Appliqués
Now it’s time for the fun part! Place your turtle shapes on the quilt top wherever you like—scattered across the “ocean” or grouped together as a family. Once you’re happy with the placement, remove the paper backing from the fusible web and iron the appliqués onto the fabric.
To secure them permanently, stitch around the edges using a zigzag or blanket stitch. This not only reinforces the appliqué but also adds a decorative touch. Use matching or contrasting thread colors depending on the look you want.
Layering and Quilting
Now that your quilt top is complete, it’s time to turn it into an actual quilt by layering it with batting and backing fabric. This step brings everything together and gives your creation that soft, puffy texture we all love.
Creating the Quilt Sandwich
Lay your backing fabric on a flat surface, wrong side up. Place the batting on top, then position your quilt top (right side up) over the batting. Smooth out any wrinkles or folds. You can use safety pins or fabric clips to hold all the layers together—this setup is often called the “quilt sandwich.”
Quilting the Layers
There are many ways to quilt your piece. For beginners, straight-line quilting is the easiest. Stitch along the seams or diagonally across the squares. If you’re feeling creative, try quilting waves or circular patterns around the turtles to mimic the movement of the ocean.
Take your time with this step—quilting can be both relaxing and meditative. Listen to some music or a podcast while you sew, and enjoy the rhythm of your stitches.
Binding and Finishing Touches
Your quilt is almost ready! The final step is binding the edges and adding those last special details that make it your own.
Adding the Binding
Cut strips of fabric about 2½ inches wide for the binding. Fold them in half lengthwise and press. Attach the binding to the edges of your quilt, sewing with a ¼-inch seam allowance. When you reach the corners, fold neatly to create a mitered edge. Hand-stitch or machine-stitch the back side of the binding for a clean finish.
Adding Details
This is your chance to get creative! You can add small embroidered bubbles, a sun in the corner, or even a name tag for personalization. Kids love quilts that feel like they were made just for them, so consider stitching their name or initials somewhere special.
Final Touch
Give your quilt a final press with the iron, trim any loose threads, and admire your work! You’ve just created a beautiful Sea Turtle Animal Quilt that’s full of love, imagination, and handmade charm.
Ideas for Customization
One of the best parts of quilting is making every project unique. Here are a few fun ways to make your Sea Turtle Quilt truly one-of-a-kind:
- Color Variations: Try a sunset-inspired color palette with warm corals and yellows instead of blues and greens.
- Themed Borders: Add a patchwork border featuring sea creatures like fish, shells, or starfish.
- Textural Fun: Use fabrics with different textures—like soft flannel for the turtles or shiny satin for the water—to make the quilt more tactile for kids.
If you’re giving this quilt as a gift, consider including a little note or tag that tells the story behind it. Handmade quilts carry emotions and memories—yours will surely become a treasure!
Share Your Sea Turtle Quilt!
Congratulations—you’ve completed your very own Sea Turtle Animal Quilt for Kids! From choosing fabrics to stitching the final seam, you’ve created something filled with creativity and care. This project is a wonderful reminder that quilting is not just about sewing—it’s about storytelling, imagination, and love.
If you make this quilt, don’t keep it to yourself! Share your finished project with the quilting community online. Post your photos on Instagram or Facebook using hashtags like #QuiltForKids, #SeaTurtleQuilt, or #QuiltingPattern, and inspire others to dive into their own creative projects.
Remember, every stitch tells a story—and yours just brought a sea turtle to life!