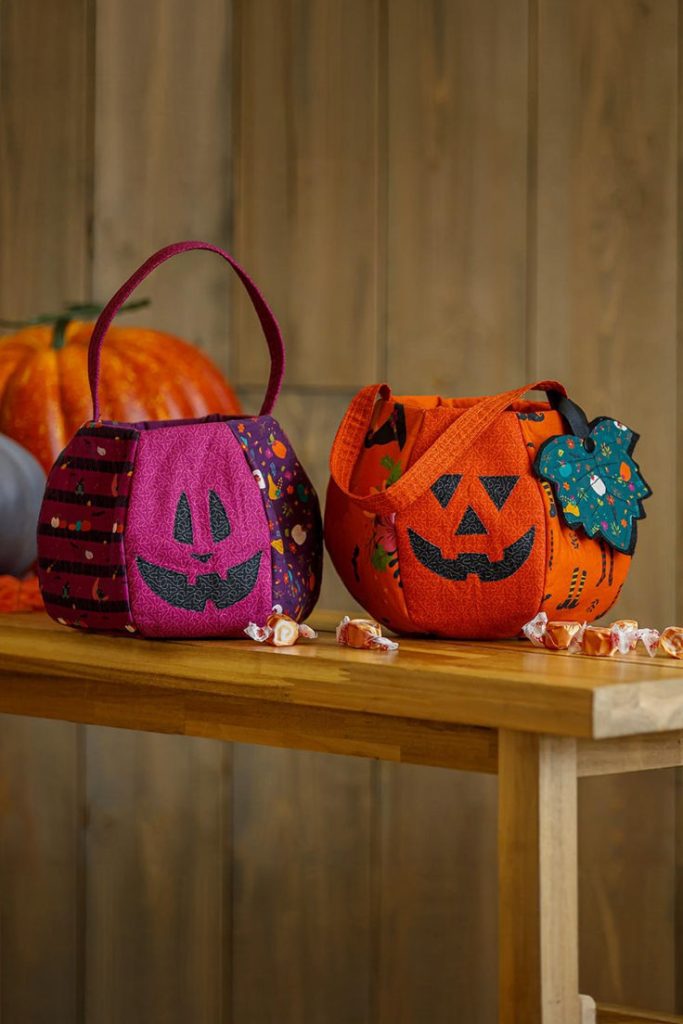
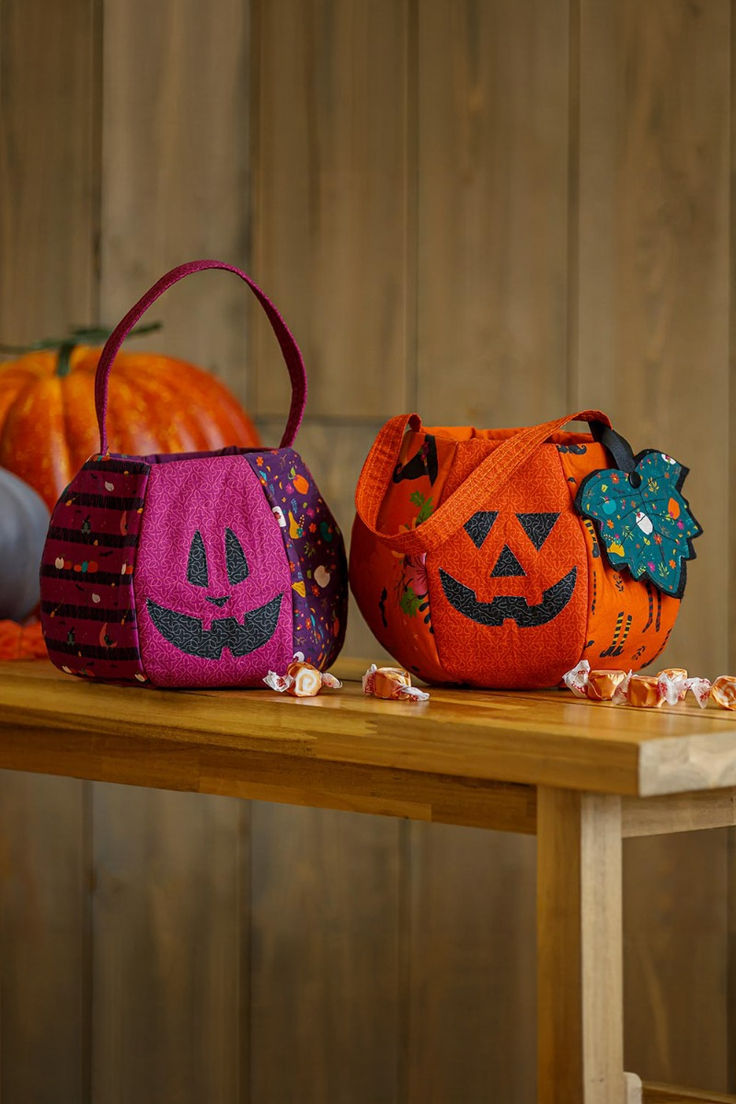
Halloween is the perfect time to bring your creativity to life, and what better way to do it than with a Fun Halloween Bag Quilt Pattern? This project combines the joy of quilting with the excitement of Halloween, allowing you to make a reusable, festive bag that can hold candy, decorations, or even serve as a charming gift. Whether you’re a beginner or an experienced quilter, this tutorial will guide you step by step through the process — from gathering materials to adding those special spooky details.
Quilting isn’t just about stitching fabric together; it’s about storytelling through color, texture, and imagination. This Halloween-themed quilting pattern captures the playful spirit of the season with fun prints, bright oranges, deep blacks, and hints of eerie purples or greens. You’ll learn how to design a quilted bag that’s not only functional but also a unique piece of art to celebrate one of the most magical holidays of the year.
So, grab your favorite Halloween fabrics, prepare your sewing tools, and let’s dive into this fun and festive quilting adventure. This project is designed to be easy enough for beginners but satisfying for anyone who loves to quilt. By the end, you’ll have a handmade Halloween bag that’s perfect for trick-or-treating or decorating your home!
Materials You’ll Need
Before diving into the sewing process, it’s important to gather all your supplies. For this quilt pattern, you’ll be combining small pieces of fabric to create a decorative patchwork effect. The final bag will measure approximately 12 x 14 inches, but you can easily adjust the size based on your needs.
Materials List:
- 6–8 pieces of cotton fabric in Halloween colors (orange, black, purple, green, and white)
- Batting (lightweight cotton or polyester)
- Lining fabric (plain black or coordinating color)
- Sewing machine and matching thread
- Fabric scissors or rotary cutter
- Pins or fabric clips
- Quilting ruler and cutting mat
- Iron and ironing board
- Optional: appliqué pieces, fabric paint, or Halloween patches
When choosing fabrics, think about texture and pattern balance. Mix solids with prints such as bats, pumpkins, spiderwebs, or ghosts. The contrast will make your quilt bag more dynamic and eye-catching. Try to use high-quality quilting cotton to ensure your stitches stay neat and your bag remains durable.
It’s also helpful to prewash your fabrics before cutting. This prevents any shrinkage or color bleeding later. Iron them flat to make the cutting and sewing process smoother. With everything ready, you’re all set to start your Halloween quilting project!

Cutting and Preparing Your Fabric
The first step in making your Fun Halloween Bag Quilt Pattern is cutting your fabric pieces. You can follow a simple patchwork layout of squares or rectangles, or get creative with triangle or diamond shapes for a more intricate design. If you’re new to quilting, starting with squares (about 4 x 4 inches) will make the process much easier.
Lay your fabrics on a flat cutting surface and use your rotary cutter and quilting ruler for clean, even cuts. You’ll need enough fabric squares to create both sides of the bag. For example, if you’re making a 12 x 14-inch bag, you’ll likely need 3 squares across and 4 squares down for each side.
After cutting your main fabrics, cut your batting and lining fabric to match the finished panel size. The lining will give your bag a professional finish and help it keep its shape. If you want to add handles made from quilted fabric, cut two strips measuring about 2 x 20 inches each.
Take your time in this step—precise cutting leads to easier assembly later. Lay out your pieces in a pattern you like before you start sewing. You can mix and match colors until you find a combination that feels balanced and festive.
Sewing the Quilt Panels
Now comes the fun part — sewing your quilted panels together! Arrange your fabric squares in the chosen layout, right sides facing each other, and begin stitching them with a ¼-inch seam allowance. Press each seam open or to one side using an iron to reduce bulk and keep your quilt top flat.
Once you’ve sewn all the rows, connect them to form a full panel for the front of your bag. Repeat the same process for the back panel. Place your completed top layer over the batting and lining, and secure them together with quilting pins. This creates your quilt sandwich — the base of any good quilting pattern.
Next, you’ll quilt through all layers using either straight-line stitching or free-motion quilting. Straight lines are perfect for beginners and can be done in a grid pattern or diagonal lines. If you’re feeling creative, you can stitch swirls, spiderwebs, or zigzags for a Halloween twist. The goal is to hold all the layers together while adding texture and charm to your design.
Assembling the Bag
With both quilted panels ready, it’s time to assemble your Halloween bag. Place the front and back panels right sides together, aligning the edges carefully. Stitch along the sides and bottom, leaving the top open. Trim any excess threads and corners for a neat finish.
To create depth, box the corners of the bag. Do this by pinching each bottom corner so that the side and bottom seams align, forming a triangle. Measure about 1.5 inches from the tip and sew a straight line across. Cut off the excess fabric and repeat for the other corner. When you turn the bag right side out, you’ll see a more structured shape — perfect for holding Halloween treats!
Next, prepare the lining by sewing its sides and bottom the same way. Insert the lining inside the outer bag, wrong sides together. Fold the top edges inward and stitch all around to secure. Finally, attach the handles by sewing them to the top edges, either inside or outside the bag, depending on your design.
Adding the Halloween Touches
Now that your bag is assembled, let’s make it truly spooky and fun! This step is where your creativity shines. You can personalize your Halloween quilt bag with appliqués, embroidery, or decorative stitching. Fabric paint and iron-on patches also work beautifully to add character.
Consider sewing a smiling jack-o’-lantern face on one side, or quilting in shapes like ghosts or bats. For a touch of sparkle, add glow-in-the-dark thread or metallic accents. You can also use leftover fabric scraps to make small quilted charms or tassels to hang from the handles.
If you’re making this as a gift, personalize it even more by adding the recipient’s name with embroidered letters. Kids will love having their own handmade candy bag for trick-or-treating, and adults can use it as a festive tote for fall shopping or decoration.
Creative Variations and Custom Ideas
The best thing about this Halloween quilting pattern is its versatility. You can easily adapt the design for different holidays or seasons by changing the fabric colors and motifs. For example, use red and green prints for a Christmas version or pastel tones for a spring tote.
Another fun idea is to experiment with different shapes. Instead of a square patchwork, try hexagons, stars, or even pumpkin-shaped panels. If you’re confident with your quilting skills, add a zipper closure, inner pockets, or a reversible lining for extra functionality.
For eco-conscious quilters, consider using fabric scraps or recycled materials from old quilts. Not only is this sustainable, but it also gives your bag a charming, vintage look. Quilting is all about making something beautiful and meaningful from what you already have — and this project embodies that spirit perfectly.
Share Your Quilting Magic!
Congratulations — you’ve completed your Fun Halloween Bag Quilt Pattern! You now have a festive, handmade accessory that combines practicality, creativity, and a love for quilting. Whether you use it for collecting treats, decorating your home, or gifting it to someone special, this bag will be a delightful reminder of your crafting skills.
Don’t forget to share your finished project with the quilting community! Post your photos on social media or quilting groups using hashtags like #HalloweenQuiltBag and #QuiltingPattern. Seeing how others interpret the same project can be incredibly inspiring and motivating for your next creation.
Remember, quilting is not just about following a pattern — it’s about expressing yourself through fabric and thread. Each stitch tells a story, and your Halloween bag is now part of that story. Have fun, stay creative, and keep quilting your way into the festive season!

