
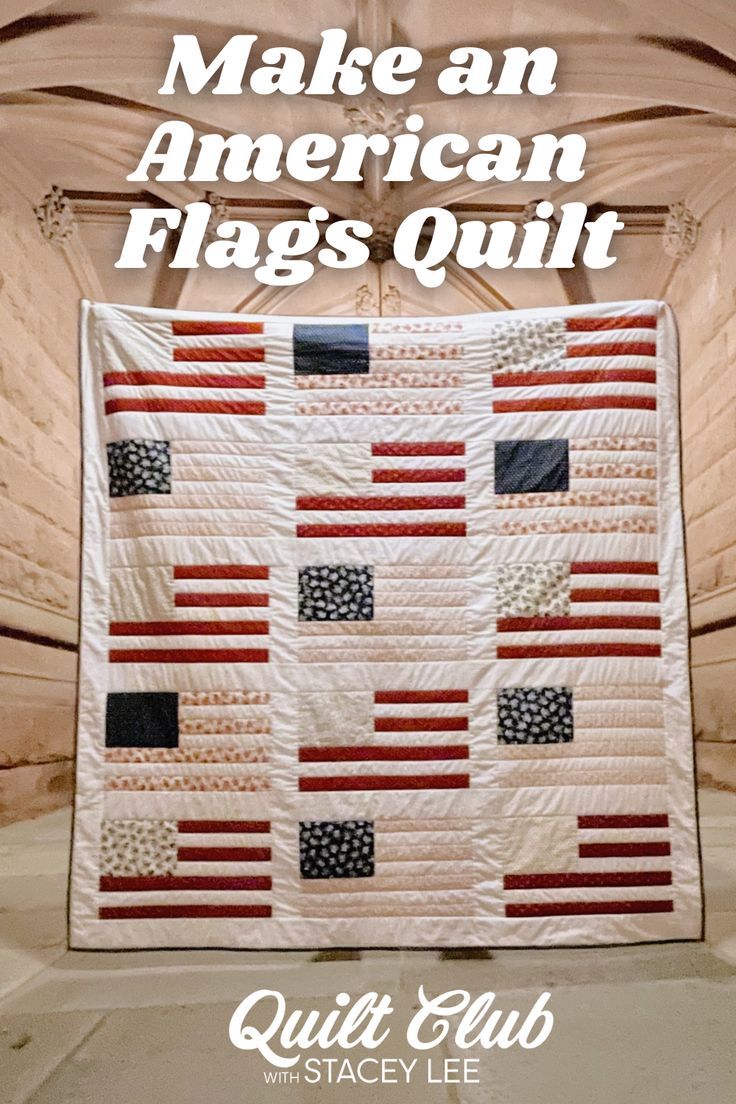
Few projects capture the spirit of creativity and pride quite like an American Flag Quilt. Whether you’re crafting it for a summer picnic, a veteran’s gift, or to celebrate the Fourth of July, this Quilting pattern brings together timeless symbolism and the joy of handmade art. In this tutorial, you’ll learn everything you need to know—from gathering materials to stitching your final star. Designed for beginners, it’s simple enough for anyone to follow, yet beautiful enough to become an heirloom piece.
Let’s dive into this step-by-step guide that will have you sewing red, white, and blue in no time!
Materials You’ll Need
Before you start quilting, make sure you have all your materials ready. For this Quilt, you’ll need cotton fabric in three main colors: red, white, and navy blue. Choose quality quilting cotton for durability and easy sewing. You’ll also need a backing fabric, batting, and thread that matches your color scheme.
Here’s a detailed list:
- Red fabric: 3/4 yard
- White fabric: 3/4 yard
- Navy blue fabric: 1/2 yard
- Batting: enough for your quilt size (usually 40” x 50”)
- Backing fabric: 1 1/2 yards
- Rotary cutter, ruler, and cutting mat
- Pins or fabric clips
- Sewing machine and iron
If you’re new to quilting, don’t worry about having fancy tools. Even with basic supplies, you can create a gorgeous Quilting pattern that captures the flag’s spirit. Just remember to press your fabrics before cutting—they’ll sew together much more smoothly.
Preparing and Cutting the Fabric
Once you have your materials, it’s time to start cutting your pieces. Accuracy is key in quilting, so take your time and double-check your measurements. You’ll need 13 stripes (7 red and 6 white) and a blue canton for the stars.
Cut the fabric as follows:
- Red stripes: 7 strips, 2 1/2” x 40”
- White stripes: 6 strips, 2 1/2” x 40”
- Blue canton (the star area): 14” x 20”
Lay out your pieces on a flat surface to preview how they’ll look together. Seeing the layout before sewing helps you visualize the final Quilt and ensures your colors balance well. It’s always exciting to see your design start taking shape even before you thread your needle!
Finally, use your rotary cutter for clean, straight lines. If you’re a beginner, cutting slowly with a sharp blade prevents frayed edges and uneven strips. This precision will make sewing your flag quilt much easier later on.
Sewing the Stripes
Now comes the fun part—assembling the stripes! Begin by sewing one red strip to a white strip, right sides together, using a 1/4” seam allowance. Continue alternating red and white until you have all thirteen stripes joined together. Press each seam flat with your iron as you go.
When all your stripes are sewn, you’ll have a long striped panel that forms the body of the flag. Double-check that your stripes are straight and even. If you notice any slight misalignments, don’t panic! Small imperfections are part of the handmade charm of quilting.
Once the stripes are ready, trim the edges if needed to keep everything square. You should now have a solid base for your American Flag Quilt that’s vibrant, symbolic, and perfectly ready for the next stage—the stars!
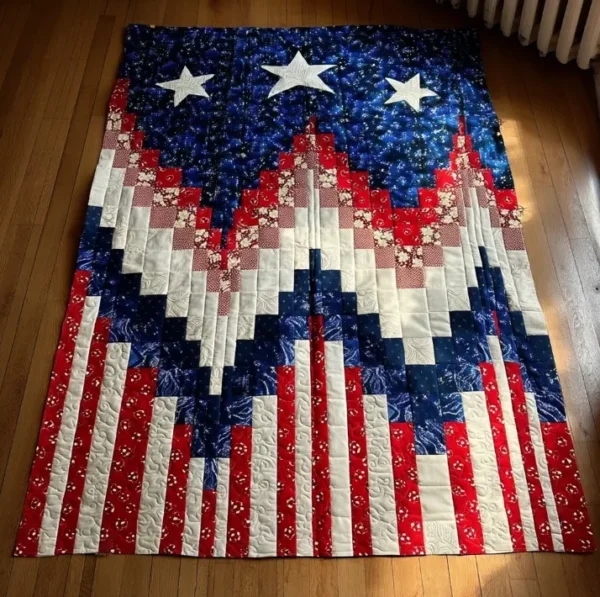
Adding the Blue Canton and Stars
The blue canton gives the flag its signature look. Place it in the upper left corner of your striped quilt top, aligning the top and left edges. Pin it in place and sew it down carefully. You’ve just completed the most recognizable part of your Quilting pattern!
Next, it’s time for the stars. You can either appliqué white stars onto the blue fabric or use white fabric paint for a quicker version. For a traditional look, cut out 50 small white stars (about 1 inch each) and arrange them in rows. Use fusible webbing to attach them, then stitch around each star with a small zigzag or blanket stitch to secure them.
If you’re new to appliqué, don’t worry—just take your time and have fun with the placement. Some quilters even choose to make fewer stars for a simplified design, especially for wall hangings or mini quilts. This flexibility is what makes every Quilt unique and personal.
Layering and Quilting
With your top complete, it’s time to assemble the quilt layers: the top, batting, and backing. Lay the backing fabric right side down, smooth the batting over it, and place your quilt top on top, right side up. Make sure all layers are smooth and aligned, then pin or baste them together.
Now you’re ready to quilt! You can quilt straight lines along the stripes for a classic look or create wavy lines to mimic a flag blowing in the wind. Quilting is where your creativity shines—it adds texture and personality to your finished piece. Even simple stitching can make a big impact when done with care.
If you’re new to quilting, practice on a small sample first. Straight-line quilting is a great choice for beginners—it’s forgiving and enhances the flag’s bold lines beautifully. When you’re done quilting, trim away any excess batting and backing to square up your quilt.
Binding the Edges
To give your American Flag Quilt a professional finish, you’ll need to bind the edges. Cut 2 1/2” strips from your red or blue fabric (or even a mix of both for a creative twist). Sew the strips together end to end, fold them in half lengthwise, and press.
Align the raw edges of your binding with the raw edge of your quilt front and sew it around all sides using a 1/4” seam allowance. Fold it over to the back, and hand-stitch or machine-stitch it down. This last step adds a neat, durable edge that keeps your Quilting pattern looking polished for years to come.
Take a moment to admire your work—it’s a satisfying sight to see the quilt fully bound and ready to display. Every stitch tells a story of patience, creativity, and pride.
Ideas for Personalization
The beauty of quilting lies in how easily you can make every project your own. This American Flag Quilt Pattern offers endless possibilities for customization. Try using different shades of red and blue for a vintage look, or soft pastel tones for a modern farmhouse feel.
You could also embroider names, dates, or meaningful quotes along the white stripes to make your Quilt even more personal. If you’re gifting it to a veteran or loved one, include a small stitched dedication on the back. Many quilters also love adding decorative quilting designs—like stars or fireworks—to the background.
And don’t forget about size! You can scale this pattern up for a bed quilt or shrink it down for a wall hanging, pillow cover, or picnic blanket. Whatever you choose, your creativity will make it truly one of a kind.
Caring for Your American Flag Quilt
After all your hard work, you’ll want your quilt to stay beautiful for years to come. Always wash your quilt gently in cold water with mild detergent, and let it air dry when possible. This preserves the colors and prevents shrinkage.
Store your quilt in a cool, dry place away from direct sunlight. Folding it with acid-free tissue between layers helps prevent creases and fading. Many quilters even display their flag quilts during special holidays, then carefully store them until the next celebration.
Your handmade quilt is more than just fabric and thread—it’s a piece of your heart. Taking care of it ensures that your Quilting pattern remains a lasting symbol of creativity and pride.
Share Your Patriotic Creation!
Congratulations—you’ve just finished your own American Flag Quilt Pattern! Whether you followed this tutorial step-by-step or added your personal flair, you’ve created something truly special. Quilting connects generations through creativity and love, and every project brings that connection to life.
We’d love to see your finished quilt! Share photos on social media using hashtags like #AmericanFlagQuilt and #QuiltingPattern, or post your work in quilting communities online. Seeing everyone’s unique versions of this classic design is always inspiring—and who knows, your project might spark someone else’s next creation.
So grab your sewing machine, spread out your fabric, and let your creativity wave like a flag in the breeze. Happy quilting!