
Creating handmade baby accessories is one of the most heartwarming projects you can make, especially when the item is both useful and adorable. An Easy Baby Bib is the perfect sewing project for beginners who want to explore simple stitching, experiment with a charming quilt look, and enjoy the creative joy of making baby essentials. In this tutorial, you’ll learn how to create a baby bib from start to finish, including cutting, assembling, quilting, and adding personal touches that make your project truly unique. Whether you are sewing for your own little one or preparing a thoughtful handmade gift, this easy bib is a delightful place to begin your sewing or quilting journey.
Materials You Will Need
Before you start sewing, make sure you have all the necessary materials prepared. You don’t need much to create this bib, making it an ideal starter project for anyone wanting to try a simple quilting pattern. Cotton fabric is the best choice because it is gentle on the skin, washable, and easy to sew. A small amount of batting will help give your bib a soft, quilt-like feel that adds comfort and durability.
For this project, you will need two pieces of fabric for the front and back, optional quilt batting, matching thread, scissors, pins or clips, and your sewing machine. You’ll also need a closure option, such as Velcro or plastic snaps, to secure the bib around the baby’s neck safely and comfortably. Don’t forget to print or draw a bib template to help you cut your pieces evenly and beautifully.
If you want to give your bib a more textured look, opt for scraps of fabric to piece together a small quilt block for the front. This allows you to incorporate the charm of quilting techniques even in small projects, helping you build skills while creating something functional and cute.
Preparing Your Fabric Pieces
Start by laying your chosen fabrics flat and ironing them gently to remove wrinkles. This step is important because smooth fabric is much easier to cut and sew accurately. Place your bib template on top of the fabric, trace around it, and cut your front and back pieces. If you plan to use quilt batting, cut one piece that matches the same size as your bib front to add softness.
If you’re incorporating a mini quilt block on the front, sew your pieces together first before cutting out the bib shape. This method allows you to build a quilting pattern that fits perfectly once complete. Even a simple block—like a basic patchwork of squares—adds character and charm to the overall design. Beginners often enjoy using leftover quilt fabrics because they add pops of color and personality without requiring much extra effort.
Once all your pieces are cut, layer them in the following order: quilt batting on the bottom, bib front on top of the batting, and bib back right-side down on top of the front piece. Pin or clip all the layers together so everything stays aligned while sewing. Taking your time during this step ensures a neat finish later on.
Sewing the Bib Together
Begin sewing around the edges of the layered pieces with a quarter-inch seam allowance. Make sure to leave a small opening at the bottom of the bib for turning. Sew slowly around the curves—baby bibs feature smooth, rounded shapes, so keeping a steady pace helps maintain accuracy. Using small, even stitches also gives your project a polished look that resembles professional-quality quilt work.
Once you’ve sewn around the entire shape, carefully trim the seam allowance along the curves. This step helps reduce bulk and allows the bib to lay flat once turned inside out. Be careful not to cut into your stitching line. Turning the bib right-side out through the opening will reveal the smooth edges of your work, and you’ll already see how charming it looks.
After turning the bib, take a moment to press the edges with an iron. This helps the bib keep its shape and makes the next steps easier. Fold the fabric at the opening inward and press it neatly so that it blends perfectly once topstitched. This attention to detail helps elevate even the simplest quilting pattern into a beautiful handcrafted project.
Adding Quilting Stitches
Quilting your baby bib is optional, but highly recommended if you want that extra layer of visual appeal and soft structure. Quilting stitches help keep the batting in place and add decorative texture to the front of the bib. You can choose simple straight lines, diagonal lines, or even free-motion quilting if you feel adventurous.
For beginners, stitching vertical or horizontal lines across the bib is a great place to start. The lines don’t have to be perfectly spaced—part of the charm of handmade quilt projects is their unique, personal look. If you created a pieced quilt block on the front, stitching along the seams helps reinforce the design and highlight the quilting pattern.
As you quilt, make sure the fabric layers remain flat and smooth to avoid puckering. Light quilting is all you need for a baby bib, so don’t worry about making it too dense. Once the quilting is complete, your bib will feel wonderfully soft and sturdy, perfect for everyday use.
Finishing the Edges and Closure
To complete your bib, topstitch around the entire perimeter. This not only gives your project a clean, crisp edge but also securely closes the opening you left for turning. Choose a thread color that complements your fabric or matches the quilt stitches for a cohesive finish. Topstitching can transform a simple project into something that looks skillfully crafted.
Next, it’s time to add your closure. Velcro is an excellent choice for beginners because it’s easy to sew and allows for quick fastening. Place one piece on each side of the bib’s neck opening and stitch them securely. If you prefer a more durable option, plastic snaps work beautifully as well. Using a snap tool makes this step quick and satisfying.
After adding the closure, give your bib one last press with the iron. This final touch makes your project look polished and ready to use or gift. Now, step back and admire your beautiful handmade bib with its quilt-inspired design and soft quilting pattern that adds an extra special touch.
Personalization Ideas
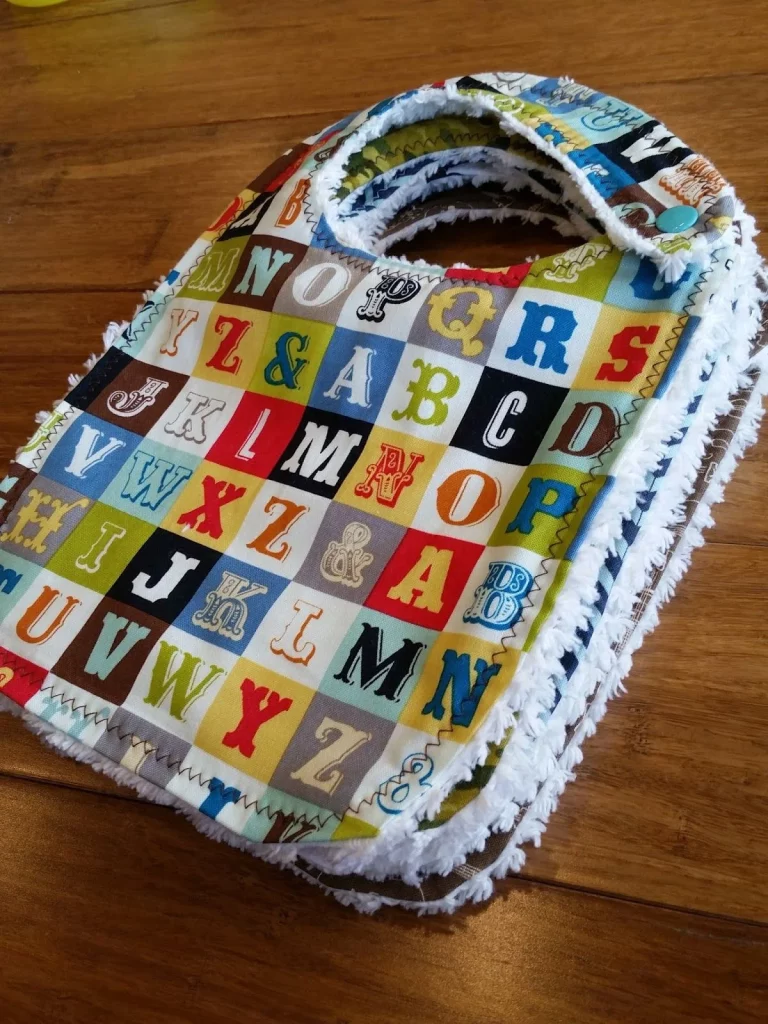
One of the best things about making baby bibs is how easily you can customize them. You can use themed fabrics—such as animals, florals, or seasonal prints—to match any occasion. Pairing colors that complement each other gives your bib a coordinated quilt look without requiring advanced sewing skills. Even a single decorative fabric strip can create a charming accent.
Embroidery is another wonderful way to personalize your bib. You can stitch the baby’s name, initials, or a sweet little message on the front. Beginners often use simple backstitch lettering because it’s easy to learn and looks adorable. Adding small quilt appliqués, such as stars or hearts, also enhances the handmade style.
For a more creative twist, try using different quilt techniques like patchwork, strip quilting, or even curved piecing on the front of the bib. Each technique brings a unique look and helps you practice new skills in small, manageable projects. A baby bib is a perfect canvas for learning, experimenting, and exploring the joy of quilting.
Share Your Handmade Baby Bib
Congratulations—you’ve created a beautiful and functional baby bib with a soft quilt feel and your own personal touch! This project is ideal for beginners who want to explore sewing and quilting patterns while creating something useful and meaningful. Handmade bibs make heartfelt gifts for baby showers, holidays, or everyday moments, and every stitch reflects your care and creativity.

If you enjoyed making this project, consider sharing your finished bib on your favorite crafting groups, social media, or with friends who love quilting and sewing. Sharing your work not only celebrates your progress but also inspires others to explore the joy of handmade creations. Happy quilting, and may your crafting journey continue to grow with every project you make!