
The Star Free Quilt Pattern is a timeless design that brings warmth, tradition, and beauty to any quilting project. Star quilts have been loved for generations because of their strong visual impact and their ability to showcase fabric combinations beautifully. Whether made in classic holiday colors or modern neutrals, this pattern always feels special and meaningful.
One of the reasons this Quilt pattern is so popular is its versatility. It can be used for table toppers, wall hangings, pillow covers, or even expanded into a full-size quilt. Beginners often choose star designs because they teach essential quilting skills while producing stunning results that feel rewarding and impressive.
In this tutorial, you will learn how to create a beautiful star quilt step by step using a free Quilting Pattern approach. The instructions are written clearly and gently, making them ideal for beginners who want to build confidence while enjoying the creative process. Take your time, enjoy each step, and remember that quilting is about progress, not perfection.
Understanding the Star Quilt Design
Star quilts are based on geometric shapes that come together to form a bold, symmetrical design. Most star patterns rely on triangles, diamonds, or half-square triangles arranged around a central point. This structure creates movement and visual interest while keeping the construction logical and repeatable.
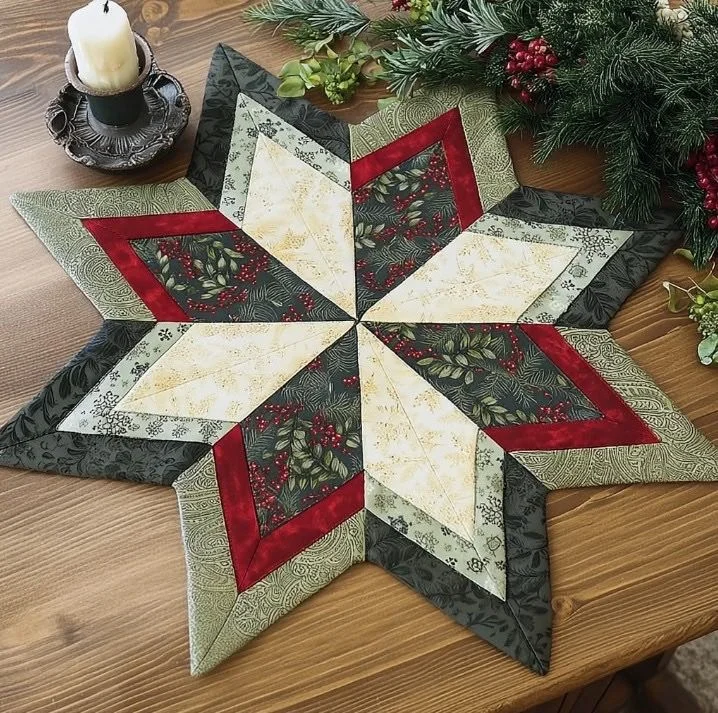
This specific Star Free Quilt Pattern features sharp points and layered sections that highlight contrast between light and dark fabrics. By alternating colors and prints, the star shape becomes more defined and eye-catching. Understanding how the pieces work together will help you stay organized and confident throughout the process.
Before cutting fabric, it is helpful to study the pattern layout and identify repeated shapes. This will allow you to chain piece efficiently and avoid mistakes. Quilting becomes much more enjoyable when you understand how each piece contributes to the final design.
Materials and Tools You Will Need
To begin this Quilt project, gather your materials in advance to ensure a smooth and relaxing experience. You will need cotton quilting fabric in at least three contrasting colors: a light fabric, a medium fabric, and a dark fabric. Choosing high-quality quilting cotton will make sewing easier and improve the final appearance.
Basic tools include a rotary cutter, self-healing cutting mat, quilting ruler, sewing machine, thread, pins or clips, and an iron. A quarter-inch presser foot is highly recommended, as accurate seam allowance is essential for crisp points and clean alignment in any Quilting Pattern.
Optional but helpful tools include starch or fabric spray for sharper cuts, a design wall or flat surface for layout, and a seam ripper for quick fixes. Having everything ready before you start allows you to focus fully on creativity rather than searching for supplies.
Cutting the Fabric Pieces
Accurate cutting is one of the most important steps in quilting, especially for star designs. Begin by pressing your fabric to remove wrinkles and ensure precise measurements. Use a rotary cutter and ruler to cut strips according to your chosen pattern dimensions.
From these strips, cut triangles or diamond shapes depending on your preferred star variation. Labeling or stacking pieces by color can prevent confusion later, especially if this is your first time working with a more detailed Quilt pattern. Staying organized will save time and reduce stress.
Take your time during this stage and double-check measurements before cutting. Small inaccuracies can affect how the star points meet at the center. Remember that careful preparation leads to smoother sewing and a more polished final quilt.
Step-by-Step Assembly of the Star Block
Start assembling the quilt by sewing smaller units together first. Many star Quilting Patterns begin with pairs of triangles sewn into diamond shapes or half-square triangle units. Use a consistent quarter-inch seam allowance and press seams as directed, usually toward the darker fabric.
Next, combine these smaller units into larger sections that form the arms of the star. Pin pieces carefully to ensure that points align correctly. Sewing slowly and checking alignment before stitching will greatly improve accuracy, especially for beginners.
Once all sections are complete, join them together to form the full star block. Press the seams gently and admire your progress. At this stage, the star design becomes clearly visible, making the effort truly rewarding.
Adding Borders and Enhancing the Design
Borders can dramatically change the look of your Quilt, framing the star and giving it more presence. A simple solid border highlights the star, while a patterned border can add texture and interest. Measure carefully to avoid stretching or puckering.
You may choose to add one or multiple borders depending on the desired size and style. Narrow borders offer a delicate finish, while wider borders create a bold statement. This flexibility allows you to adapt the Quilting Pattern to your personal taste.
Press the quilt top thoroughly after adding borders. This step ensures that everything lies flat and prepares the quilt for layering. A well-pressed top makes the next stages much easier and more enjoyable.
Quilting and Finishing the Project
Once the quilt top is complete, it is time to layer the quilt top, batting, and backing. Smooth all layers carefully and secure them with pins or spray basting. This step prevents shifting during quilting and keeps stitches even.
Quilting can be as simple or decorative as you like. Straight-line quilting is perfect for beginners and complements the geometric nature of the star design. Stitching in the ditch or echo quilting around the star points enhances the pattern without overwhelming it.
After quilting, trim excess batting and backing, then attach the binding. Binding finishes the edges and gives your Quilt a professional appearance. Take your time with this final step and enjoy the satisfaction of completing a handmade piece.
Personalization Ideas and Creative Variations
One of the joys of quilting is making each project uniquely yours. Try changing the color palette to suit different seasons, such as soft pastels for spring or rich jewel tones for winter. Fabric choice can completely transform the look of the same Quilting Pattern.
You can also experiment with scale by making smaller star blocks for pillows or larger ones for statement quilts. Adding embroidery, decorative stitching, or subtle embellishments can give your quilt extra personality and charm.
Mixing prints and solids is another great way to personalize your design. Floral prints, batiks, or holiday-themed fabrics all work beautifully in star quilts, allowing endless creative possibilities.
Tips for Beginners and Common Mistakes to Avoid
If you are new to quilting, remember that patience is key. Take breaks when needed and don’t rush through steps. Quilting is meant to be relaxing and enjoyable, not stressful.
Pay close attention to seam allowance and pressing direction. These small details make a big difference in how well pieces fit together. When mistakes happen, see them as learning opportunities rather than failures.
Finally, trust the process and enjoy watching your Quilt come together piece by piece. Every finished project builds confidence and skills that carry into future Quilting Pattern adventures.
Final Thoughts and Invitation to Share
Creating a Star Free Quilt Pattern is a wonderful way to develop quilting skills while producing a beautiful and meaningful project. This design combines tradition, creativity, and practical learning in a way that is perfect for beginners and experienced quilters alike.
Whether you display your quilt on a table, hang it on a wall, or gift it to someone special, it will carry the warmth and care you put into every stitch. Handmade quilts tell stories, and your star quilt will be no exception.
If you enjoyed this tutorial, I invite you to share your finished Quilt with friends, family, or online quilting communities. Your creativity may inspire others to start their own quilting journey and fall in love with this timeless Quilting Pattern.