The Cube Toiletry Bag with Zipper is one of the most practical and profitable sewing projects you can make. Not only is it beginner-friendly, but it is also perfect for gifts, travel accessories, and even selling in handmade shops. With its structured box shape and secure zipper closure, this pouch is ideal for organizing cosmetics, toiletries, sewing supplies, or small travel essentials.
In this step-by-step sewing tutorial, you will learn how to create a professional-looking cube toiletry bag using simple techniques. Additionally, you will discover the best materials, measurements, and sewing tips to achieve clean edges and a polished finish.
If you love practical sewing patterns that combine functionality with style, this cube zipper pouch will quickly become one of your favorite projects.
Why Make a Cube Toiletry Bag?
A boxy zipper pouch is versatile and highly functional. Because of its cube structure, it maximizes interior space while maintaining a compact shape. Unlike flat pouches, this design stands upright, making it easier to access items inside.
Moreover, this project is excellent for:
- Travel toiletry organization
- Makeup storage
- Grooming kits
- Baby essentials
- Handmade gift ideas
- Craft and sewing supply storage
Since zipper bags are always in demand, this pattern is also ideal if you sell handmade products online.
Skill Level and Finished Size
This project is suitable for beginners who already know how to sew straight lines and install a basic zipper.
Recommended finished size:
- 9 inches long
- 5 inches high
- 5 inches deep
You can easily adjust the size by increasing or decreasing the main rectangle measurements.
Materials Needed
Choosing quality sewing supplies will improve durability and structure.
Fabric:
- Exterior fabric (quilting cotton, canvas, or denim)
- Lining fabric (cotton recommended)
- Medium-weight interfacing
- Optional fusible fleece for added structure
Notions:
- 10-inch zipper (nylon or metal)
- Coordinating thread
- Fabric clips or pins
Tools:
- Sewing machine
- Rotary cutter
- Self-healing cutting mat
- Acrylic ruler
- Iron and ironing board
- Scissors
Tip: Using medium-weight interfacing helps the bag hold its cube shape. For a more structured cosmetic bag, fusible fleece is highly recommended.
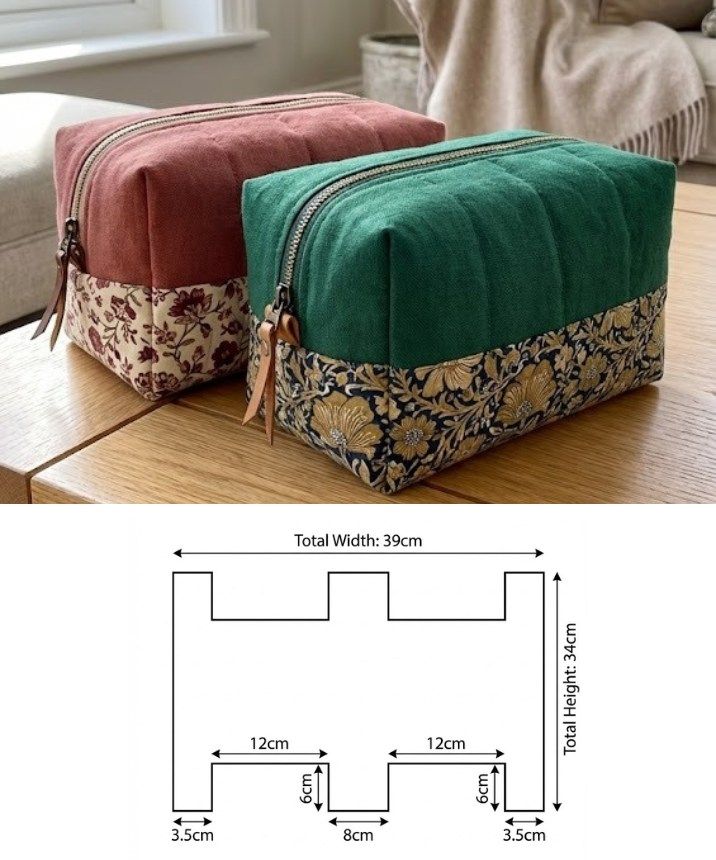
Cutting Measurements
Cut the following pieces:
Exterior Fabric:
- 1 rectangle: 10” x 14”
Lining Fabric:
- 1 rectangle: 10” x 14”
Interfacing:
- 1 rectangle: 10” x 14”
Optional handle:
- 2” x 8” strip
These measurements include a ½-inch seam allowance.
Step-by-Step Instructions
Step 1 – Prepare the Fabric
Fuse interfacing to the wrong side of the exterior fabric using an iron. This step adds stability and helps the bag maintain its structure.
If adding a handle, fold the strip lengthwise, press, fold raw edges inward, and stitch along both long sides.
Step 2 – Install the Zipper
Place the zipper right side down along one long edge of the exterior fabric. Then place the lining fabric right side down on top, sandwiching the zipper between the layers.
Sew along the edge using a zipper foot. Flip fabrics right side out and topstitch close to the zipper for a clean finish.
Repeat the process on the opposite zipper side.
Step 3 – Form the Tube
Open the zipper halfway. This is very important so you can turn the bag right side out later.
Fold the fabric so exterior pieces face each other and lining pieces face each other. Align edges carefully and clip in place.
Sew around the perimeter, leaving a 3-inch opening in the lining for turning.
Step 4 – Create the Boxed Corners
To achieve the cube shape, pinch each corner so the side seam aligns with the bottom seam, forming a triangle.
Measure 2 inches from the tip and draw a straight line across. Sew along the line and trim excess fabric.
Repeat for all four corners (two exterior, two lining).
Step 5 – Turn and Finish
Turn the bag right side out through the opening in the lining. Push out the corners gently.
Close the lining opening using a small seam or hand stitch.
Push the lining inside the bag, shape the corners, and press lightly if needed.
Your cube toiletry bag is now complete.
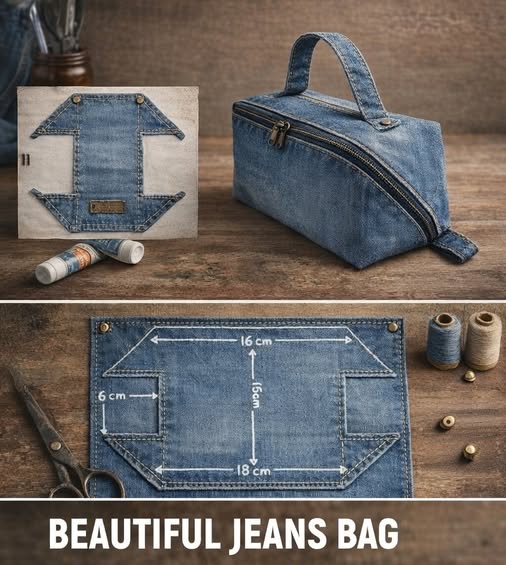
Customization Ideas
One of the best parts of this sewing project is how easily you can customize it.
You can:
- Use denim for a rustic look
- Add quilted exterior fabric
- Sew patchwork panels
- Add interior pockets
- Insert waterproof lining for travel
- Use decorative metal zippers
- Add leather zipper tabs
Additionally, contrast lining fabric creates a beautiful surprise when the bag is opened.
Tips for a Professional Finish
- Always press seams after sewing.
- Topstitch along the zipper for durability.
- Use a zipper slightly longer than the bag width for easier installation.
- Trim seam allowances before turning to reduce bulk.
- Reinforce stress points near the zipper ends.
These small details make your finished toiletry bag look store-bought.
Frequently Asked Questions
Is this project beginner-friendly?
Yes, as long as you are comfortable sewing a zipper.
Can I make this bag larger?
Absolutely. Increase the main rectangle dimensions while keeping proportions balanced.
What fabric works best?
Canvas, denim, and quilting cotton with interfacing are excellent choices.
Can I sell bags made from this pattern?
Yes, if you create your own measurements and do not copy a copyrighted pattern template.
Final Thoughts
The Cube Toiletry Bag with Zipper is a stylish and practical sewing project that combines structure, organization, and creativity. Whether you are sewing for personal use, gifting, or selling handmade products, this boxy zipper pouch is both functional and profitable.
With quality fabric, careful zipper installation, and precise boxed corners, you can achieve a professional result that looks impressive and lasts for years.
If you would like, I can now create a version optimized for higher RPM with stronger buyer-intent keywords like “best zipper for sewing,” “heavy-duty sewing machine,” or “waterproof lining for cosmetic bags.