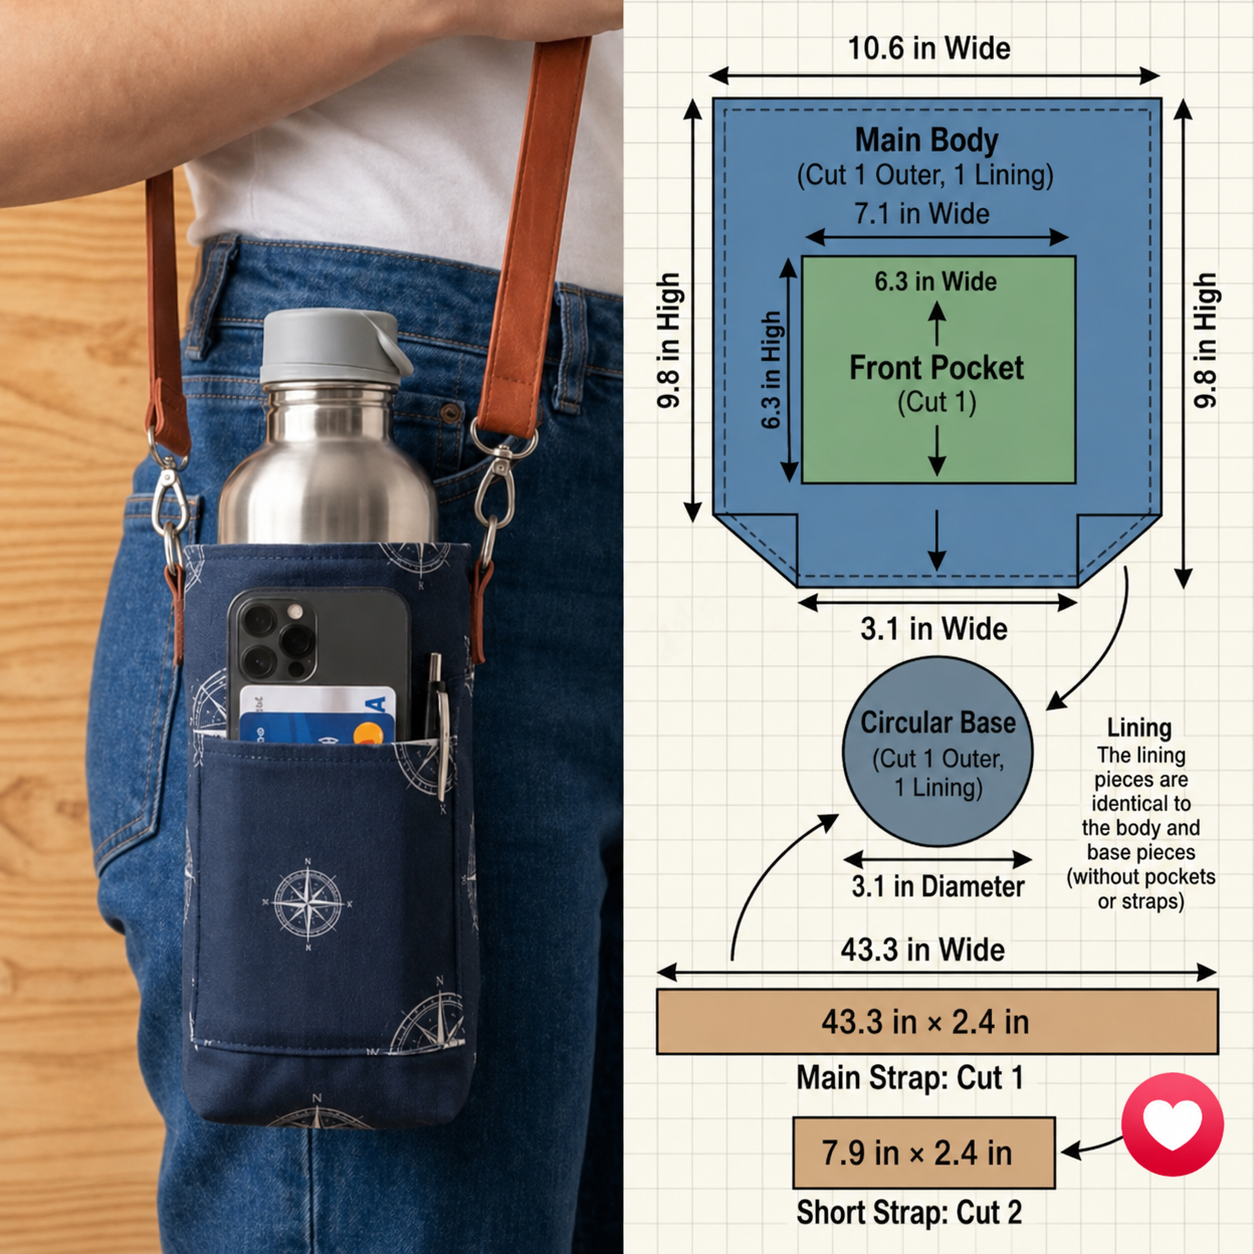
Making a fabric bottle holder that fits perfectly doesn’t have to involve complicated math. Whether you’re sewing a water bottle carrier, insulated tumbler bag, travel bottle holder, or reusable drink carrier, one simple formula will help you achieve professional results every time.
Instead of guessing the fabric size and hoping it fits, you can calculate the exact measurements before making your first cut. This saves fabric, reduces waste, and gives your sewing projects a polished finish.
If you’ve ever struggled with a bottle holder that was too loose or too tight, this guide will become one of your favorite sewing references.
The Golden Formula
To calculate the width of the fabric needed for the body of your bottle holder, use this formula:
Bottle Diameter × 3.1416 + 2 cm (¾ inch seam allowance) = Fabric Width
The number 3.1416 (π) converts the diameter into the circumference of the bottle.
The additional 2 cm provides a 1 cm seam allowance on each side for sewing the fabric tube together.
Example
Let’s imagine you’re making a bottle holder for a water bottle with an 8 cm diameter.
Step 1
Measure the diameter across the bottom of the bottle.
Bottle Diameter = 8 cm
Step 2
Multiply by π.
8 × 3.1416 = 25.13 cm
Round to 25 cm.
Step 3
Add your seam allowance.
25 + 2 = 27 cm
Your fabric should be cut 27 cm wide before sewing.
Don’t Forget the Circular Base
The bottom circle is calculated differently.
If your bottle measures 8 cm across, cut your fabric circle using:
Bottle Diameter + 2 cm
Example:
Bottle Diameter = 8 cm
Seam Allowance = 2 cm
Cut Circle Diameter = 10 cm
This gives you enough fabric to stitch the base securely without making it too small.
Step-by-Step Instructions
Step 1 – Measure Your Bottle
Using a measuring tape or ruler, measure straight across the bottom of the bottle through the center.
This measurement is the diameter.
Accuracy here makes the entire project fit perfectly.
Step 2 – Calculate the Fabric Width
Multiply the diameter by 3.1416.
This gives you the circumference, which becomes the width of your bottle holder before sewing.
Step 3 – Add Seam Allowance
Always add 2 cm to the width.
This provides enough fabric for the side seam and prevents the holder from becoming too tight.
Step 4 – Cut the Body Fabric
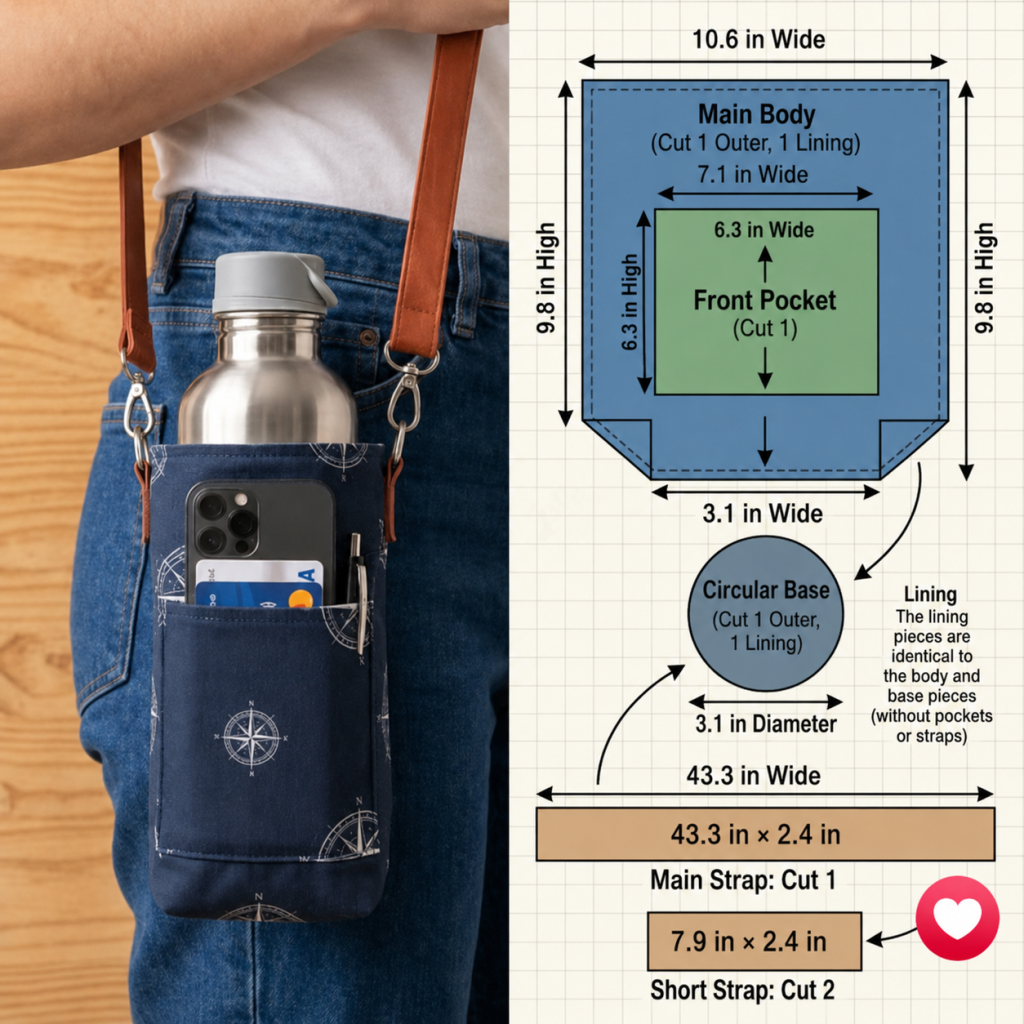
Cut a rectangle using:
- Width = Calculated measurement
- Height = Desired bottle holder height plus top and bottom seam allowances
Step 5 – Cut the Bottom Circle
Cut one fabric circle using:
Bottle Diameter + 2 cm
This extra fabric allows the circle to be sewn neatly to the body.
Step 6 – Sew the Side Seam
Fold the rectangle with right sides together.
Sew along the long edge using a 1 cm seam allowance to create a fabric tube.
Step 7 – Attach the Base
Pin the circular base evenly around the opening.
Sew slowly, easing the fabric as you go.
Clipping small notches into the seam allowance helps the circle lay flat.
Professional Sewing Tips
- Measure twice before cutting.
- Use quilting cotton, canvas, denim, or waterproof fabric for durability.
- Interface the outer fabric for extra structure.
- Press every seam while sewing.
- Clip curved seams before turning.
- Topstitch around the upper edge for a professional finish.
Common Mistakes to Avoid
One of the biggest mistakes beginners make is confusing the body measurement with the base measurement.
Remember:
- The body width is based on the bottle’s circumference.
- The bottom circle is based on the bottle’s diameter.
Using the wrong measurement often results in a holder that doesn’t fit properly.
Another common mistake is forgetting to include seam allowances, making the finished project too small.
Why This Formula Works
Professional bag makers rarely guess measurements.
Using a simple mathematical formula ensures every bottle holder fits consistently, whether you’re sewing for yourself, making gifts, or selling handmade accessories.
Once you learn this method, you can easily resize your pattern for bottles, tumblers, thermoses, travel mugs, insulated cups, sports bottles, or reusable water bottles.
Final Thoughts
A perfectly fitted bottle holder starts with accurate measurements—not guesswork.
By using the simple formula:
Bottle Diameter × 3.1416 + 2 cm
you can create professional-looking bottle carriers that fit beautifully every time.
Pair this with the correct circular base measurement, take your time while sewing, and you’ll enjoy better results on every project.
Keep this formula near your sewing machine or cutting table, and you’ll always have the perfect starting point for your next handmade bottle holder.
Happy sewing!