
Creating festive quilts is one of the most rewarding ways to add a cozy and personalized touch to your home decor. The A Little Bit Shorter Tall Tree Quilt Pattern is a fun and creative project perfect for beginners and seasoned quilters alike. This delightful pattern features a charming tree design that brings a touch of winter magic into any room. Whether you’re crafting it as a holiday decoration, a wall hanging, or a gift, this quilt will surely impress.
In this tutorial, we will cover everything you need to know to create your own A Little Bit Shorter Tall Tree quilt. From gathering materials to piecing the blocks and finishing touches, you’ll find clear instructions and helpful tips along the way. Let’s dive into this exciting quilting adventure!
Why Choose the A Little Bit Shorter Tall Tree Quilt Pattern?
This quilt pattern is beloved for its simplicity and elegance. It is a great way to practice basic quilting techniques without feeling overwhelmed by intricate designs. The tree motif adds a festive yet versatile element, making it suitable not only for Christmas but for any season, depending on the fabrics you choose.
Another reason to love this quilt pattern is its adaptability. You can make the tree as tall or as short as you’d like by adjusting the block count. Additionally, this design looks stunning in both traditional and modern color palettes. It’s a great project for using up fabric scraps or showcasing that special fabric you’ve been saving.
Most importantly, this pattern is beginner-friendly. With straightforward steps and simple shapes, even new quilters can achieve a professional-looking result. So, if you’ve been hesitant to start quilting, this is the perfect opportunity to jump in.
Materials You’ll Need
Before you begin, gather all the materials required for your A Little Bit Shorter Tall Tree Quilt Pattern. Having everything on hand will make the process smooth and enjoyable. Here’s a quick checklist to help you prepare:
- Fabric for the tree: Green shades or any color of your choice (fat quarters or fabric scraps work well)
- Background fabric: White, cream, or a contrasting solid or print
- Tree trunk fabric: Brown or a textured neutral
- Binding fabric: A coordinating color or festive print
- Backing fabric: Matching or contrasting fabric for the quilt’s reverse side
- Batting: Low-loft or medium-loft batting for softness and structure
- Thread: Coordinating colors for piecing and quilting
- Rotary cutter, ruler, and cutting mat
- Sewing machine with a quarter-inch foot
- Iron and pressing board
Make sure your fabrics are prewashed and pressed for the best results. If you prefer a scrappy look, mix and match different shades and patterns for a unique finish.
Cutting the Fabric Pieces
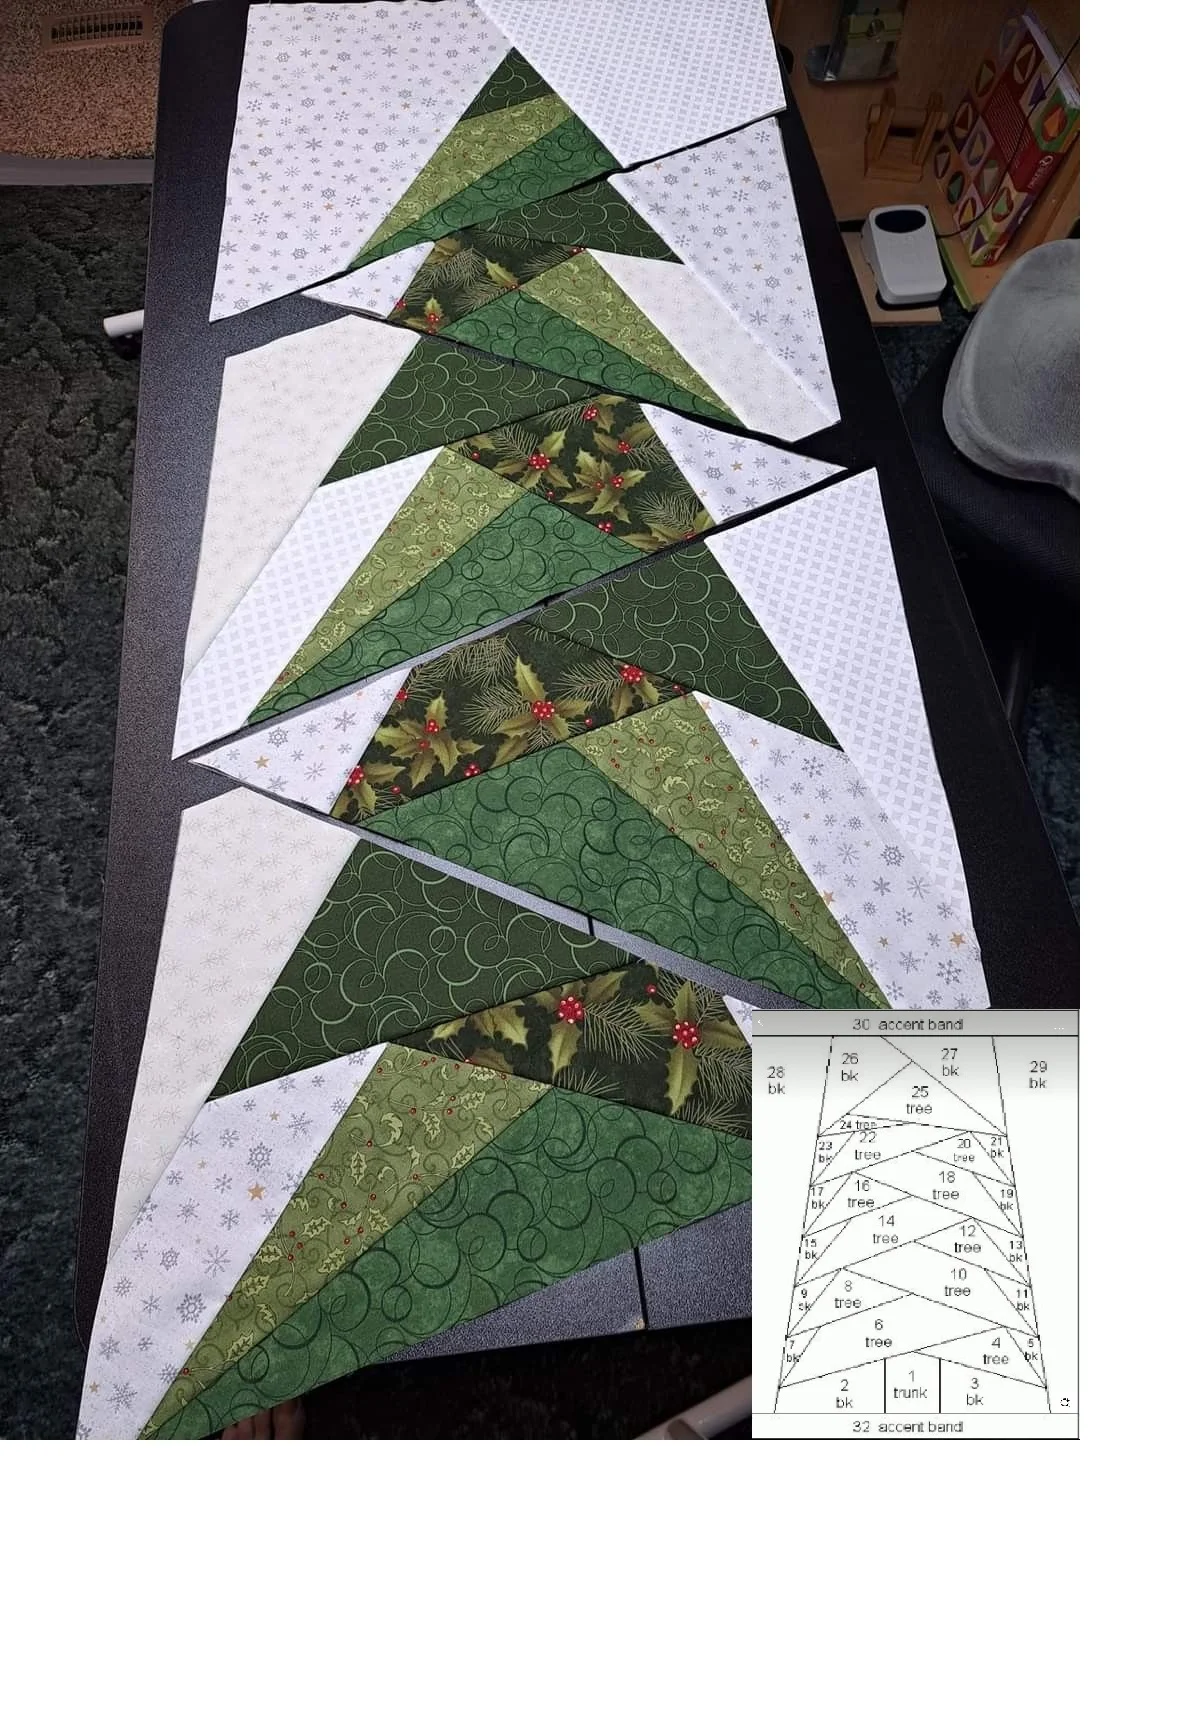
Accurate cutting is essential for a neat and professional-looking quilt. For the A Little Bit Shorter Tall Tree Quilt, you’ll be working primarily with triangles and rectangles. Here are the basic cutting instructions for a quilt measuring approximately 24” x 36”:
- Tree Sections:
- Cut 6 pieces of green fabric measuring 8” x 8” (these will be cut into triangles)
- Background Sections:
- Cut 6 pieces of background fabric measuring 8” x 8”
- Tree Trunk:
- Cut one piece measuring 4” x 6” from brown fabric
- Additional Background for Trunk Row:
- Two pieces measuring 4” x 6” each
To create the tree blocks, pair one green square with one background square. Draw a diagonal line across the back of the background square, sew a quarter-inch seam on each side of the line, and cut along the line to make two half-square triangles (HSTs). Repeat until you have 12 HST units. These units will form the tiers of your tree.

Piecing the Quilt Top
Now that you have your HSTs ready, it’s time to assemble the quilt top. Arrange the triangles in rows to form a tree shape, starting with a single triangle at the top and adding more triangles as you move down. For example, the first row will have one block, the second row two blocks, and so on, until you create the desired height.
Once you’re happy with the layout, sew the triangles together in rows. Press the seams toward the darker fabric to keep everything neat. After completing the rows, join them together carefully, aligning points for a polished look. Finally, attach the trunk piece at the bottom center and add background rectangles on either side.
Press the completed quilt top well. This step ensures that your quilt lies flat and is ready for layering and quilting.
Quilting and Finishing Touches
With the quilt top complete, it’s time to turn it into a finished quilt. First, create a quilt sandwich by layering the backing fabric (right side down), batting, and quilt top (right side up). Smooth out any wrinkles and baste the layers using safety pins or temporary spray adhesive.
When it comes to quilting, you have several options. A simple straight-line design following the tree’s angles works beautifully and is beginner-friendly. Alternatively, you can add free-motion quilting for a more intricate look. Choose a thread color that complements your fabrics for a cohesive finish.
After quilting, trim the edges and prepare your binding. Cut binding strips 2.5” wide, join them end to end, and sew them around the quilt edges using a quarter-inch seam. Fold the binding to the back and hand-stitch or machine-stitch it in place for a clean finish.
Creative Ideas for Personalization
One of the best things about this quilt pattern is its versatility. Here are a few ideas to make your A Little Bit Shorter Tall Tree Quilt truly unique:
- Color Variations: Instead of traditional green, try a modern color palette such as navy and gold, or go bold with bright, contrasting hues.
- Add Ornaments: Sew on buttons, beads, or small fabric circles to mimic ornaments for a festive holiday quilt.
- Play with Size: Make a mini version for a wall hanging or a large version for a cozy throw. Adjust the number of rows to fit your desired dimensions.
Personalizing your quilt is what makes quilting such a creative and enjoyable craft. Don’t be afraid to experiment with fabrics and embellishments to reflect your style.
Share Your A Little Bit Shorter Tall Tree Quilt!
Congratulations! You’ve completed your A Little Bit Shorter Tall Tree Quilt Pattern project. This beautiful design is not only a joy to make but also a wonderful addition to your home decor or a thoughtful handmade gift for a loved one.
We’d love to see your creations! Share photos of your finished quilt on social media or quilting groups to inspire others. Use hashtags like #TallTreeQuilt and #QuiltPatternLove to join the community of passionate quilters.
Happy quilting, and remember—every stitch tells a story!