
The African Queen Block is a stunning quilt pattern that captures the essence of bold colors, intricate designs, and cultural richness. Whether you’re an experienced quilter or a beginner looking for a unique project, this tutorial will guide you step by step. Using simple cutting techniques and careful fabric selection, you’ll create a striking block that can be used in various quilt projects.
Materials and Fabric Selection
Choosing the right materials and fabrics is crucial for bringing out the beauty of the African Queen Block. The traditional colors and patterns inspired by African culture play a significant role in making this quilt stand out.
Select cotton fabrics with bold, vibrant prints that reflect African heritage. Wax prints, batiks, and geometric designs are excellent choices for adding cultural depth to your quilt patterns. A combination of warm and cool tones will create balance and contrast within the design.
You’ll also need quilting rulers, rotary cutters, and a sewing machine to ensure precise cuts and stitches. Using high-quality thread will help maintain the durability and appearance of your quilt over time.
Cutting the Fabric Pieces
Accurate cutting is the foundation of a well-assembled quilt block. Follow these measurements to prepare your fabric pieces:
- Four squares of print fabric (5” x 5” each)
- Four squares of a contrasting solid color (5” x 5” each)
- Two rectangles (2.5” x 10”) for the center strip
- Four triangle pieces (cut from 6” squares, then sliced diagonally)
Using a rotary cutter and ruler, ensure each piece is precisely cut to maintain the integrity of the quilt pattern. Organize the pieces before sewing to avoid any mistakes in placement.
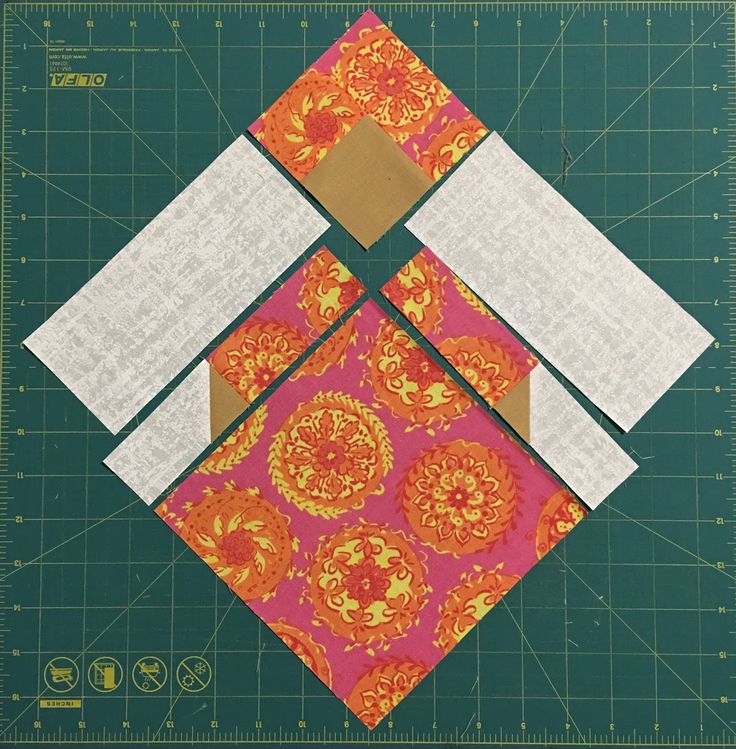
Assembling the African Queen Block
Start by creating the central strip. Sew the two rectangles together along the long edges, pressing the seam open for a smooth finish. This strip will be the focal point of the block.
Next, arrange the four large squares in a two-by-two layout, alternating between print and solid colors. Sew them together using a 1/4” seam allowance, pressing the seams open after each stitch to ensure flat joins.
Finally, attach the triangular pieces to each corner, ensuring they align properly before sewing. This step frames the central design, enhancing the overall symmetry of the quilt block.
Sewing and Pressing Techniques
Using the correct sewing techniques can make a significant difference in the final appearance of your quilt block. Keep a consistent 1/4” seam allowance to maintain uniformity in block size.
Always press the seams open or to one side, depending on the pattern’s requirement. Pressing reduces bulk and helps in matching seams more accurately, giving a professional look to your quilt patterns.
For added stability, consider starching the fabric lightly before sewing. This helps in managing bias edges and prevents unnecessary stretching.
Joining Blocks for a Full Quilt
Once you have completed multiple African Queen Blocks, it’s time to join them together. Lay out the blocks in a pattern that complements your color choices, ensuring that each block aligns correctly.
Sew the blocks together in rows, using the same seam allowance as before. Press each row before joining them to maintain smooth seams. This process ensures that the quilt top remains even and professionally finished.
For the quilt’s border, choose a fabric that ties all the colors together, either by using a solid color or a complementary print. Borders provide a frame and enhance the overall appearance of the quilt.
Quilting and Finishing Touches
Once the quilt top is assembled, it’s time to quilt the layers together. Choose a batting that suits your desired thickness and a backing fabric that complements the quilt front.
For quilting techniques, you can use straight-line quilting for a modern look or opt for free-motion quilting to add texture and depth. If you prefer a traditional touch, hand quilting with contrast thread can emphasize the African-inspired design.
Finish the quilt with binding by folding and sewing the edges neatly. This step secures the quilt and adds a polished touch to your work.
Final Thoughts
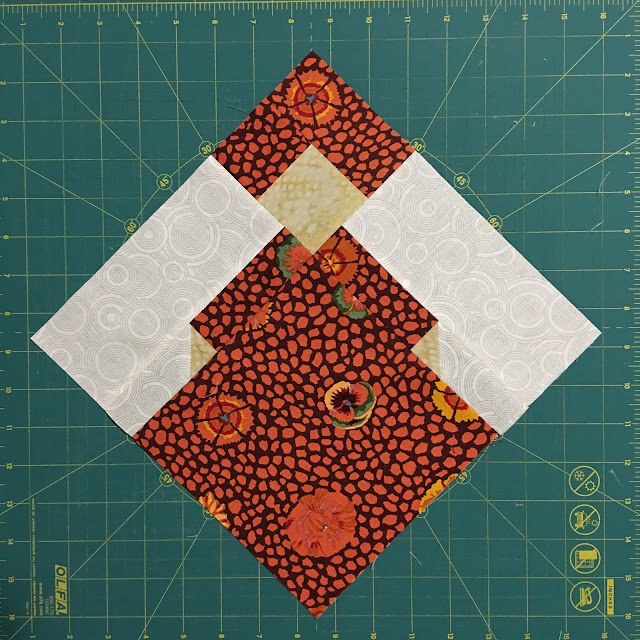
The African Queen Block is a versatile and striking quilt pattern that celebrates bold colors and intricate designs. Whether used as a single statement block or repeated in a full quilt, this pattern is a beautiful addition to any collection.
By following this tutorial, you can master the techniques needed to create a stunning quilt block that reflects the rich heritage of African textiles. Enjoy the process, experiment with fabric choices, and let your creativity shine in your quilting projects!