
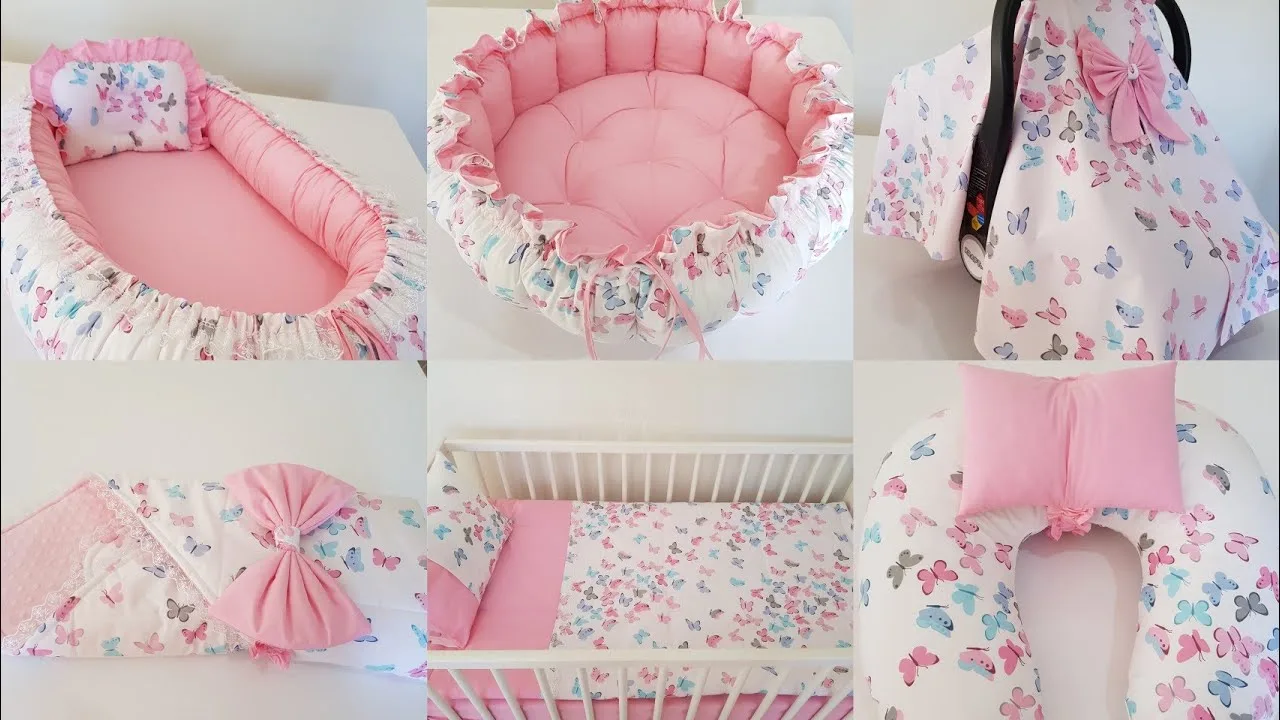
Creating a cozy and charming space for your baby is a joy for any parent or sewing enthusiast. The Babynest Set with Pink Butterfly is the perfect handmade gift for newborns, combining both comfort and style. In this tutorial, we will walk through the complete process of making this beautiful project from scratch, including a detailed quilt pattern for the nest’s padded base. This step-by-step guide is ideal for beginners and seasoned crafters alike, offering practical tips and creative ideas to make your project unique.
The gentle butterfly theme adds a sweet and timeless touch, making it a delightful addition to any nursery. By incorporating soft pastel fabrics, especially pink tones, you’ll create a nest that feels both soothing and visually appealing. Whether you’re making it for your own little one or as a thoughtful handmade gift, this project is an excellent way to practice your sewing skills and work with different fabrics.
This guide will cover everything you need to know: from gathering materials to following the quilt pattern, assembling the babynest, adding personal touches, and ensuring a professional finish. Let’s dive into the world of soft, dreamy baby projects that combine creativity with practical use.
Materials You Will Need
Before starting your Babynest Set with Pink Butterfly, gathering the right materials is key to a smooth sewing process. For the base, you’ll need 100% cotton fabric for softness and breathability, preferably in a pastel pink tone with butterfly prints. You will also need batting or quilt wadding to give the base its plush comfort, and bias tape to neatly finish the edges.
Here’s the complete list:
- Main fabric (cotton) – 1.5 meters, preferably in pink with butterfly patterns
- Lining fabric (cotton) – 1.5 meters in a complementary soft pastel color
- Batting or quilt wadding – 1 meter, medium thickness
- Polyester stuffing – 500g for the side rolls
- Bias tape – 5 meters
- Sewing thread – matching or contrasting color
- Scissors or rotary cutter
- Fabric marker or chalk
- Pins and sewing clips
- Sewing machine with quilting foot (optional but recommended)
The quality of your materials will greatly impact the durability and comfort of your babynest. Soft, breathable cotton ensures safety for babies, while high-quality batting helps the base keep its shape even after multiple washes. Choosing the right quilt pattern for the base will also enhance the beauty of your project.
Cutting and Preparing the Fabric
Start by cutting the main and lining fabrics to the desired dimensions. A typical babynest measures around 90 cm in length and 60 cm in width, with side rolls approximately 15 cm high. For the quilted base, cut two identical oval pieces from your main and lining fabrics, and one from the batting.
To make cutting easier, fold the fabric in half and draw half of the oval shape before cutting. This ensures perfect symmetry. If you’re using a printed butterfly fabric, pay attention to the direction of the design so that the pattern aligns beautifully once the babynest is assembled.
Once the fabrics are cut, place the batting between the main and lining fabrics to create your quilted base. This is where your quilt pattern comes in—mark parallel or diamond-shaped lines using your fabric marker. This step will not only make the base more attractive but also keep the batting in place during use and washing.
Quilting the Base
Quilting is an essential part of this project, as it adds both structure and beauty to the babynest. Set your sewing machine to a straight stitch and start sewing along the marked lines of your chosen quilt pattern. Whether you prefer straight-line quilting or a crisscross diamond pattern, make sure your stitches are even and secure.
Start quilting from the center outward to prevent fabric shifting. This method ensures that the batting stays flat and that there are no unwanted wrinkles in the fabric. Use quilting clips to hold the layers together, especially if you’re new to quilting.
The quilted base not only serves as a comfortable foundation for the baby but also showcases your craftsmanship. The pink butterfly fabric will truly shine with a neat and precise quilt pattern, making your babynest look professional and charming.
Assembling the Side Rolls
The side rolls are what give the babynest its snug and protective feel. Cut a long strip of fabric approximately 150 cm long and 40 cm wide. Fold it lengthwise, right sides together, and sew along the edge to create a tube. Turn the tube right-side out and stuff it with polyester filling until it is firm but still flexible.
Once stuffed, attach the roll to the quilted base by sewing it around the oval edge. Leave a small gap at the bottom for inserting or adjusting the stuffing. The rolls should be evenly filled to provide a uniform cushion around the baby.
The side rolls also allow for slight adjustments to the nest size. Some makers add a drawstring or ribbon at the end so it can be tightened or loosened as needed, giving your babynest extra versatility.
Adding the Bias Tape Finish
Finishing your babynest with bias tape gives it a polished and durable edge. Open the bias tape and align it along the raw edges of the nest, making sure to sandwich both the quilted base and side rolls within it. Sew along the fold line, then fold the tape over and stitch again to enclose the edge completely.
Using a matching bias tape will give your babynest a soft, cohesive look, while a contrasting color can add a playful pop. Since the Babynest Set with Pink Butterfly has a feminine and delicate theme, soft white or pastel pink bias tape works beautifully.
This finishing step also protects the seams from fraying and ensures your babynest will last through many washes, making it both beautiful and practical.

Personalization Ideas
One of the joys of making your own babynest is adding personal touches. You can embroider the baby’s name onto the quilted base or add small applique butterflies for extra charm. Lace trims along the edges can add a vintage, delicate look, while a small removable pillow in matching fabric makes the set even cozier.
Another personalization idea is to vary the quilt pattern on the base. Instead of traditional straight lines, try free-motion quilting with swirls or butterfly-shaped stitching. This adds a unique, handcrafted touch that store-bought nests simply don’t have.
For a coordinated nursery look, you can make matching accessories such as a baby blanket, quilted changing pad, or small storage baskets using the same fabric. This way, the Babynest Set with Pink Butterfly becomes part of a complete handmade ensemble.
Safety and Maintenance Tips
While the babynest is adorable, safety always comes first. Always place the babynest on a flat, firm surface, and never leave a baby unattended inside. The nest is designed for supervised rest and playtime, not for overnight sleep.
To maintain the babynest, choose fabrics that are machine washable and pre-wash them before sewing to prevent shrinkage. The removable stuffing in the side rolls makes cleaning easier, and quilting the base ensures the batting stays in place wash after wash.
A well-maintained babynest can last for years, becoming a keepsake or even passed down to future siblings or friends. This makes it a truly special handmade item.
Conclusion – Share Your Creation!
The Babynest Set with Pink Butterfly is more than just a sewing project—it’s a heartfelt creation filled with love, care, and creativity. With its soft quilted base, charming butterfly design, and personalized details, it’s sure to be cherished by both parents and baby.
By following this tutorial, you’ve learned how to cut, quilt, assemble, and personalize your own babynest from start to finish. This project is an excellent way to explore quilt patterns while making something practical and beautiful.
Once your babynest is complete, we encourage you to share your creation with the crafting community! Post photos online, join sewing groups, and inspire others to try their hand at this delightful project. Every handmade piece tells a story—let yours take flight with butterflies.