
A Practical and Charming Quilted Project
Sewing your own fabric basket is not only a fun and creative project, but also a practical way to add handmade charm to your space. Whether you’re organizing sewing supplies, storing yarn, or gifting treats, a quilted fabric basket is the perfect solution. In this tutorial, we’ll guide you step by step through creating your own basket sewing pattern.
This project is ideal for beginners and experienced quilters alike. It uses basic sewing techniques and introduces simple quilting methods to enhance structure and design. If you’re looking to expand your list of quilt patterns, this is a great opportunity to do so with a functional twist.
Let’s walk through the process of cutting, quilting, and assembling your fabric basket. We’ll provide fabric measurements, sewing tips, and pattern instructions for a beautiful quilted finish.
Materials You’ll Need
Before diving into the sewing process, let’s gather the materials required. Choose high-quality cotton or canvas fabrics for durability and a professional finish. You’ll also need some basic quilting tools and supplies.
Here’s your material checklist:
- Outer fabric: 1 fat quarter
- Lining fabric: 1 fat quarter
- Fusible fleece: 1 fat quarter
- Quilting ruler, rotary cutter, iron, sewing clips or pins
- Coordinating thread and sewing machine
These materials are easy to find in any local or online fabric store. Many quilt patterns use fat quarters, making this project an excellent way to use up fabric scraps from previous quilting projects.
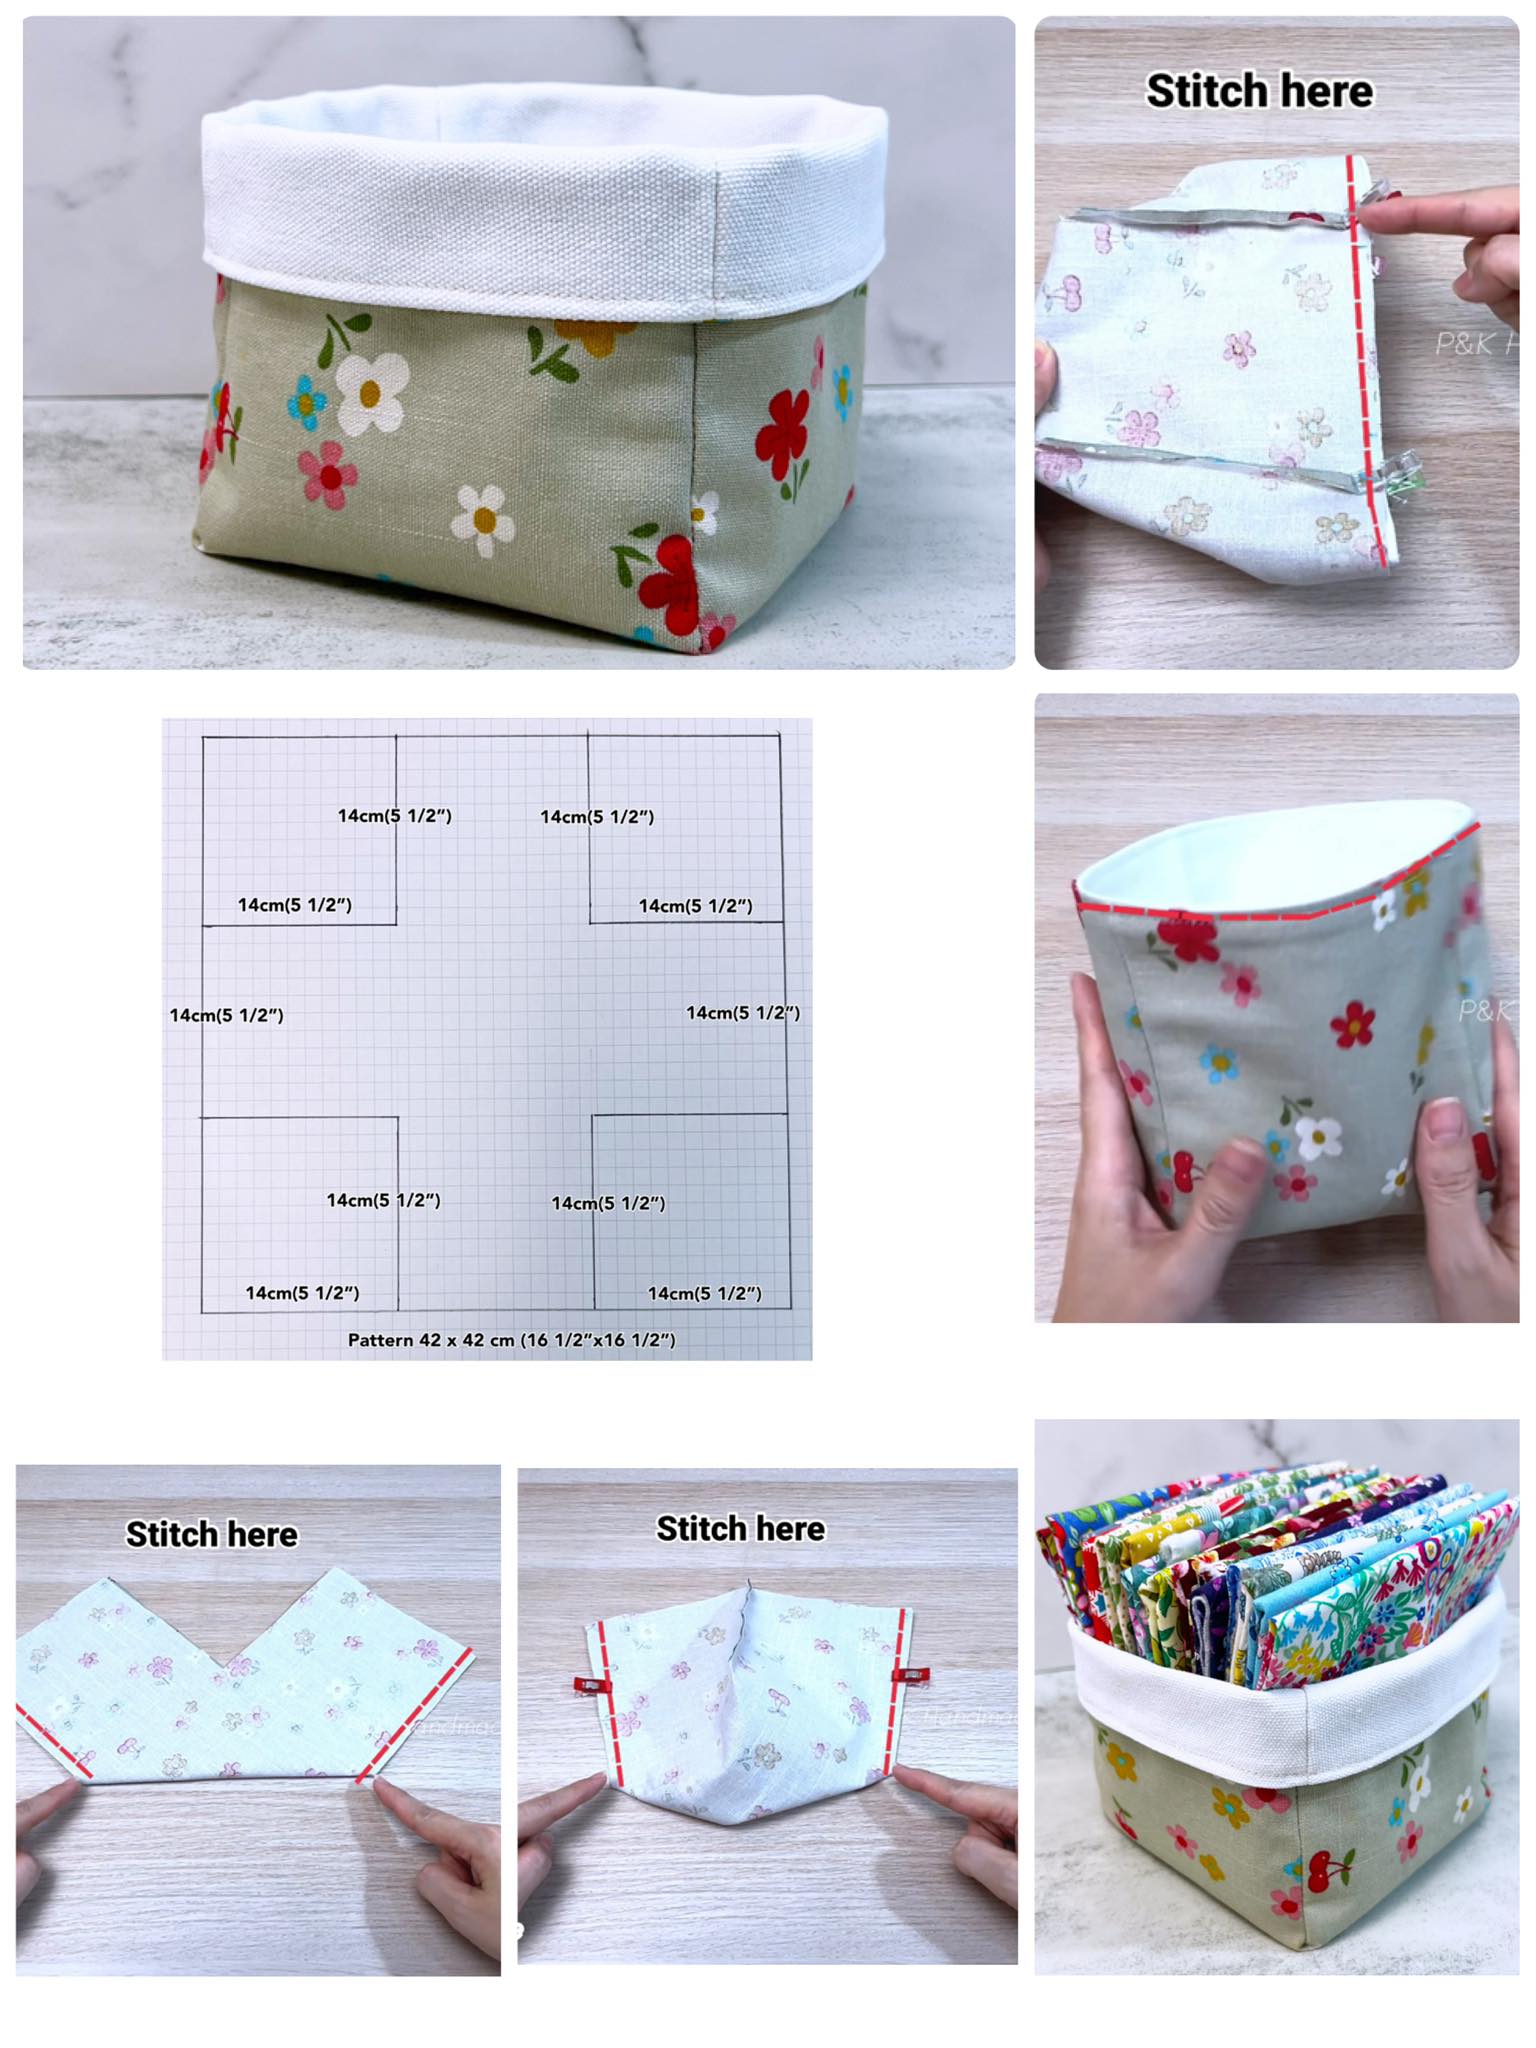
Cutting the Fabric – Dimensions and Layout
Let’s begin by cutting the fabric. These dimensions are ideal for a small storage basket, but you can adjust them to suit your needs. Accuracy here will help your final product hold its shape and look professionally made.
Cut the following pieces:
- Outer fabric: 2 pieces, 10.5″ x 6.5″
- Lining fabric: 2 pieces, 10.5″ x 6.5″
- Fusible fleece: 2 pieces, 10.5″ x 6.5″
- Outer fabric for base: 1 piece, 6.5″ x 6.5″
- Lining fabric for base: 1 piece, 6.5″ x 6.5″
- Fusible fleece for base: 1 piece, 6.5″ x 6.5″
- Handle fabric: 2 pieces, 10″ x 2″
Always use a rotary cutter and quilting ruler to ensure straight lines. This technique, common in quilt projects, prevents distortion and keeps your pieces neat.
Quilting the Basket Panels
Iron the fusible fleece onto the wrong side of the outer fabric panels. This step adds structure and creates the perfect base for simple quilting. Choose a straight-line or grid quilting style for clean, modern lines.
Using your sewing machine, quilt each panel by stitching evenly spaced lines (around 1″ apart). A walking foot can help keep your layers from shifting. Use thread that matches or contrasts, depending on your design preference.
Quilting the panels enhances the strength of your fabric basket. Just like in traditional quilt patterns, this step adds texture and stability. Once quilted, trim any loose threads.
Assembling the Outer Basket
Now it’s time to put the outer basket together. Start by sewing the side panels to the base, right sides facing. Use a ¼” seam allowance, which is standard in quilting and sewing projects.
Sew the two side panels to opposite edges of the base piece. Then, sew the remaining sides, forming a box. Clip the corners slightly (without cutting the seam) to reduce bulk when turning.
Turn the basket right side out and press the seams. This step gives your basket that crisp, structured look you often see in handcrafted quilt items.
Sewing the Lining
Repeat the same assembly steps with your lining fabric—but do not turn the lining right side out yet. Leave a small 3″ opening in the base seam. This gap will allow you to turn the entire basket later on.
You won’t need fusible fleece in the lining unless you want added thickness. Keep the lining lightweight for easier handling and a snug fit inside the outer basket.
As in quilting, maintaining clean seams and even stitches ensures a neat, professional outcome. This method is widely used across various quilt patterns and sewing tutorials.
Making the Handles
Let’s add the handles before final assembly. Fold each 10″ x 2″ fabric strip in half lengthwise, wrong sides together, and press. Open, fold the long edges to the center crease, then fold again and press.
Topstitch along both long edges of the handle to secure it. This will give the handle a neat, finished look and make it strong enough to carry items.
Attach each handle to the outer basket’s top edge, about 2.5″ from each side seam. Clip or pin in place. These handles add both style and function, much like details in designer quilt patterns.
Final Assembly – Bringing It All Together
With the outer basket right side out and the lining inside out, place the outer basket inside the lining so right sides are together. Align the seams and handles, pin around the top edge.
Sew around the top edge with a ¼” seam allowance, making sure the handles are caught in the seam. Turn the basket right side out through the gap left in the lining base.
Tuck the lining inside, press the top edge, and topstitch around the top to close the gap and finish the seam. This topstitching step mirrors finishing techniques found in high-quality quilt work.
Optional Quilting Embellishments
Want to personalize your basket even more? Try adding patchwork or embroidery to the outer panels before quilting. You can incorporate leftover quilt patterns or appliqué shapes like hearts, stars, or initials.
This basket project is perfect for using scraps from previous quilting projects. Mix different fabrics and textures to make each basket unique. Use bold colors or soft neutrals depending on your style.
You can also make themed baskets for different holidays using seasonal quilt fabrics. It’s a creative way to keep your quilting journey fresh and exciting.

Tips for Success
- Use interfacing or fusible fleece with extra stiffness if you want the basket to stand more firmly.
- When quilting, always test your tension and stitch length on a scrap first.
- Consider adding binding along the top edge for an extra touch of quilter’s flair.
Just like with detailed quilt patterns, the little steps matter. Take your time with measuring, cutting, and pressing to get the best results.
Every stitch you make is a part of a story—a story of creativity, patience, and handmade charm. That’s what quilting and sewing are all about.
Conclusion: A Quilted Basket That Combines Beauty and Function
You’ve now completed a charming quilted basket using basic sewing and quilting techniques. From cutting the fabrics to quilting the panels and sewing the final seams, each step brought your fabric to life.
This basket sewing pattern is a wonderful addition to your list of useful and decorative sewing projects. It’s a creative way to explore new quilt patterns while making something practical and beautiful.
Feel free to adjust the size, shape, and fabrics to make baskets for every room in your home. Keep exploring, keep quilting, and enjoy the satisfaction that comes from sewing something with your own hands.