
Creating a Bird Block Quilt is a wonderful way to bring nature’s charm into your sewing space. With its graceful shapes and cheerful color combinations, this quilting pattern captures the beauty of birds in flight, making your quilt come alive with personality. Whether you are a beginner exploring simple patchwork or an experienced quilter looking for a fresh, modern block, this project is perfect for you.
In this tutorial, we’ll walk through everything you need—from materials to step-by-step instructions—so you can make your own Bird Block confidently. Let’s spread our creative wings and get started!
Materials You’ll Need
Before diving into your sewing machine, make sure you have all the essential materials at hand. Gathering everything in advance helps your quilting process flow smoothly and ensures a relaxing experience. Here’s what you’ll need for one Bird Block:
- Fabric for the bird body: 1 fat quarter in your preferred color
- Fabric for the background: 1 fat quarter (solid or low-volume print)
- Fabric for the beak and wing details: Small fabric scraps
- Thread: Coordinating color for piecing and quilting
- Rotary cutter and cutting mat
- Ruler: For accurate measurements
- Pins or clips
- Sewing machine and iron
You can always mix and match your fabrics to express your creativity. The Bird Block is especially beautiful when made with contrasting colors—a bright bird on a soft pastel background or vice versa. Try experimenting with patterns, prints, or even batik fabrics for a unique texture and look.
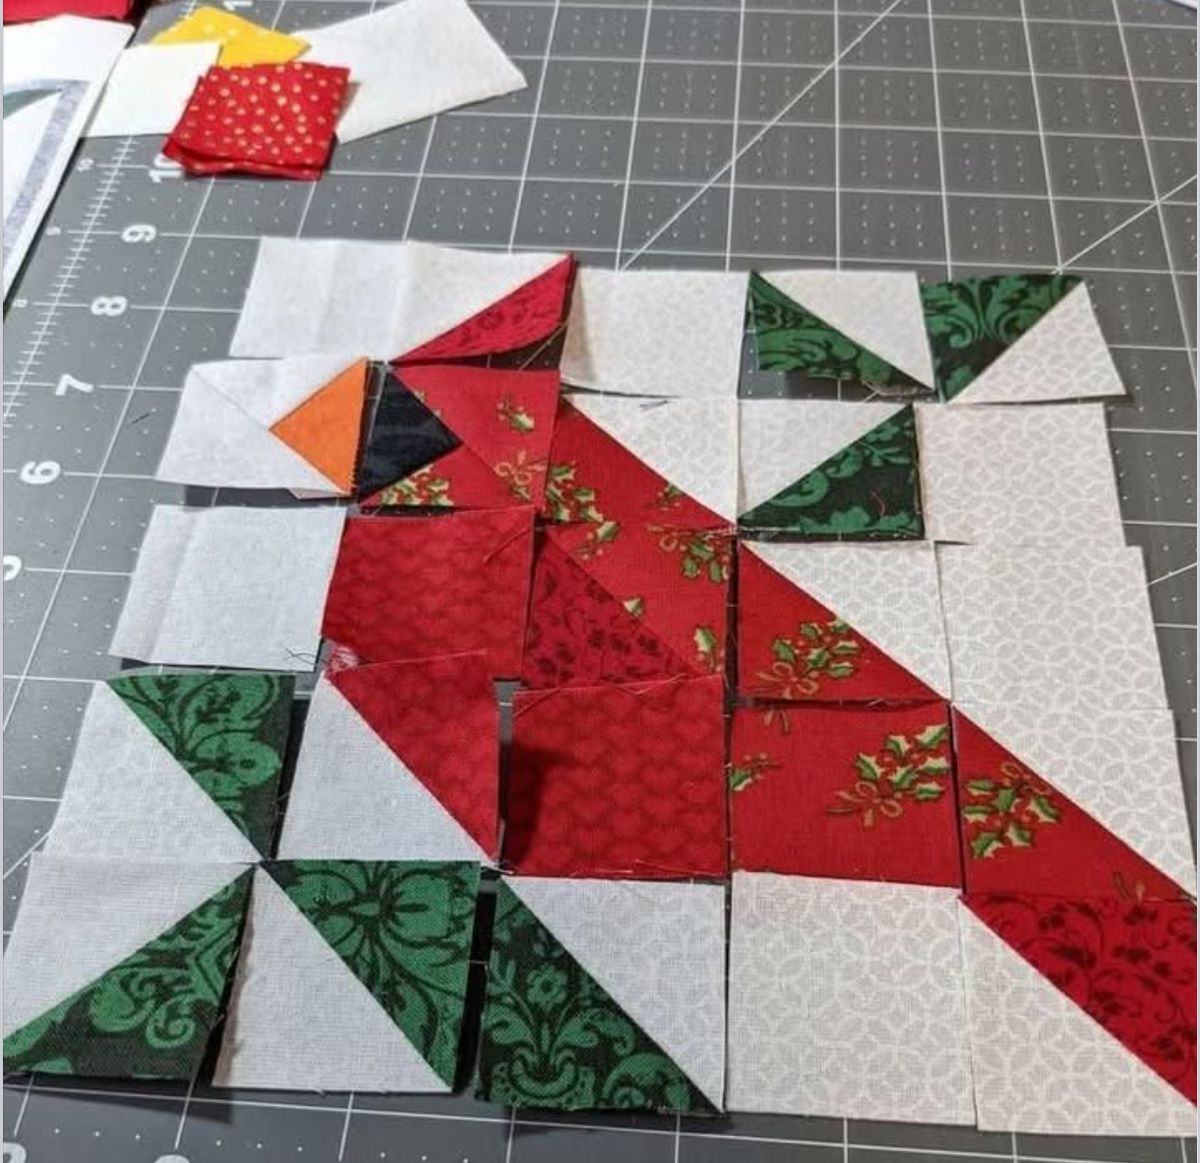
Cutting the Fabric Pieces
The secret to a successful quilt block lies in accurate cutting. Take your time with this step to ensure that all your pieces fit together neatly. For this Bird Block, you’ll need a combination of squares, rectangles, and triangles to form the bird’s body, wings, and beak.
Start by cutting:
- One 4½” x 4½” square for the bird’s body
- Two 3” x 3” squares for the wings
- One 2” x 2” square for the beak
- Background pieces: four 4½” x 4½” squares to frame the bird
Use your rotary cutter and ruler to achieve crisp edges. If you’re new to quilting, remember: precision is more important than speed. Once all your pieces are cut, lay them out on your table in the shape of a bird. This visual layout helps you check if the colors and arrangement look balanced before sewing them together.
Sewing the Bird Block Together
Now comes the fun part—bringing your bird to life! Start by sewing the smaller sections, such as the beak and wings, using a ¼” seam allowance throughout. Press each seam as you go to keep your block flat and tidy.
Next, piece the bird’s body by joining the main square to the wings and the beak. Be sure to align the seams carefully to avoid uneven edges. Once the main shape of the bird is complete, add the background squares around it to form the full block.
When all pieces are joined, give the block a final press. You’ll see your bird taking shape, with clean lines and a beautifully framed silhouette. This step is always satisfying—it’s when your quilting pattern truly starts to shine!
Adding the Quilt Blocks Together
Once you’ve completed one Bird Block, you’ll probably want to make more! This design looks stunning when repeated in a larger quilt, forming a flock of colorful birds. To create a full quilt top, sew multiple Bird Blocks together in rows, alternating the direction of the birds for a dynamic look.
You can also mix bird blocks with solid or patterned filler blocks for visual balance. Using a sashing strip between the blocks gives your quilt a clean, organized appearance. Once all blocks are connected, trim the edges for a straight, polished finish.
At this stage, your Bird Block Quilt top is ready for quilting. Whether you choose to stitch simple straight lines or free-motion quilt around each bird, the goal is to highlight the lovely shapes and give texture to your piece.

Quilting and Finishing Touches
Layer your quilt top with batting and backing fabric, smoothing out any wrinkles before pinning or basting. Then, start quilting following your chosen design. Straight-line quilting works beautifully for beginners, while advanced quilters may enjoy echoing the bird’s outline for added depth.
Once the quilting is complete, trim the excess batting and backing. Prepare your binding strips and sew them around the edges of your quilt for a professional finish. This final step seals your masterpiece and adds that satisfying touch of completion.
Don’t forget to add a label with your name and the date—it’s a lovely way to mark your creativity and effort. Each Bird Block Quilt tells a story, and yours deserves to be remembered.
Ideas for Customization
One of the best things about this quilting pattern is how adaptable it is. You can personalize each Bird Block to suit your style, home décor, or even the season. Here are some creative ideas to inspire your next project:
- Color play: Try a rainbow of birds on a white background for a lively, modern quilt.
- Theme quilts: Make a pastel version for a baby gift or rich jewel tones for a cozy autumn throw.
- Textured fabrics: Mix cotton with linen or use embroidered pieces for the bird’s wings.
You can also turn individual blocks into smaller projects like pillow covers, tote bags, or wall hangings. The Bird Block’s clean lines and charming look make it a great focal point for any quilted creation.
Tips for Beginners
If you’re new to quilting, the Bird Block is a wonderful place to start. Here are a few tips to make your sewing journey smooth and enjoyable:
- Practice accuracy: Use a ¼” foot on your sewing machine for consistent seams.
- Press often: Ironing after every seam keeps your block neat and aligned.
- Chain piecing: If making multiple blocks, sew similar sections together to save time.
Remember, quilting isn’t about perfection—it’s about creativity and joy. Every stitch you make adds personality to your quilt, and with each project, your skills will grow stronger.
Share Your Bird Block Quilt
Now that your Bird Block is complete, take a step back and admire your creation! You’ve turned fabric and thread into a beautiful piece of art that reflects your love for quilting and nature.
We’d love to see your version of the Bird Block Quilt! Share your finished projects on social media using the hashtag #BirdBlockQuilt and tag other quilters who might enjoy trying this quilting pattern. Seeing different color choices and styles from around the world is always inspiring and helps the quilting community grow.
So grab your favorite fabrics, thread up your machine, and let your creativity soar. Happy quilting, and may your next Bird Block take flight beautifully!