Quilting is a beautiful and rewarding craft that allows you to transform simple pieces of fabric into something meaningful, cozy, and artistic. One of the most exciting ways to explore quilting is by creating Block Buster quilt blocks—a fun and versatile approach that combines creativity, structure, and endless design possibilities. Whether you’re new to Quilt projects or looking to expand your skills, this tutorial will guide you step by step.
In this article, you’ll learn everything you need to confidently create your own quilt Pattern using Block Buster blocks. From understanding the basics to assembling your final quilt, this guide is designed to be easy, inspiring, and practical for beginners.
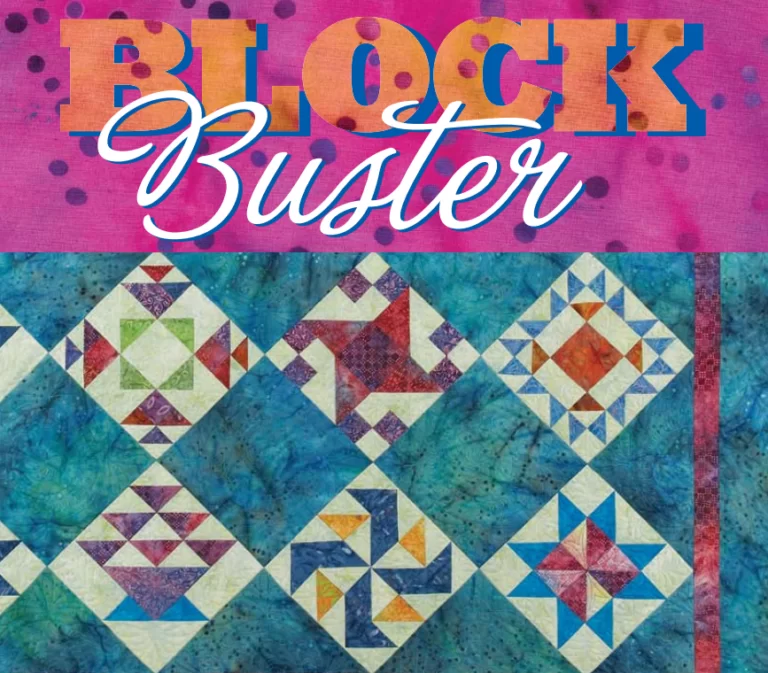
What Are Block Buster Quilt Blocks?
Block Buster quilt blocks are individual quilt blocks designed to stand out on their own while also working beautifully together in a larger quilt. Each block typically features bold shapes, clean lines, and eye-catching patterns that create a striking visual effect when combined. These blocks are often used in sampler quilts, where each section showcases a different design.
One of the best things about this type of Quilt is its flexibility. You can use the same block repeatedly for a cohesive look or mix different block styles to create a more dynamic quilt Pattern. This makes it perfect for beginners who want to experiment without feeling restricted.
Additionally, Block Buster quilts are ideal for using fabric scraps or showcasing favorite prints. Because each block is distinct, you can play with colors, textures, and patterns while still maintaining balance in your overall design.
Materials You Will Need
Before you start your Quilt project, it’s important to gather all the necessary materials. Having everything ready will make the process smoother and more enjoyable.
First, you’ll need fabric. Choose a combination of cotton fabrics in different colors and prints. For beginners, it’s helpful to select a coordinated color palette to ensure your quilt Pattern looks harmonious. You’ll also need a background fabric that helps your blocks stand out.
Next, gather your tools. Essential quilting tools include a rotary cutter, cutting mat, quilting ruler, sewing machine, pins or clips, and thread. Accurate cutting and consistent seams are key to achieving clean, professional-looking quilt blocks.
Finally, don’t forget batting and backing fabric. The batting provides warmth and structure, while the backing completes your Quilt. Choose materials that complement the front design for a polished finish.
Understanding the Basic Block Structure
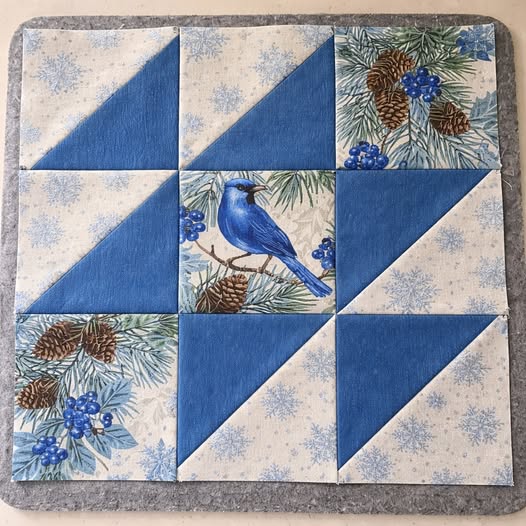
Before diving into the step-by-step process, it’s helpful to understand how Block Buster quilt blocks are constructed. Most blocks are made from smaller fabric units such as squares, rectangles, and half-square triangles.
Each block typically follows a grid layout, such as a 3×3 or 4×4 arrangement. This structure helps keep your quilt Pattern organized and makes it easier to assemble multiple blocks into a cohesive quilt top. Understanding this layout will also help you troubleshoot any alignment issues.
Another important concept is seam allowance. In quilting, a standard ¼-inch seam allowance is used. Maintaining this consistency ensures that your blocks fit together perfectly. Taking the time to practice accurate seams will make a big difference in your final Quilt.
Step-by-Step: How to Make a Block Buster Quilt Block
Now let’s walk through the process of creating your own Block Buster quilt block. Take your time with each step, especially if you’re new to quilting.
Start by cutting your fabric pieces according to your chosen quilt Pattern. For a basic block, you might need several squares and triangles in different colors. Use a quilting ruler and rotary cutter to ensure precise measurements.
Next, begin sewing your smaller units together. For example, if your block includes half-square triangles, sew two squares together diagonally, then cut and press them open. Pressing your seams flat after each step helps keep your block neat and accurate.
Once your smaller units are ready, arrange them according to your block design. This is a great moment to double-check placement before sewing. Then, sew the pieces together row by row, and finally join the rows to complete your block. Press the finished block and trim it if necessary to ensure it’s square.
Assembling Your Quilt Top
After creating multiple Block Buster quilt blocks, the next step is assembling your quilt top. This is where your individual blocks come together to form a cohesive Quilt design.
Lay out your blocks on a flat surface or design wall. Experiment with different arrangements until you find a layout you love. This step allows you to balance colors and patterns across your quilt Pattern.
Once you’re satisfied with the arrangement, start sewing the blocks together in rows. Join the blocks row by row, pressing seams as you go. Then, sew the rows together to complete your quilt top.
Take your time during this stage to ensure everything aligns properly. Matching seams and corners will give your Quilt a polished, professional appearance.
Quilting and Finishing Your Project
With your quilt top complete, it’s time to add batting and backing. Layer the backing fabric (right side down), batting, and quilt top (right side up). Smooth out any wrinkles and secure the layers with pins or clips.
Next, quilt the layers together. Beginners can start with simple straight-line quilting, which is both easy and effective. You can quilt along the seams or create your own patterns for added texture.
Finally, trim the edges and add binding to finish your Quilt. Binding not only secures the edges but also adds a decorative touch. Once your binding is attached, your Block Buster quilt is complete and ready to use or display.
Creative Ideas for Personalization
One of the most enjoyable parts of quilting is making your project uniquely yours. There are many ways to personalize your Block Buster quilt blocks and overall quilt Pattern.
Consider experimenting with color schemes. You can create a modern look with bold, contrasting colors or a soft, traditional feel with pastel tones. Using seasonal colors is another fun idea, especially if you’re making a themed Quilt.
You can also play with fabric textures and prints. Mixing solids, florals, and geometric patterns adds depth and interest to your design. Don’t be afraid to incorporate fabric scraps or meaningful materials, such as old clothing, to make your quilt more personal.
Another creative option is adding embellishments. Simple embroidery, appliqué, or decorative stitching can elevate your quilt and make it truly one of a kind.
Tips for Beginners
If you’re new to quilting, it’s completely normal to feel a bit overwhelmed at first. The key is to start simple and build your confidence as you go.
Focus on accuracy rather than speed. Take your time with cutting and sewing to ensure your pieces fit together properly. Small mistakes are part of the learning process and can often be fixed or incorporated into your design.
Practice pressing your seams correctly. This might seem like a small detail, but it makes a big difference in how your Quilt looks and feels. A well-pressed quilt block is easier to assemble and results in a cleaner finish.
Lastly, enjoy the process. Quilting is as much about relaxation and creativity as it is about the final product. Don’t be afraid to experiment and have fun with your quilt Pattern.
Final Thoughts and Share Your Creation
Creating a Block Buster Quilt Blocks Pattern is a wonderful way to explore quilting while building your skills step by step. From choosing fabrics to assembling your quilt top and adding finishing touches, each stage offers an opportunity to learn and express your creativity.
This type of Quilt is perfect for beginners because it allows you to work with manageable pieces while still achieving a stunning result. With practice, you’ll gain confidence and be able to try more complex quilt Pattern designs.
Now it’s your turn to start your quilting journey. Gather your materials, choose your favorite fabrics, and begin creating your own Block Buster quilt. When you’re finished, don’t forget to share your project with friends, family, or your online community. Your creation might inspire someone else to start their own Quilt adventure!