
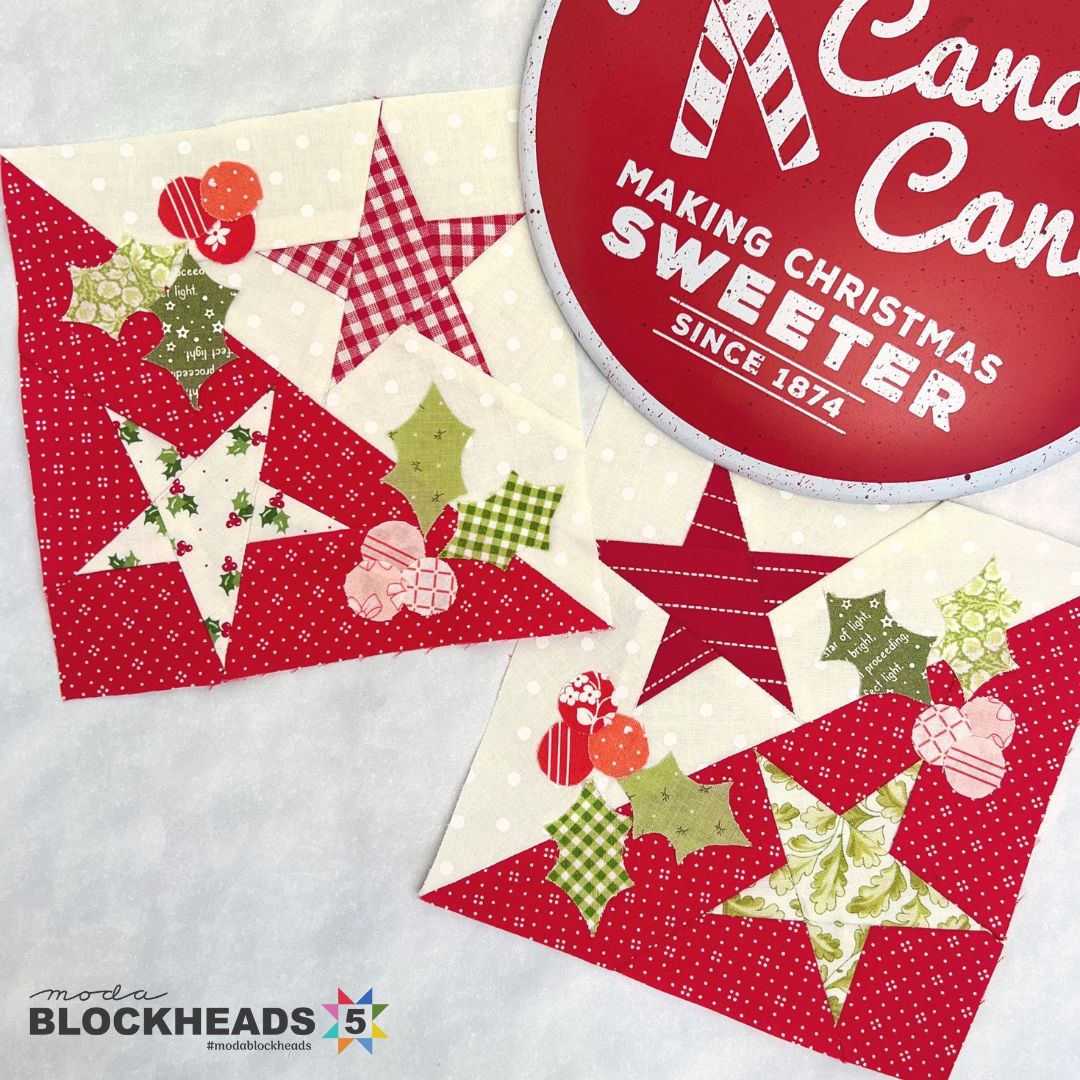
The Candy Striped Holly Star quilt pattern is a joyful and festive design, perfect for holiday-inspired sewing projects. With its classic red, green, and white color scheme and starburst layout, it offers the perfect balance between traditional charm and creative quilting. This free tutorial will walk you through how to make your very own quilt block, featuring detailed instructions, fabric cuts, and helpful tips.
Whether you’re a beginner looking for a cheerful holiday pattern or a seasoned quilter in search of a fresh twist, the Candy Striped Holly Star is a fantastic project. Its symmetry and bright color play make it a centerpiece in any seasonal quilt. Plus, its versatility means you can use it for wall hangings, table toppers, or full-sized quilts.
In this guide, you’ll learn how to piece the star together, how to cut your fabrics accurately, and how to assemble it all into a vibrant, well-balanced quilt block. Let’s dive into the creative process and build something merry and bright!
Materials You’ll Need
To get started with the Candy Striped Holly Star quilt pattern, you’ll need a few basic quilting materials. These include fabric in coordinating holiday colors, a rotary cutter, cutting mat, quilting ruler, and a sewing machine with a ¼-inch foot. Make sure your iron and pressing board are ready to go too!
For fabric, stick to three main colors: red (for the candy stripes), green (for the holly leaves), and white or cream (as the background). A fat quarter of each will be enough for a single block, but you may need more if you plan to create a full quilt. Stick with 100% cotton for the best results.
If you’re new to quilting, don’t worry — this tutorial is beginner-friendly and will guide you through each step clearly. Keep your workspace organized, and make sure your rotary cutter is sharp for clean fabric cuts.
Fabric Cutting Instructions
Accurate fabric cutting is essential to a polished quilt pattern. Begin by pressing your fabrics well before cutting to ensure clean, precise lines. Use a rotary cutter and quilting ruler to measure and slice your pieces to the following sizes:
- Red (candy stripes):
- 4 pieces: 2½” x 4½”
- 4 pieces: 2½” x 2½”
- Green (holly points):
- 4 pieces: 4½” x 4½”
- White (background):
- 8 pieces: 2½” x 2½”
- 4 pieces: 2” x 4½”
- 1 piece: 4½” x 4½” (center square)
Before piecing, lay out your fabric pieces on a design board or flat surface. This will help you visualize how the star will come together. Make sure the reds and greens alternate correctly to maintain the starburst effect.
Keeping your cuts consistent is key to matching seams accurately. Double-check your measurements before moving to the next stage, and group your pieces by color to stay organized.
Assembling the Star Points
Start building your quilt pattern by creating the star points using the red and green fabrics. First, take one red 2½” x 4½” rectangle and sew a white 2½” x 2½” square diagonally across one end, trimming off the excess and pressing it open. Repeat this with the opposite end to create a flying geese unit.
Next, repeat this process with the green 4½” x 4½” squares. You’ll use the red 2½” x 2½” squares to create contrast and visual flair at each star tip. Be sure to press seams open or toward the darker fabric to reduce bulk.
Once you have four red and four green flying geese units, arrange them into pairs, alternating the colors to form the star rays. These will later be joined around the center square. Each pair should mirror the other to maintain the symmetrical layout.
Constructing the Center Block
The center of the Candy Striped Holly Star quilt is composed of a simple 4½” x 4½” square. Choose a solid or a subtle print that complements your red and green palette. White or cream can provide a strong contrast and help the star points pop.
Now, take your assembled flying geese and begin attaching them around the center square. Sew the top and bottom pairs to the square first, then add the side pairs, forming a plus-sign-like shape with the center block in the middle.
Be mindful of your seam allowances — maintaining a consistent ¼-inch seam will ensure the block stays square and true. Press all seams flat for a crisp finish.
Completing the Quilt Block
Once the center and star points are complete, it’s time to add the background pieces to square off the block. Sew the white 2” x 4½” rectangles to the sides of your star structure. Then add the remaining 2½” white squares to the corners.
At this stage, the block should measure approximately 12½” x 12½”. Double-check your measurements to ensure consistency, especially if you plan to make multiple blocks for a larger quilt project.
Finish by giving your block a final press. Use steam to help flatten any stubborn seams and give it a professional appearance. Your Candy Striped Holly Star block is now ready for sashing or incorporation into a larger quilt top!
Ideas for Using This Pattern
The Candy Striped Holly Star quilt pattern is incredibly versatile and can be used in many creative ways. Use it as a feature block in a holiday quilt, or create multiple blocks for a full Christmas-themed quilt top. Combine it with other festive blocks like trees, snowflakes, or gifts for added flair.
You can also use a single block to create a cheerful table runner or a decorative wall hanging. Pair it with metallic threads or gold sashing for a more elegant touch. This is a great way to make use of holiday fabric scraps as well.
Another fun idea is to make matching quilted pillows or stockings using this same block. The consistent size and festive shape make it perfect for small seasonal home décor items that brighten your space during the holidays.
Tips for Beginners
If you’re new to quilting, this quilt pattern is a great starting point. It teaches fundamental techniques like flying geese construction, accurate fabric cutting, and symmetrical piecing. Start slow, follow each step carefully, and don’t rush the process.
Use fabric clips or pins generously to keep your seams aligned. Prewashing your fabrics can help reduce shrinkage and remove any chemicals, especially when using bold holiday colors like red and green.
Lastly, remember that quilting is as much about enjoyment as it is about precision. Don’t worry if your seams aren’t perfect the first time. Practice makes progress, and soon you’ll be confidently creating stunning quilt blocks like the Candy Striped Holly Star.
Wrapping Up
The Candy Striped Holly Star – Free Tutorial is an ideal holiday project that brings festive cheer into your sewing room. With bright colors and a playful layout, this quilt pattern is both fun to make and beautiful to display. Whether you sew just one block or many, the result will bring warmth and charm to your home.
Thanks to its simple construction and striking design, this pattern works well for both beginners and experienced quilters alike. Plus, it’s a great opportunity to use up those holiday fabric scraps you’ve been saving. It’s quick, satisfying, and perfect for gifting.
So pull out your red, green, and white fabrics, warm up your sewing machine, and start stitching your very own Candy Striped Holly Star quilt block today!