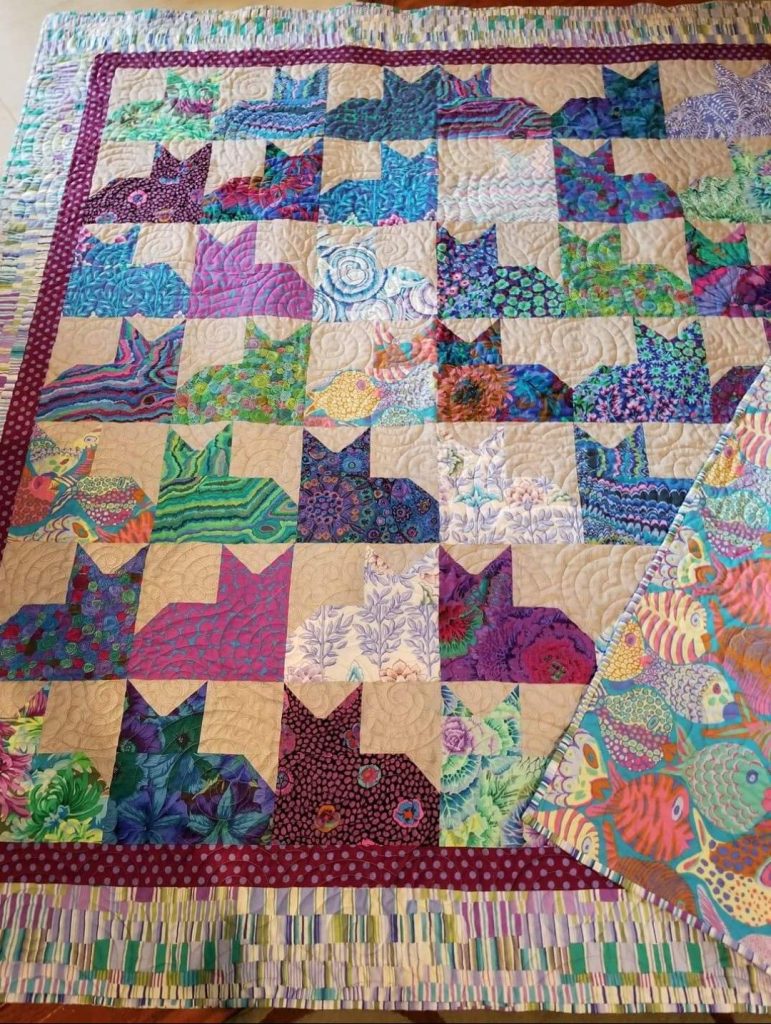
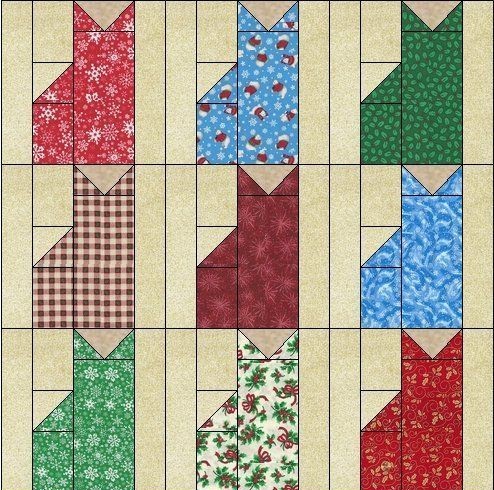
Quilting has always been a beautiful way to combine art, tradition, and storytelling into one cozy creation. Among the many themes you can explore, the cat quilt pattern has become a favorite for beginners and experienced quilters alike. Whether you’re making it as a gift for a cat lover or adding a playful touch to your own home, this quilt is guaranteed to bring warmth and charm.
The cat quilt pattern stands out because it blends whimsical design with simple shapes, making it approachable even for beginners. Each block typically features a stylized cat face or silhouette, which you can customize with fabrics that reflect different personalities. From bold colors to soft pastels, every fabric choice gives your quilt a unique character.
This tutorial will walk you step by step through the process of making your own cat quilt. We’ll cover the materials you need, fabric cutting instructions, sewing techniques, and some fun personalization ideas. By the end, you’ll have a completed quilt that not only looks stunning but also feels special because it’s handmade.
Materials You’ll Need
Before you start, it’s important to gather all the necessary materials. The great news is that the cat quilt pattern doesn’t require anything out of the ordinary—just the basic quilting supplies. You’ll need a rotary cutter, cutting mat, quilting ruler, sewing machine, and of course, fabric and thread. Don’t forget safety pins and quilting clips to help keep everything in place during assembly.
For fabrics, choose a mix of solids and prints to bring your cats to life. You’ll need background fabric, accent fabrics for the cat blocks, and a border fabric to frame the quilt. Cotton fabric is recommended since it’s easy to cut and sew. As for batting, a medium-weight cotton batting works best to give your quilt a cozy feel without making it too heavy.
Finally, you’ll need coordinating thread for piecing and quilting. Neutral shades like white, cream, or gray usually blend well, but you can also go bold with colorful stitching if you’d like your quilting lines to stand out. Having your materials prepared will make the process smoother and more enjoyable.
Cutting the Fabric
The cutting stage is where your quilt really begins to take shape. For the cat quilt pattern, you’ll primarily be cutting squares, rectangles, and triangles. The cat faces are usually formed by combining these shapes in creative ways, with small triangle ears and rectangular bodies. Keeping your measurements accurate is crucial for a clean finish.
Start by cutting your background fabric into squares measuring 10” x 10”. These will serve as the base for each cat block. Next, cut your cat fabric pieces into 8” x 8” squares for the faces. For the ears, cut small 3” x 3” squares and then slice them diagonally to form triangles. These will later be sewn onto the face blocks.
If you’d like to add collars or whiskers, you can cut thin strips of fabric or ribbon to applique onto the cats. Always press your fabric before cutting to avoid uneven edges. Using a rotary cutter on a self-healing mat with a quilting ruler ensures that each piece is precise, making assembly easier.
Sewing the Cat Blocks
Now comes the exciting part—sewing your quilt blocks! Begin with the face block, where you’ll attach the ear triangles to the top corners. Sew them carefully using a ¼” seam allowance, then press the seams toward the darker fabric to reduce bulk. This simple addition instantly creates the iconic cat shape.

Once the face is ready, you can embellish it by stitching on button eyes or embroidering details. This step is optional, but it adds so much personality to each block. If you’re new to embroidery, even a few simple stitches can make your quilt more expressive. You could also use fabric paint or iron-on transfers for an easier approach.
After finishing the cat faces, assemble them with the background blocks. Sew one face block to a background square, pressing seams flat as you go. Continue until you have all your cat blocks completed. When placed together, they’ll create a playful pattern that showcases a family of cats.
Assembling the Quilt Top
With your cat blocks ready, it’s time to lay them out into a quilt top. Arrange the blocks in rows, mixing colors and patterns to balance the design. Step back occasionally to see how the quilt looks from a distance, adjusting as needed. This step is like painting a picture—except with fabric!
Once you’re happy with the layout, sew the blocks together row by row. Press the seams in alternating directions for each row so they nest neatly when joined. This technique helps reduce bulk and keeps your quilt flat. After sewing the rows, attach them to form the full quilt top.
To finish the top, add border strips around the edges. Borders not only frame the design but also help stabilize the quilt’s shape. Choose a border fabric that complements your cat blocks—solid colors work well if your cats are made with busy prints. With your quilt top assembled, you’re ready for layering.
Layering and Quilting
Layering, also called making the “quilt sandwich,” involves placing the quilt top, batting, and backing fabric together. Spread your backing fabric right side down, then place the batting on top, followed by the quilt top. Smooth out each layer carefully to avoid wrinkles.
Baste the layers together using safety pins, quilting spray, or hand basting stitches. Pin from the center outward to keep everything aligned. Once basted, you can begin quilting by hand or machine. Straight-line quilting works beautifully with the cat quilt pattern, as it highlights the geometric shapes without overwhelming the design.
If you’re feeling adventurous, try free-motion quilting to add swirls or paw print motifs around the cats. Quilting is both functional and decorative—it keeps the layers together while adding texture and style. Take your time and enjoy the process; each stitch brings your quilt closer to completion.
Binding the Quilt
The final step is binding the quilt, which gives it a neat, finished edge. Start by cutting 2.5” wide strips of fabric for your binding. Join the strips end to end at a 45-degree angle, then press them into one long strip. Fold the strip in half lengthwise and press again.
Sew the binding to the front of the quilt using a ¼” seam allowance, mitering the corners as you go. Once attached, fold the binding over to the back and hand-stitch it in place for a polished look. If you prefer a faster method, you can machine-stitch the binding down, though hand stitching tends to look more traditional.
Binding not only protects the edges of your quilt but also adds a final decorative touch. Choosing a fabric that contrasts with your border can make the quilt pop, while a coordinating fabric offers a softer finish. Either way, your quilt is now ready to be loved and admired.
Personalization Ideas
One of the joys of quilting is the ability to make each project truly your own. With the cat quilt pattern, personalization options are endless. You can create cats in every color of the rainbow, or stick to a monochrome theme for a modern look. Adding accessories like collars, bows, or even patchwork tails can make each cat unique.
Another fun idea is to make memory quilts using fabric from old clothes, especially if they belonged to a beloved pet owner. This transforms your quilt into a sentimental keepsake filled with stories and connections. You could also embroider names under each cat block, turning your quilt into a personalized gift.
For those who enjoy experimenting, try mixing in other quilt blocks, like paw prints or fish motifs, alongside the cats. This adds variety and playfulness to the design. Remember, the best quilt is one that reflects your creativity and brings joy to both maker and recipient.
Conclusion – Share Your Cat Quilt
Congratulations! You’ve completed your cat quilt and now have a beautiful handmade treasure. From cutting the fabric to stitching the final binding, you’ve learned the essential steps of quilting while creating something truly special. Every quilt tells a story, and your cat quilt is sure to become a favorite in your collection.
The beauty of quilting is not just in the finished product but in the journey itself. Along the way, you practiced new skills, made creative choices, and poured love into every stitch. Whether your quilt finds a place on your couch, bed, or as a wall hanging, it will bring warmth and smiles for years to come.
We’d love to see your finished cat quilt! Share your project with friends, quilting groups, or online communities to inspire others. Every quilt pattern comes alive differently in each maker’s hands, and your version deserves to be celebrated. Happy quilting!

