A Beginner-Friendly Sewing Pattern to Add Charm to Your Home
Introduction to the Chicken Doorstop Project
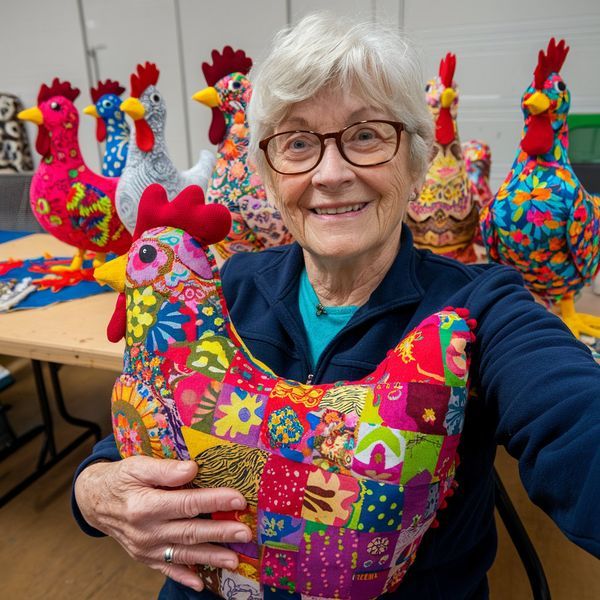
If you’re looking for a creative and practical project, this Chicken Doorstop tutorial is the perfect place to start. Combining functionality with charm, this adorable sewing project not only keeps your doors in place but also adds a cozy, handmade touch to your home décor. Whether you’re new to Sewing or already comfortable with basic techniques, this Sewing pattern is designed to be approachable and enjoyable.
One of the best things about this project is how beginner-friendly it is. You don’t need advanced skills or expensive tools to create something beautiful and useful. With just a few materials and some patience, you can sew a delightful chicken-shaped doorstop that reflects your personal style. It’s also a great way to practice essential Sewing techniques like cutting, stitching, stuffing, and assembling.
In this tutorial, you’ll find everything you need: a full list of materials, a step-by-step guide, and creative ideas for customization. By the end, you’ll have a finished piece that you can proudly display or gift to someone special. Let’s dive into this fun and rewarding Sewing pattern together.
Materials You Will Need
Before starting your Chicken Doorstop, it’s important to gather all the necessary materials. Having everything ready will make your Sewing process smoother and more enjoyable. You don’t need anything too fancy—most items are easy to find at home or in a local craft store.
Here’s what you’ll need:
- Cotton fabric (for the body)
- Scrap fabric (for beak, comb, and wings)
- Thread (matching or contrasting)
- Sewing needle or sewing machine
- Scissors
- Pins or clips
- Fabric marker or chalk
- Stuffing (polyfill or fabric scraps)
- Weighted filling (rice, sand, or small pebbles)
- Paper for the Sewing pattern
Choosing the right fabric can make a big difference in the final result. Cotton is ideal because it’s easy to handle and holds its shape well. For a more rustic look, you can use linen or even recycled fabrics. The weighted filling is what transforms this cute project into a functional doorstop, so don’t skip that part. Once you have everything ready, you’re all set to begin your Sewing journey.
Preparing Your Sewing Pattern
Creating or printing your Sewing pattern is the first step in bringing your Chicken Doorstop to life. You can draw a simple chicken shape on paper or find a template online. The design typically includes a rounded body, a small triangle for the beak, a comb shape, and wing pieces.
Once your pattern is ready, carefully cut out each piece. Lay them on your fabric and trace around them using a fabric marker or chalk. Make sure to leave a small seam allowance—about 1 cm—around each piece. This extra space is essential for Sewing everything together neatly.
Take your time during this step, as accuracy will make the assembly much easier later on. Pin your pattern pieces to the fabric to keep them in place while cutting. This ensures clean edges and consistent shapes. Preparing your Sewing pattern properly sets the foundation for a successful and enjoyable project.
Cutting and Assembling the Pieces
Now that your Sewing pattern is ready, it’s time to cut out your fabric pieces. You’ll need two main body pieces, along with smaller pieces for the beak, comb, and wings. Be careful to cut precisely along your traced lines to ensure everything fits together correctly.
Start by assembling the smaller details. Fold the beak piece in half and stitch along the edges, then turn it right side out. Repeat this process for the comb and wings if needed. These elements add personality to your Chicken Doorstop, so take your time to make them neat and well-shaped.
Next, pin the small pieces onto one of the body panels in their correct positions. The beak goes near the front, the comb on top, and the wings on the sides. Once everything is in place, you’re ready to join the body pieces together. This step is where your project really starts to take shape.
Sewing the Chicken Doorstop
Place the two body pieces right sides together, making sure all the smaller elements are tucked inside. Pin around the edges to secure everything in place. Leave a small opening at the bottom—this will be used later for turning and filling.
Using your sewing machine or hand stitching, sew around the edges with a consistent seam allowance. Go slowly, especially around curves, to maintain a smooth shape. Reinforce the beginning and end of your stitches to ensure durability, as this doorstop will be used frequently.
Once sewn, carefully turn the piece right side out through the opening. Use a blunt tool, like a pencil, to push out the corners and shape the chicken properly. At this stage, you’ll start to see your Chicken Doorstop come to life, which is always an exciting moment in any Sewing project.
Filling and Finishing Your Doorstop
Filling your Chicken Doorstop correctly is key to making it both cute and functional. Start by adding a layer of soft stuffing to shape the body. This gives your chicken a plush and rounded appearance.
Next, add the weighted filling, such as rice or sand, into the base. This is what will keep your door in place. You can mix the weighted material with stuffing to balance softness and stability. Make sure the weight is evenly distributed so your doorstop sits properly.
Finally, close the opening using a hidden stitch or ladder stitch for a clean finish. Take your time with this step to ensure it looks neat and secure. Once done, give your chicken a final shape adjustment, and your project is complete. You’ve successfully followed a Sewing pattern and created something both practical and adorable.
Creative Customization Ideas
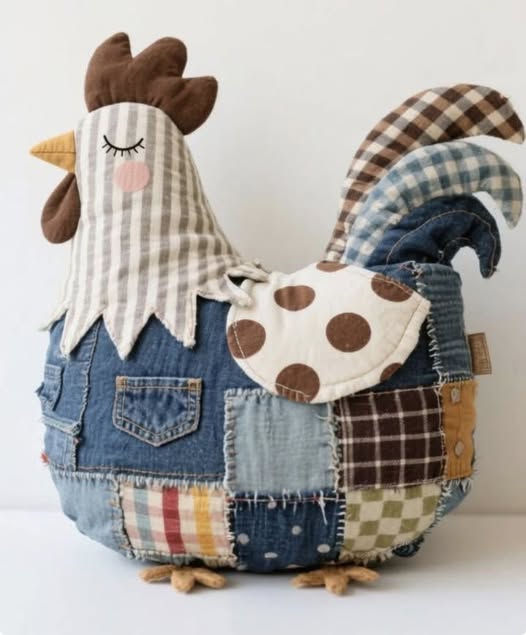
One of the most enjoyable parts of Sewing is adding your personal touch. Your Chicken Doorstop can be customized in countless ways to match your style or home décor. You can experiment with different fabric patterns, from floral prints to polka dots or even seasonal themes.
Consider adding decorative elements like buttons for eyes, embroidery details, or lace trims. You can also play with color combinations to make your chicken more vibrant or more neutral, depending on your preference. Each variation makes your project unique and special.
If you’re feeling adventurous, try scaling the Sewing pattern to create different sizes. A smaller version can be used as a decorative piece, while a larger one can serve as a heavier doorstop. Customization not only enhances your project but also helps you grow your Sewing skills creatively.
Final Thoughts and Share Your Creation
Congratulations on completing your Chicken Doorstop tutorial! This project is a wonderful introduction to Sewing and a great way to build confidence with a simple yet rewarding Sewing pattern. You’ve learned how to prepare materials, assemble pieces, and finish a functional handmade item.
Handmade projects like this bring warmth and personality into your home. They also make thoughtful gifts for friends and family. Imagine gifting a cute chicken doorstop that you made yourself—it’s a meaningful and memorable gesture that anyone would appreciate.
Now it’s your turn to share your creation! Take a photo of your finished Chicken Doorstop and show it to friends, post it on social media, or share it with fellow Sewing enthusiasts. Your creativity might inspire someone else to start their own Sewing journey.