
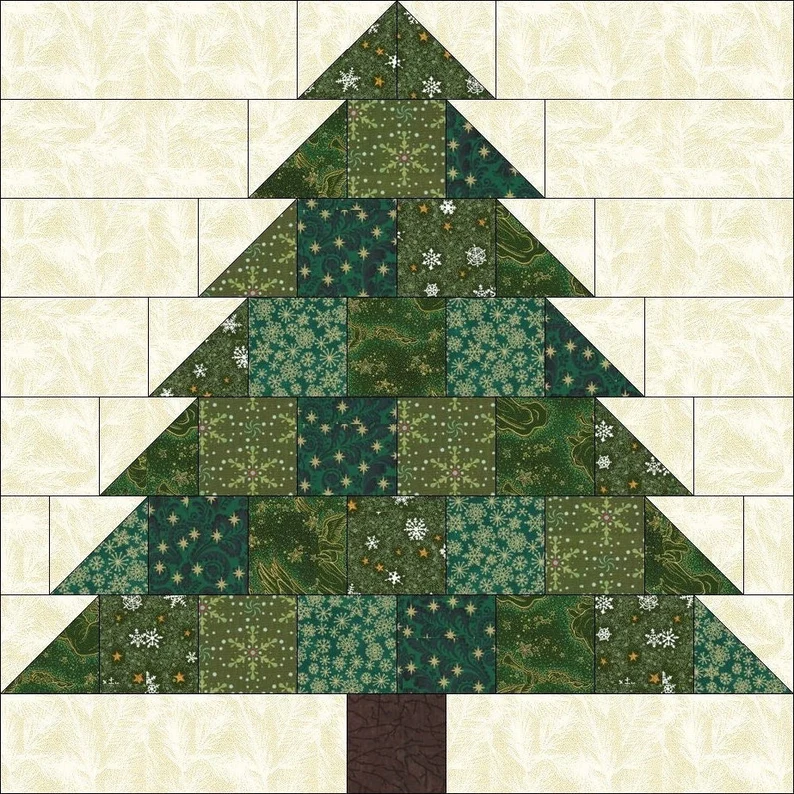
When the holiday season comes around, many of us look for ways to bring that festive spirit into our homes. A Christmas Tree Quilt Block is one of the simplest yet most heartwarming ways to do that. Whether you’re brand new to quilting or have a few projects under your belt, this block provides a straightforward path to creating something beautiful. It’s a classic design that can be used on its own or combined into a larger quilt to capture the holiday magic.
The beauty of a Christmas Tree Quilt Block lies in its versatility. You can make it as simple or as intricate as you’d like, experimenting with fabrics, colors, and layouts. Each block can stand alone as a small wall hanging or table topper, or you can sew multiple blocks together to form a full holiday quilt. This makes it a wonderful pattern for both practice and final projects.
For beginners, this block is especially appealing. Its geometric shapes and clean lines are easy to cut and assemble, offering a stress-free introduction to quilting. Plus, the result is immediately recognizable and festive, giving you that satisfying feeling of accomplishment. In this tutorial, you’ll learn step by step how to make your own Christmas Tree Quilt Block, along with tips, customization ideas, and inspiration to help you enjoy the process.
Materials You Will Need
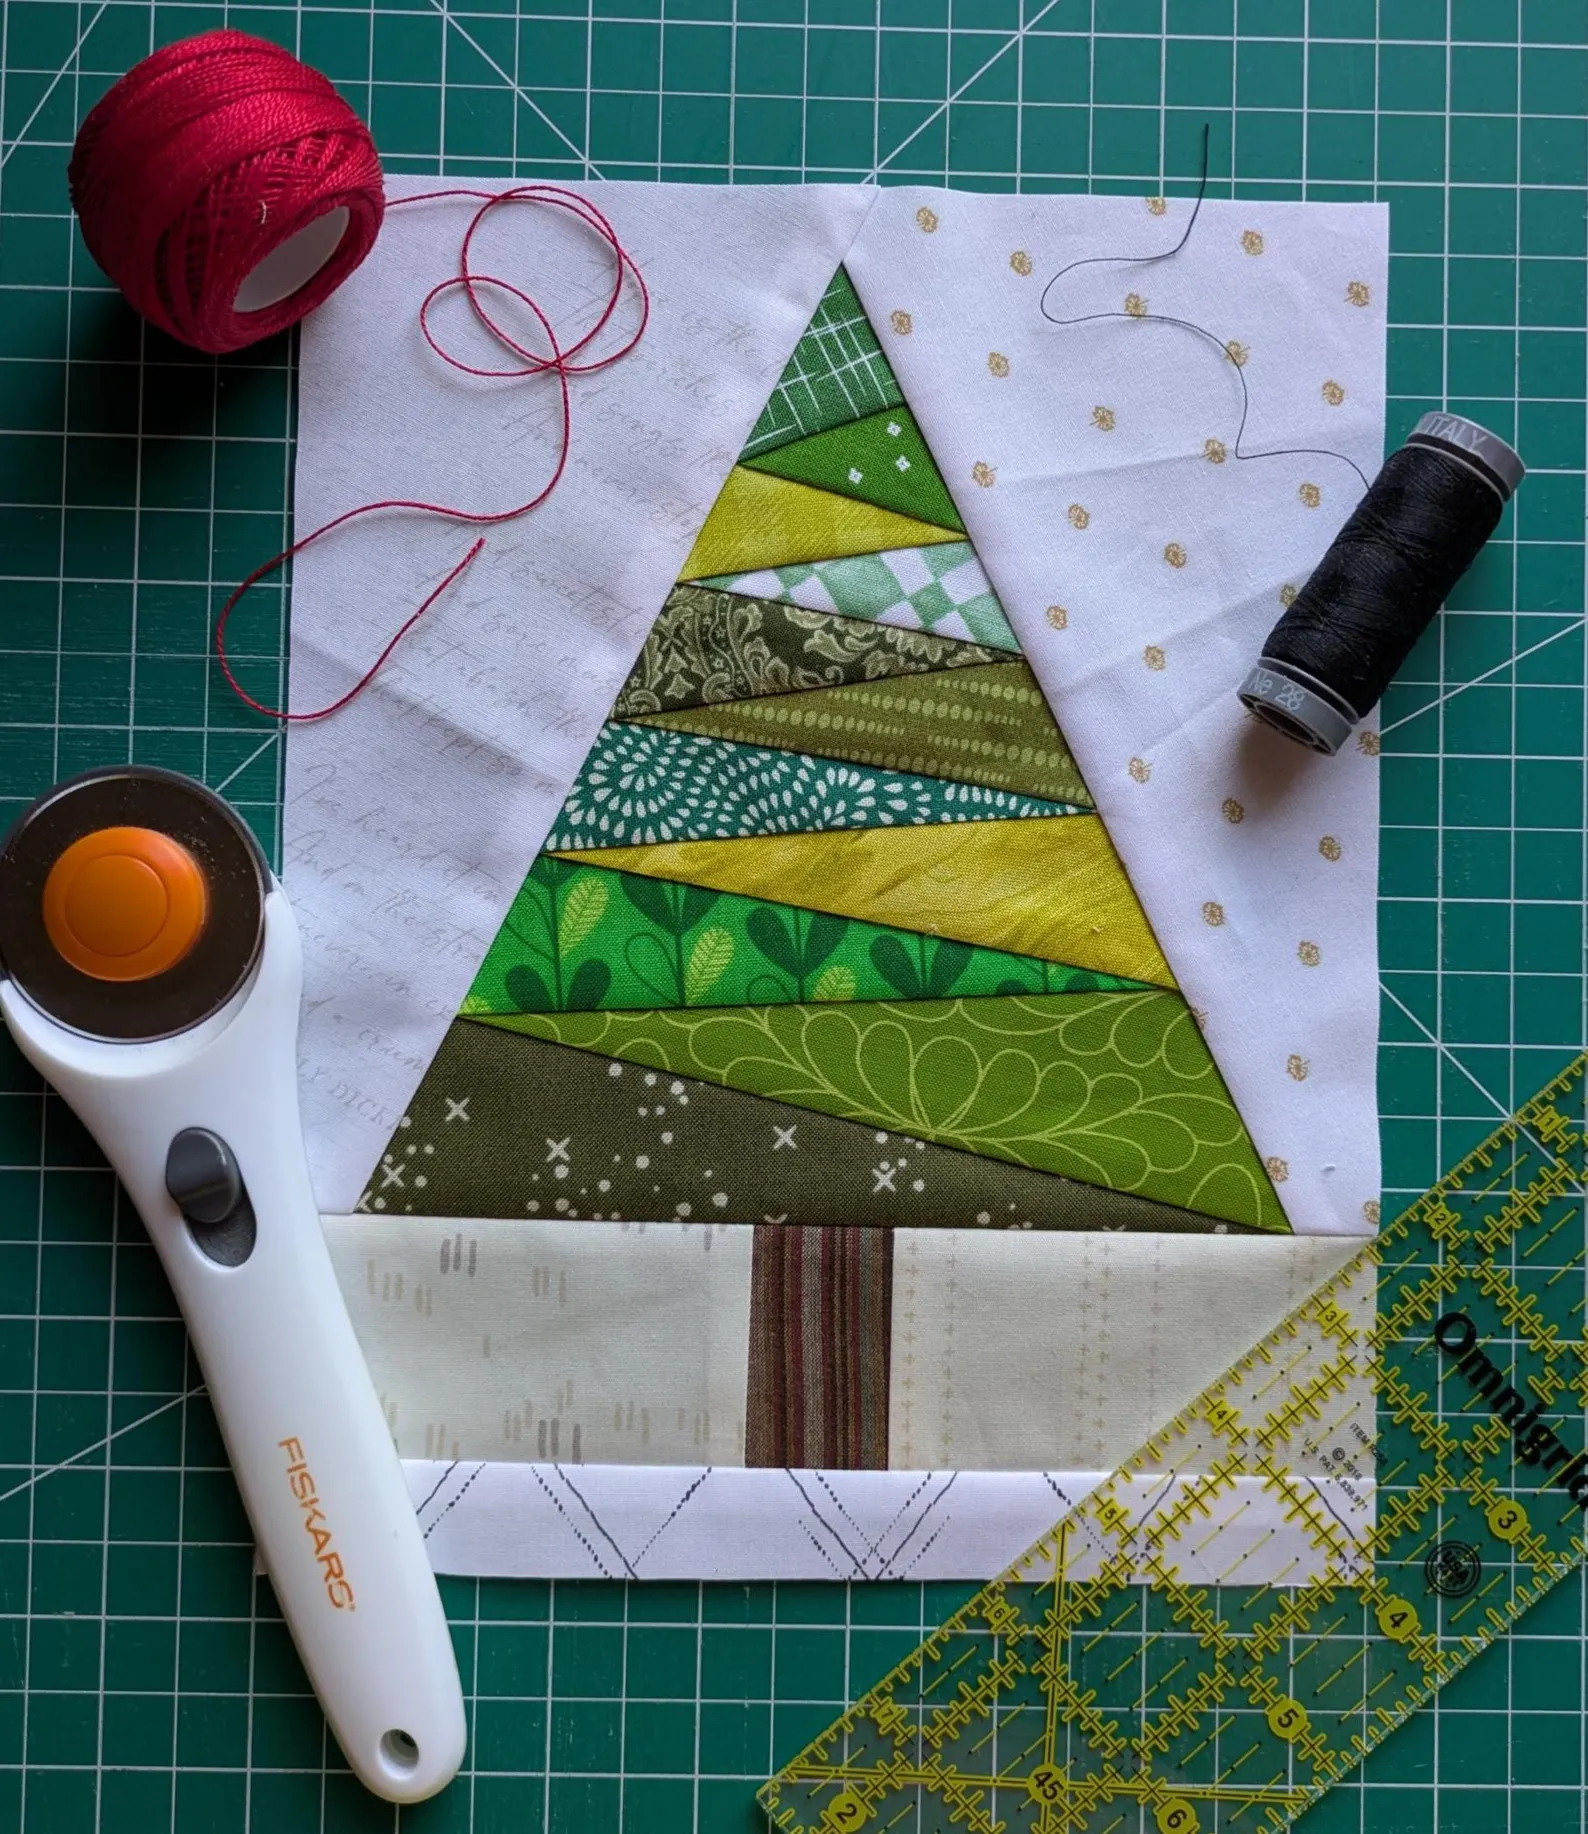
Before you begin sewing, it’s important to gather all the supplies you’ll need for your quilting pattern. The basics include fabric, thread, a rotary cutter, quilting ruler, and a cutting mat. You’ll also need an iron and ironing board for pressing seams, which helps your block lay flat and neat. Beginners may find it helpful to also have sewing pins or clips to hold pieces in place as they sew.
For fabric, you’ll want a variety of greens for the tree itself, perhaps in solids or small prints. The tree trunk usually works best in a brown fabric, while the background can be white, cream, or any festive color like red or gold. If you’d like to add some sparkle, consider metallic fabrics or holiday-themed prints. Fat quarters or fabric scraps are often perfect for this kind of project.
Thread is another important consideration. Cotton thread is most commonly used in quilting, as it’s durable and easy to work with. Choose a neutral shade that blends well with your fabrics, or go bold with contrasting thread for added detail. With all of your materials ready, you’ll be fully prepared to start working on your Christmas Tree Quilt Block.
Cutting the Fabric Pieces
The first step in creating your quilt block is cutting the fabric pieces to size. Precision is key in quilting patterns, and the Christmas Tree block is no exception. Begin by cutting a square for the background, which will serve as the foundation for your block. You will also cut smaller squares and rectangles to form the tree shape.
To build the tree, you’ll need several green triangles. The simplest way to make these is by cutting squares in half diagonally. For the trunk, cut a small brown rectangle. The background squares and rectangles will fill in around your tree shape, so be sure to cut these in sizes that match the measurements of your tree pieces. Keeping everything square and even at this stage will make assembly much easier.
Use a rotary cutter and ruler to achieve straight, sharp cuts. Quilting requires accuracy, so take your time with this step. If you’re using scraps, make sure you have enough fabric to cut each piece correctly. Labeling your pieces or laying them out in the shape of a tree before you begin sewing can help you stay organized and avoid confusion later.
Sewing the Tree Together
Once your pieces are cut, it’s time to start sewing your Christmas Tree Quilt Block. Begin by sewing the green triangle pieces together to form the tree layers. These will usually be arranged in three or four tiers, depending on the size of your block. Each tier should look like a triangle or trapezoid that narrows toward the top.
After the tree layers are complete, add the background pieces to the sides of each tier. This step will square off your triangles and help everything fit together neatly. Press your seams flat with an iron as you go—this not only makes the block look better but also helps it line up correctly when you sew the sections together.
Finally, sew the trunk to the bottom of the tree and attach the last background pieces. By this stage, your Christmas Tree Quilt Block should look nearly finished. Check for alignment and trim any uneven edges if necessary. With all the sections sewn, you’ll have a crisp and festive block ready to use in a larger quilt or as a standalone decoration.
Adding Borders and Sashing
A quilt block can be used just as it is, but many quilters like to add borders or sashing for a more finished look. Borders are strips of fabric that frame the block, making it larger and helping the design stand out. Sashing refers to the strips that separate individual blocks in a larger quilt, giving the project structure and space.
If you’re making a wall hanging or table runner with a single block, adding a border can be a lovely finishing touch. Choose a fabric that complements your tree—red for a bold holiday look, gold for elegance, or a patterned fabric for extra cheer. Borders can be narrow or wide, depending on how much you want the block to stand out.
For quilts made from multiple Christmas Tree blocks, sashing is especially useful. It keeps the quilt balanced and prevents the blocks from blending into one another. White or cream sashing works well to create a snowy effect, while dark green or red can make the trees pop. Adding borders and sashing is entirely optional, but it’s a great way to enhance your final quilt.
Quilting and Finishing Touches
Once your block is complete, you may choose to quilt it—meaning to stitch through all the layers to add texture and durability. Simple straight-line quilting works beautifully for a Christmas Tree Quilt Block. You can quilt lines that follow the tree’s shape or go with diagonal crosshatching for a classic look.
Another option is free-motion quilting, which allows you to stitch swirls, loops, or even holiday-themed motifs like stars or snowflakes. If you’re a beginner, don’t feel pressured to try advanced techniques right away. Even simple quilting adds charm and keeps the layers secure.
To finish, bind the edges of your quilt block project with bias tape or binding strips. This gives the piece a polished look and prevents fraying. You can also embellish with buttons, beads, or appliqué ornaments to make your tree truly festive. Finishing touches are where your creativity can really shine.
Customization Ideas
The Christmas Tree Quilt Block is a wonderful canvas for creativity. You can easily personalize it to suit your holiday décor or make it a thoughtful handmade gift. One fun idea is to use multiple shades of green to create a layered, dimensional effect. Mixing prints and solids can also add visual interest.
If you enjoy whimsical designs, consider adding appliqué ornaments, stars, or even presents at the base of your tree. Embroidery can also bring your block to life, whether you stitch tiny snowflakes in the background or outline the tree for emphasis. Another playful option is to use novelty holiday fabrics featuring candy canes, reindeer, or holly.
The size of your block is also customizable. You can make small blocks for a mini quilt or larger ones for a bedspread. Whether you’re making one block or a whole set, the Christmas Tree design is flexible enough to fit your vision. Experiment and have fun with it—that’s the true joy of quilting.
Conclusion: Share Your Christmas Quilt Block
Creating a Christmas Tree Quilt Block is a rewarding project that combines simplicity with festive charm. It’s approachable enough for beginners while still offering room for experienced quilters to get creative. With just a few pieces of fabric, some careful sewing, and a little imagination, you’ll have a beautiful quilt block that brings holiday cheer.
Quilting is not just about the final product—it’s about the process. Each stitch tells a story, and each block adds to the joy of making something with your own two hands. Whether you keep your block, turn it into a gift, or sew it into a larger quilt, it will always carry that special handmade touch.
If you decide to make your own Christmas Tree Quilt Block, I’d love to see your creations! Share your finished projects with friends, family, or on social media to spread the holiday spirit. Quilting is best when shared, and your unique take on this festive quilting pattern is sure to inspire others this season.