
The world of quilt patterns is filled with timeless treasures, and the Friendship Star quilt block is one of those classic designs that quilters love to revisit again and again. Its simple geometry, rich history, and countless creative possibilities make it an ideal block for both beginner and seasoned quilters alike.
In this free quilt pattern tutorial, we’ll walk you through how to make the traditional Friendship Star quilt block, introduce several inspiring variations, and offer plenty of helpful tips to ensure success. Whether you’re stitching a heartfelt gift or creating a vibrant quilt full of stars, this guide is your perfect companion.
Let’s get sewing!
Materials You’ll Need
Before diving into your project, gather the materials listed below. These essentials will help you build a solid foundation for your block and experiment with different styles later on.
Basic Materials List:
- Fabric A (background) – light or neutral tone (fat quarter or scraps)
- Fabric B (star points) – contrasting or vibrant color (fat quarter or scraps)
- Rotary cutter and self-healing mat
- Quilting ruler – for accurate cuts
- Pins or clips
- Sewing machine and thread – preferably 100% cotton
- Iron and pressing board
- Cutting templates or pencil/chalk for marking
Tip: Pre-wash and press your fabrics before cutting to avoid shrinkage and improve accuracy.
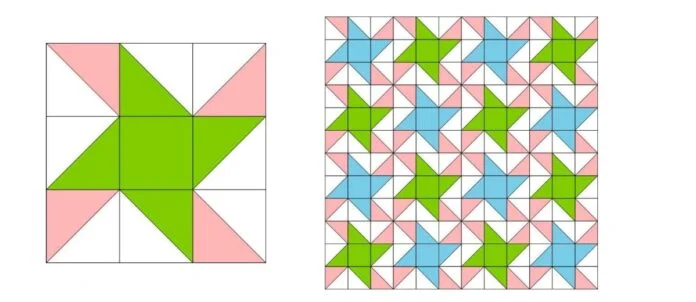
What Is the Friendship Star Quilt Block?
The Friendship Star quilt block is a traditional nine-patch design made up of squares and half-square triangles (HSTs). Its symbolic name comes from early quilting history, where blocks were made collaboratively and gifted among friends as a symbol of affection.
Each block features a central square surrounded by triangles that form a spinning star. It’s simple, elegant, and easy to modify. You can use it in small projects like mug rugs or build full-sized quilts made entirely from stars.
Perfect for adding a charming vintage touch to your next project!
How to Make the Basic Friendship Star Block
Creating a standard 9″ finished Friendship Star block involves just a few simple steps. Here’s the step-by-step quilt tutorial to help you get started:
Cutting Instructions:
- Fabric A (background):
- 4 squares – 3.5″ x 3.5″
- 2 squares – 4″ x 4″ (for HSTs)
- Fabric B (star points):
- 2 squares – 4″ x 4″ (for HSTs)
- 1 square – 3.5″ x 3.5″ (center square)
Assembly:
- Create Half-Square Triangles (HSTs):
- Pair one 4″ square from Fabric A with one from Fabric B (right sides together).
- Draw a diagonal line on the back of Fabric A, sew 1/4″ on both sides of the line, then cut along the line to make 2 HSTs.
- Trim each HST to 3.5″ square. Repeat for the second pair.
- Layout the Block:
- Arrange your squares into a 3×3 grid: place the HSTs in the star point positions, the background squares at the corners, and the center block in the middle.
- Sew Rows and Join:
- Sew each row together, then sew the rows to each other. Press seams flat or to the side as preferred.
Don’t forget to check for alignment—accuracy here ensures a crisp, clean star every time!
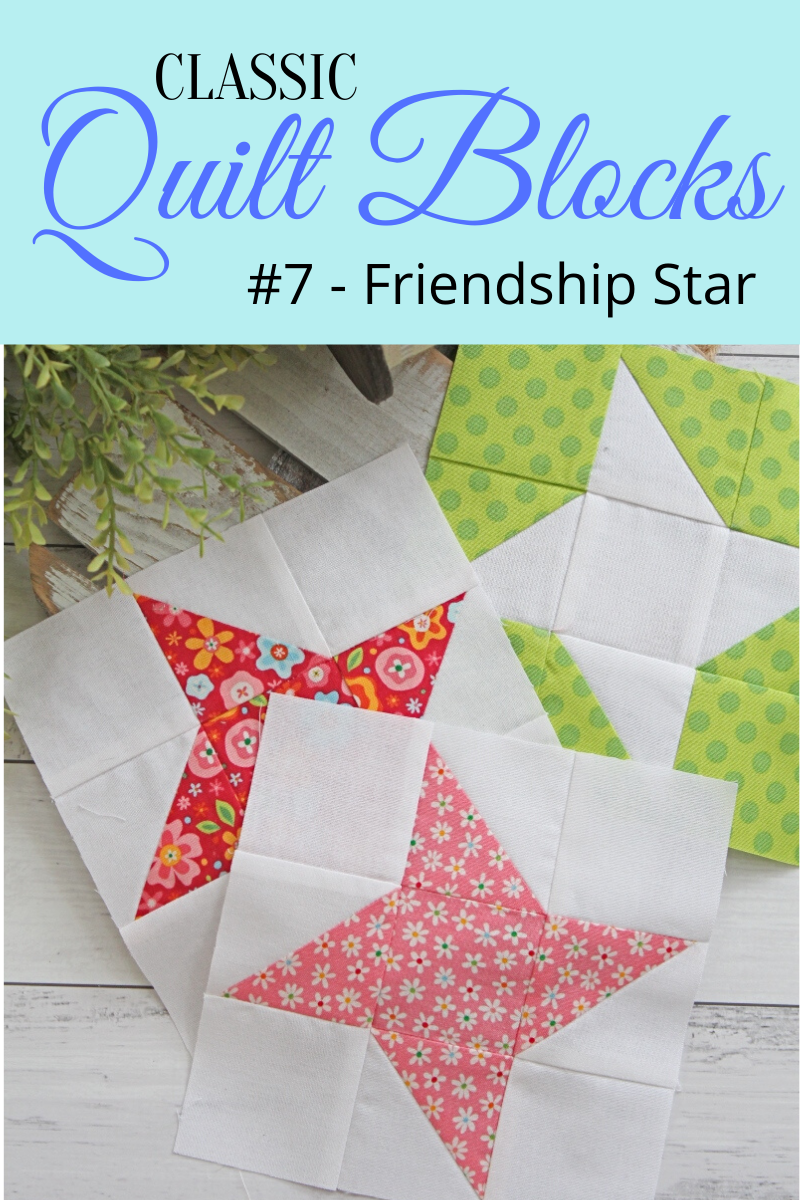
Creative Variations of the Friendship Star
One of the best things about classic blocks like the Friendship Star is how easy they are to customize. Below are a few creative ideas to breathe new life into this beloved quilt pattern.
1. Scrappy Friendship Star
Use a variety of prints and colors for your star points instead of one solid fabric. This is a fantastic way to use up fabric scraps and give the block a fun, modern twist.
2. Nested Stars
Layer a smaller star inside a larger one by combining small star blocks within the center square of larger stars. It’s an eye-catching design and gives your quilt more dimension.
3. Rotating Stars
Play with placement! Rotate each Friendship Star 90 degrees in your layout for a swirling, pinwheel-like effect that adds movement and drama to your quilt.
Not sure what color scheme to choose? Try a gradient or rainbow palette for a stunning effect!

Helpful Tips for Sewing the Perfect Friendship Star
To make your quilt tutorial experience as smooth as possible, follow these simple but effective quilting tips:
- Use starch or fabric stabilizer: This helps with precision and prevents fabric from stretching while working with triangles.
- Chain-piece your squares: Save time and thread by sewing similar seams in batches.
- Press, don’t iron: Lifting and pressing seams (rather than dragging the iron) prevents distortion.
Consistent seam allowance (1/4″) is crucial to keeping your block at the correct size.
Adjusting Block Sizes and Layouts
Changing the size of your Friendship Star quilt block opens up even more design opportunities. Smaller blocks work great in baby quilts or pillow covers, while oversized stars can become the focal point of a modern quilt.
Size Guide:
- 6″ finished block: Cut base squares at 2.5″, HSTs from 3″ squares.
- 12″ finished block: Cut base squares at 4.5″, HSTs from 5″ squares.
You can also alternate Friendship Stars with other classic blocks like Nine-Patch or Ohio Star for added texture and interest.
Mix and match classic blocks for a true vintage sampler quilt look!
Project Ideas Using Friendship Star Blocks
The versatility of the Friendship Star block means it fits into projects of all sizes. Here are a few creative uses to spark your imagination:
- Mini wall hangings or framed decor
- Baby quilts using colorful star blocks
- Table runners with alternating stars and solid squares
- Memory quilts using fabrics from old clothing or linens
Why not stitch up a set of placemats as a gift for a friend—true to the name Friendship Star!
Final Thoughts – Keep the Quilting Spirit Alive!
The Friendship Star is a beautiful reminder of how quilting brings people together—one block, one stitch, one shared story at a time. This free quilt pattern not only teaches the technique but also invites you to make it your own with colors, textures, and layout choices.
We hope this quilt tutorial inspires you to explore more quilt patterns, try new combinations, and spread joy with your creativity. Keep experimenting and sharing your work—it’s part of what makes quilting such a warm and welcoming community.
Don’t forget to try bold colors, mix patterns, and have fun!
Happy quilting!