
Crafting Beauty: Creating an Elephant Quilt, is not just a craft, it is an art form that allows individuals to express their creativity and tell stories through fabric.
Among the myriad of designs, the elephant quilt stands out as an emblem of strength, grace, and wisdom.
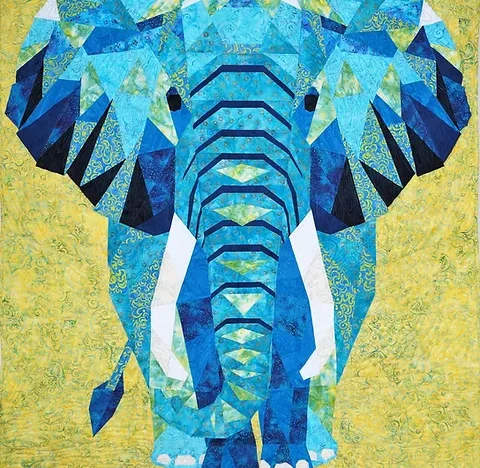
In this article, we delve into the process of creating an elephant quilt, exploring the steps involved and the artistic nuances that make each quilt a unique masterpiece.
Crafting Beauty: Creating an Elephant Quilt
Understanding the Symbolism
Before delving into the intricacies of quilting an elephant design, it’s essential to appreciate the symbolism associated with this majestic creature.
Elephants are revered in many cultures for their intelligence, loyalty, and familial bonds.
They symbolize strength, resilience, and the importance of community—a fitting motif for a quilt that is often crafted with love and shared among loved ones.
Materials and Tools
To embark on the journey of creating an elephant quilt, you’ll need a selection of materials and tools.
Firstly, choose high-quality fabric in various shades and patterns to represent the elephant’s body, ears, and trunk.
Additionally, gather batting for the quilt’s middle layer and backing fabric to provide structure and stability.
Essential tools include a sewing machine, rotary cutter, cutting mat, quilting ruler, pins, and thread in coordinating colors.
Design and Planning
The design phase is where your creativity takes flight.
Sketch out your vision for the elephant quilt, considering factors such as size, layout, and color scheme.
Will the quilt feature a single elephant or a herd? Will the background be a tranquil landscape or a vibrant patchwork of patterns? Experiment with different arrangements until you find a composition that resonates with your artistic vision.
Piecing Together
Once you have finalized your design, it’s time to bring it to life through piecing.
Begin by cutting fabric pieces according to your pattern, ensuring precision and accuracy with each cut. Assemble the individual components using a quarter-inch seam allowance, taking care to match seams and corners for a polished finish.
Whether you opt for traditional piecing or modern improvisational techniques, let your craftsmanship shine through each stitch.
Quilting and Embellishment
With the quilt top assembled, turn your attention to quilting—the process of stitching together the quilt top, batting, and backing.
Consider different quilting motifs to enhance the elephant design, such as swirling patterns reminiscent of elephant tracks or geometric shapes that echo their natural habitat. As you quilt, pay attention to texture and dimension, using contrasting thread colors to add depth and visual interest.
Finishing Touches
As the quilting nears completion, it’s time to add the finishing touches that will elevate your elephant quilt from mere fabric to a work of art.
Trim excess batting and backing fabric, square off the edges, and bind the quilt with a complementary fabric binding.
Consider embellishments such as appliqué accents, embroidered details, or even beadwork to add a personal touch and enhance the quilt’s narrative.
Sharing the Story
Once your elephant quilt is complete, take a moment to admire your handiwork and reflect on the journey you’ve embarked upon.
Whether it’s destined for a nursery, a living room sofa, or an art gallery wall, know that your quilt carries not only the warmth of its materials but also the story of its creation.
Share this story with pride, knowing that you’ve crafted a piece of beauty that will be cherished for generations to come.
Crafting Beauty: Creating an Elephant Quilt
Creating an “Elephant Quilt” is a delightful quilting project and can be a great way to express your creativity.
Here is a basic step-by-step guide to creating an “Elephant Quilt”, including the fabric cuts and measurements needed:
Step 1: Choosing the Fabric
Select fabrics in shades of gray for the elephants and fabrics of your choice for the background of the quilt. You will also need fabrics for the edges and lining.
Step 2: Fabric Cuts
Gray Elephant Fabric:
- Cut (6.5-inch) squares for the elephants’ bodies.
- Cut (2.5 inch) wide strips for the ears.
- Cut (1.5 inch) wide strips for the trunks.
Background Fabric:
Cut 6.5-inch squares for the quilt bottom.
Edge Fabric:
Cut 3-inch-wide strips for the quilt edges.
Lining Fabric:
Cut a piece large enough to cover the entire back of the quilt, with extra seam allowance.
Step 3: Assembling the Elephants
Sew the ear straps to the top corners of the gray squares.
Sew the trunk strips to the bottom of the gray squares.
You can add extra details, like eyes, using embroidery stitches or appliqués.
Step 4: Assembling the Quilt
Arrange the elephant squares and background squares in a pattern you like.
Sew the squares together in rows and then stitch the rows together to form the quilt top.
Add border strips around the top of the quilt to frame it.
Step 5: Quilting
Place the quilt top, lining and batting together and pin in layers.
Quilt the layers together using a quilting pattern of your choice. You can do this by hand or by machine.
Step 6: Finishing
After quilting, trim the excess fabric and trim the edges of the quilt.
Add a bias border around the edges of the quilt for a clean finish.
Step 7: Conclusion
Once finished, your “Elephant Quilt” will be ready to display or give as a gift!
Remember, these are just basic guidelines and you can adjust the project to suit your personal preference and quilting skills.
Have fun and enjoy the creative process!
Conclusion
Creating an elephant quilt is more than just a craft project; it’s a labor of love that celebrates the timeless bond between artistry and tradition.
As you stitch each seam and quilt each layer, remember the symbolism imbued within the elephant motif—strength, grace, and community.
Let your creativity soar as you transform fabric into a masterpiece that will warm hearts and inspire imaginations for years to come.