
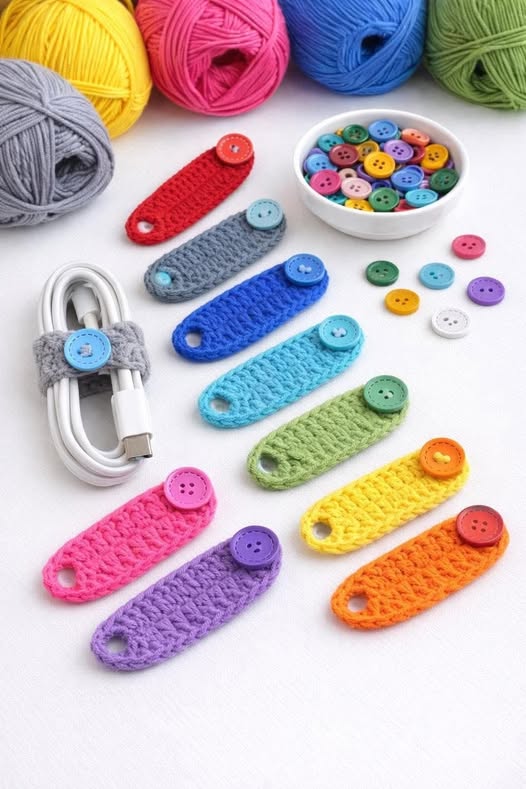
If you’re tired of dealing with tangled chargers, messy earphones, and cables all over your workspace, this crochet cable organizer is the perfect solution. This practical and charming project combines handmade creativity with everyday organization. It helps keep your cords tidy while also serving as an eco-friendly alternative to plastic ties. Even better, you can customize it with your favorite colors and adapt it to different cable sizes.
Making your own crochet cable organizer is simpler than it looks. Even beginners can enjoy this project, as it introduces basic stitches in a small and manageable piece. In this guide, you’ll learn about the materials required, the stitches involved, and each step needed to complete your organizer. In the end, you’ll have a useful handmade item you can use daily.
One of the best things about following a step-by-step guide is the flexibility. You can work at your own pace, pause whenever needed, and easily fix mistakes by undoing a few stitches. This tutorial is designed to make the process easy and enjoyable, helping you create something both functional and सुंदर.
Materials Needed for Your Crochet Cable Organizer
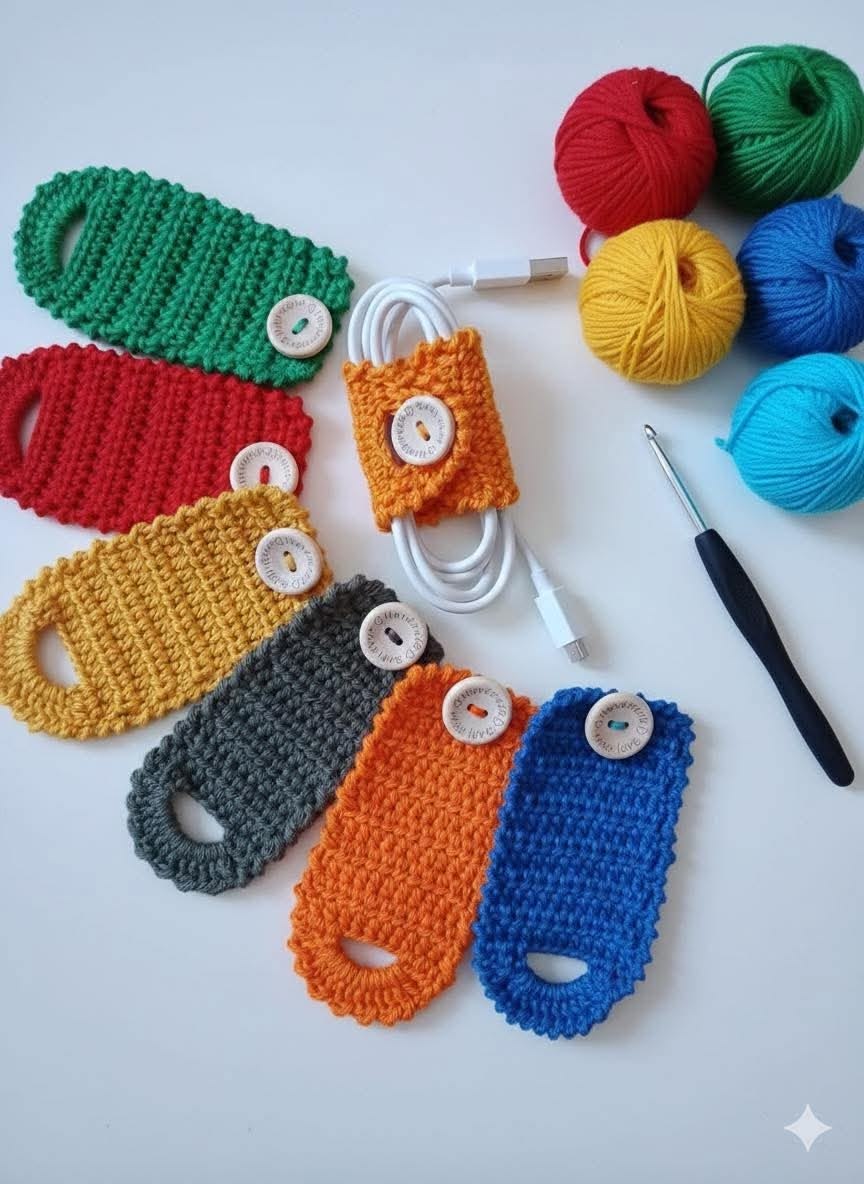
To begin your crochet cable organizer, you’ll only need a few basic supplies. Since it’s a small project, it’s perfect for using leftover yarn from previous work. A light or medium-weight yarn is ideal, with cotton being the best option because it is durable and keeps its shape well. You’ll also need a crochet hook suitable for your yarn, scissors, and a yarn needle to finish the piece.
For closure, you can add a small button or a snap fastener. These options provide both functionality and a decorative touch. If you choose a button, make sure to have a sewing needle and thread to attach it securely.
Color choice is another fun part of the process. Bright shades make organizers easy to find, while neutral tones create a clean, minimalist look. Since it’s handmade, you have complete control over the design.
Beginners may prefer ergonomic crochet hooks for added comfort during longer sessions. A hook size between 3.5 mm and 4.5 mm usually works well, depending on the yarn thickness.
It’s also helpful to have a measuring tape to keep your organizers consistent in size, especially if you plan to make several as gifts. This ensures a more polished and professional result.
Keeping your materials organized in a small basket or pouch can also make the process smoother, allowing you to continue your project anytime with ease.
Step-by-Step Instructions
Start by making a slip knot and creating a chain with the desired length. Typically, 18 to 24 chains are enough for most cables. Make sure your stitches are even and not too tight, as this will form the base of your organizer.
Next, work single crochet stitches across the chain, starting from the second chain from the hook. This creates a firm and sturdy foundation. At the end of each row, turn your work and continue crocheting until you reach about 4 to 5 rows in width.
Once the base is finished, you can create a button loop. Simply chain a few stitches—enough to fit your button—and then slip stitch back into the base. This loop will help keep your cable neatly secured.
On the opposite end, sew your button in place using strong thread. If you prefer a snap closure, attach both parts according to the instructions provided with it.
After that, use a yarn needle to weave in any loose ends and trim excess yarn. This step gives your project a clean and professional finish while preventing unraveling.
Finally, shape your organizer by hand. Cotton yarn usually doesn’t require blocking, but if needed, you can lightly steam it or shape it with a damp cloth for a smoother look.
Advantages of Making a Crochet Cable Organizer
One of the main benefits of creating your own cable organizer is reducing clutter. Tangled cords can be frustrating and may even damage your cables over time. A crochet organizer keeps everything neat and protected.
This project is also a great way to use leftover yarn, turning scraps into something practical. It’s a simple way to practice sustainable crafting while reducing waste.
Because it’s quick to make, you can create several organizers in just one afternoon. They also make thoughtful handmade gifts for friends and family, especially those who frequently use electronics.
Customization is another big advantage. You can adjust sizes for different cables—smaller ones for earbuds and larger ones for chargers or laptop cords. Playing with colors and patterns makes each piece unique.
Crocheting is also a relaxing activity. Working on small projects like this can help reduce stress while keeping your hands busy.
Most importantly, handmade items carry a personal touch that store-bought products simply don’t have.
Personalization Ideas
To make your organizer more unique, try experimenting with different stitches. While single crochet is the easiest option, you can also use half double crochet or textured stitches for a different look.
You can add decorative details such as appliqués or embroidered initials to give each piece a personal touch. Using contrasting colors can make these details stand out even more.
If you’re making multiple organizers, consider color-coding them for different devices. For example, use blue for phone chargers, green for headphones, and red for larger cables.
Variegated yarn is another great choice, as it creates a multicolor effect without needing to switch yarns.
You can also try different closure methods, such as ties, elastic bands, or even crocheted loops. Each option offers a different style and function.
Keeping a few ready-made organizers in a drawer or basket ensures you always have one on hand when needed.
FAQ – Crochet Cable Organizer
How long does it take to make one?
Most people can complete a cable organizer in about 20 to 40 minutes.
What type of yarn works best?
Cotton yarn is ideal because it is strong, holds its shape, and is easy to wash.
Is this project beginner-friendly?
Yes! It’s perfect for beginners since it uses simple stitches and is small in size.
How should I clean it?
Wash it by hand with mild soap and let it air dry. Avoid hot water to prevent shrinking.
Can I sell these organizers?
Yes, as long as the design is your own, they are great items for selling at craft fairs or online.
Which closure is better: button or snap?
It depends on your preference. Buttons are decorative, while snaps are quicker to use.
Conclusion
Creating a crochet cable organizer is a simple and satisfying project that combines creativity with practicality. With just a few materials and basic stitches, you can make something useful that helps keep your space organized and your cables protected.
Now that you’ve learned the process, why not try making your own? It’s a quick project with great results. Feel free to share your experience and suggestions—we’d love to hear how your organizer turned out!
PATTERN HERE
Crochet – Tutorial
FULL PATTERN ACCESS
You will be redirected to another site