
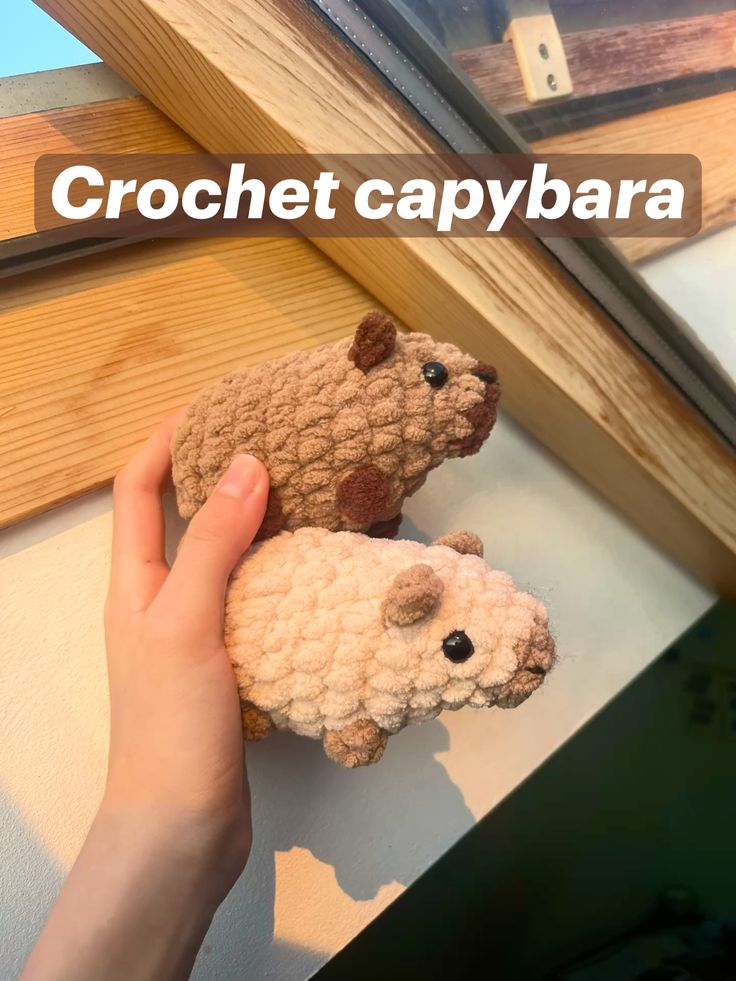
Capybaras are having a well-deserved moment in the spotlight. These calm, water-loving animals have charmed the internet with their chill personalities and sociable nature. It’s no wonder so many crafters are looking for a fun, beginner-friendly crochet pattern to make their very own plush capybara. Whether you’re an animal lover, a crochet newbie, or just looking for a new weekend project, this tutorial is the perfect fit.
In this crochet tutorial, we’ll walk you through everything you need to know to make an adorable capybara from scratch. No experience with animal amigurumi? No problem! This guide is tailored for beginners and includes all the basics, from materials to final stitches.
By the end of this project, you’ll have a cozy capybara plush that you can keep for yourself or gift to someone who appreciates handmade charm. Let’s get started on this heartwarming crafting journey!
Materials You’ll Need
Before we jump into the crochet pattern, let’s gather our materials. Choosing the right tools and yarn will make your capybara come out just the way you imagined it. Feel free to use what you already have or try something new to make it unique.
Here’s what you’ll need:
- Worsted weight yarn in brown (main body), beige (snout and belly), and black (nose, eyes or embroidery)
- Crochet hook (Size 3.5mm or E-4 recommended)
- Stuffing (polyfill or recycled yarn scraps)
- Yarn needle
- Stitch markers
- Safety eyes (optional: 8mm or 10mm) or black yarn for embroidered eyes
This project is perfect for using leftover yarns, and you can always swap the colors for creative variations. Just make sure to keep the yarn weight consistent so your stitches remain even and your capybara holds its shape.
Getting Started: Basic Stitches and Tips
If you’re new to crochet, don’t worry—this pattern only requires basic stitches like chain (ch), single crochet (sc), increase (inc), and decrease (dec). These are all beginner-friendly and a great way to build confidence while crafting something cute and memorable.
Here’s a quick glossary of the stitches you’ll use:
- ch (chain) – yarn over, pull through loop.
- sc (single crochet) – insert hook, yarn over, pull up a loop, yarn over again, pull through both loops.
- inc (increase) – 2 single crochet in the same stitch.
- dec (decrease) – single crochet two stitches together.
Before you start, create a small practice swatch using your yarn and hook. This will help you get used to the tension and grip. Keep your stitches relaxed—tight stitches can make the piece stiff and hard to shape.
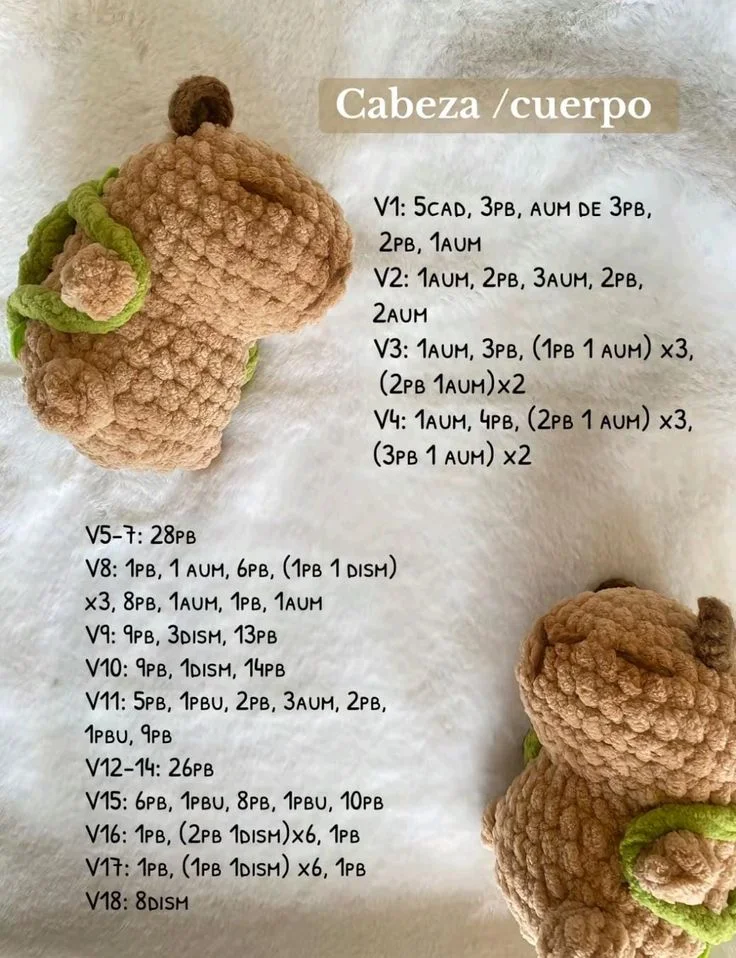
Step-by-Step: Crochet Capybara Body
Let’s begin with the body of the capybara, which is worked in the round like a classic amigurumi shape. Use the main brown yarn.
Round 1: Make a magic ring, and work 6 sc into the ring (6)
Round 2: Inc in each st around (12)
Round 3: (Sc in next st, inc) around (18)
Round 4: (Sc in next 2 sts, inc) around (24)
Rounds 5-15: Sc in each st around (24)
Round 16: (Sc in next 2 sts, dec) around (18)
Round 17: (Sc in next st, dec) around (12)
Round 18: Dec around (6)
Fasten off and leave a tail. Stuff the body firmly before closing.
Use your yarn needle to weave the tail through the final round and pull tight to close the body. This oval shape will be the chunky, lovable base of your capybara!
Step-by-Step: Crochet the Head and Snout
The capybara’s head has a rounded shape and extends slightly from the body. You can either make it as a separate piece and sew it on, or crochet it as a continuation of the body (for more advanced crafters).
Head (in brown):
Round 1: Magic ring, 6 sc into ring (6)
Round 2: Inc around (12)
Round 3: (Sc in next, inc) around (18)
Rounds 4–8: Sc around (18)
Round 9: (Sc in next, dec) around (12)
Round 10: Dec around (6)
Fasten off, stuff, and sew onto the body.
Snout (in beige):
Ch 6, turn and work 4 sc, 3 sc in last st, continue around other side, 4 sc, 3 sc in final st (14)
Sc around for 3 more rounds, fasten off and attach to front of head.
Sew the snout gently, allowing it to stick out for that iconic capybara look. Add a nose using black yarn or embroidery floss.
Step-by-Step: Legs, Ears, and Tail
No capybara is complete without stubby legs, tiny ears, and a little tail. These features are what give your plush its personality!
Legs (Make 4 in brown):
Round 1: Magic ring, 6 sc (6)
Round 2: Inc around (12)
Rounds 3–5: Sc around (12)
Fasten off and stuff lightly. Sew to the underside of the body.
Ears (Make 2 in brown):
Ch 4, turn and sc 3 back.
Next row: Dec, sc 1
Fasten off and sew on top of the head.
Tail (in brown):
Magic ring, 5 sc
Next 2 rounds: Sc in each (5)
Fasten off, stuff slightly, and sew to the back of the body.
These little pieces add so much character to your capybara. Take your time positioning them—angled legs or tilted ears can completely change the mood of your plush!
Ideas for Personalization
One of the joys of working with a crochet pattern like this is making it your own. Want your capybara to look like it just came from a spa? Add a tiny towel and cucumber slices! Want it to look festive? Add a mini party hat or scarf!
Here are some fun customization ideas:
- Color play: Use pastel shades for a kawaii-style capybara or bold, bright colors for a quirky twist.
- Accessories: Create a tiny backpack, flower crown, or even a crocheted teacup.
- Textures: Experiment with fluffy yarn or textured stitches to give your capybara a fuzzy coat.
Let your imagination run wild! This crochet project is your playground, and the capybara is the perfect canvas.
Final Touches and Display
Once your capybara is fully assembled and personalized, give it a final fluff and smile—your work is done! You’ve not only followed a crochet pattern, but you’ve brought a bit of joy into the world through yarn and creativity.
PATTERN HERE
Crochet – Tutorial
FULL PATTERN ACCESS
You will be redirected to another site
Display your finished plush proudly on your desk, shelf, or bedside table. These make thoughtful gifts for friends, family, or even co-workers who need a soft companion during stressful days.
If you’ve made it this far, congratulations! You’ve completed your first (or newest) capybara, and hopefully learned a few new crochet skills along the way.