
If you love pets and crafting, there’s nothing more delightful than creating your own crochet cats and dogs. Whether you want to craft a cuddly cat or a loyal little dog, this project is full of charm and personality. It’s perfect for beginners and experienced crocheters alike, especially if you’re passionate about animals and cute handmade creations.
This guide provides a detailed, step-by-step pattern to make adorable crochet animals that resemble our favorite furry companions. These plushies can serve as keepsakes, gifts, or even decorations in a pet-themed nursery. And best of all, you don’t need to spend a fortune—just some yarn, a hook, and your imagination.
In the world of crochet patterns, animals are always popular. Cats and dogs stand out because they offer endless creative options. You can choose colors, breeds, poses, and facial expressions, which makes each project truly unique and special.
Materials You’ll Need
Before diving into the crochet process, it’s essential to gather all necessary materials. The good news is, you probably already have most of them at home if you’ve worked on other crochet patterns before.
You’ll need worsted-weight yarn in a variety of colors depending on the animal you plan to create. For cats, grays, browns, whites, and black are common, while dogs can be beige, golden, brown, or even spotted. A 3.0mm or 3.5mm crochet hook works well for tight stitches typical in amigurumi designs.
In addition to yarn and hook, prepare stuffing (polyfill), safety eyes (or black embroidery floss), a yarn needle, and scissors. Optional but helpful tools include stitch markers, blush for cheeks, or felt for ear and paw pads. These tools will help your finished animal look polished and expressive.
Step-by-Step Pattern: Starting the Head
Most crochet cats and dogs begin with the head, which forms a round or oval base. Start by creating a magic ring and working six single crochet (sc) stitches into it. Then increase each round by multiples of six until your shape resembles a ball or oval.
The placement of increases will determine the shape of the head. For a more rounded face (like a Persian cat or pug), concentrate increases in the front area. For a sleeker head (like a Siamese or beagle), keep it even throughout. Once the desired size is reached, continue stitching evenly to form the length of the head.
Stuff the head firmly and place your safety eyes between the 6th and 8th rounds, spacing them according to your design. If you’re using embroidery thread for eyes or nose, wait until you’ve finished the body for easier alignment.
Shaping the Body
After the head, transition directly into the body or crochet it separately and sew it later. The body is usually a tapered tube, wide at the bottom and narrower toward the neck. Start with a base of single crochets and gradually increase for the first few rounds.
Once the base is wide enough, crochet evenly for several rounds to add height. Begin decreasing gradually to form the shoulders. Make sure to stuff as you go to maintain the plushie’s shape and firmness.
For a cat, make the body slim and elegant. For dogs, especially puppies or smaller breeds, a rounder torso adds a more playful appearance. Adjust the length according to your desired pose—sitting, standing, or lying down.
Crafting the Ears and Tail
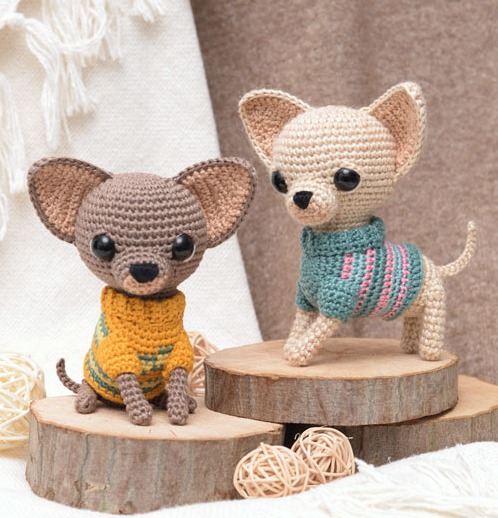
Next, crochet the ears, which vary widely depending on breed. For cats, triangle-shaped ears are common. Start with a small number of chains and build them up into a triangle, working in rows or rounds. For dogs, you might make floppy ears (worked in ovals) or pointy upright ones.
The tail is another area to personalize. Cat tails are often long and flexible, while dog tails may be curly, short, or wagging. Begin with a magic ring, then crochet a long tube with or without stuffing, depending on how firm or flexible you want it.
Sew the ears onto the head symmetrically and attach the tail to the back of the body. Use pins to place them first and make adjustments before stitching. Don’t forget to curve or pose the tail slightly—it adds a lot of character to your crochet animal.
Legs, Paws, and Finishing Details
Now let’s work on the legs and paws, which can be attached or crocheted directly onto the body. For sitting animals, short round legs work well. For standing poses, longer legs with flat bases help keep balance.
Each leg starts with a magic ring, followed by rounds of increases. Then crochet evenly to form the leg tube. For feet, create a slightly wider base and stitch paw pads or claws if desired. Assemble four legs, and stuff them lightly to allow some flexibility.
Sew each leg carefully to the body. Make sure the front and back legs are symmetrical so the plushie sits or stands evenly. After that, embroider the nose, whiskers, mouth, or add small felt details. This is the moment your little animal truly comes to life.
Customizing Breeds and Personalities
One of the most exciting aspects of crochet patterns is how easily they can be customized. You can create nearly any breed of cat or dog by adjusting the color, size, ear shape, and tail design.
Want a Siamese cat with blue eyes? Use cream yarn and dark brown for ears and tail. Looking to replicate your French bulldog? Use short, rounded ears and a flat face. Even fantasy breeds like rainbow dogs or cartoon-style cats are easy to make with colorful yarns and felt embellishments.
Add accessories like a tiny collar, bell, bow, or name tag to reflect your real-life pets or your imagination. With crochet, there are no limits—each piece becomes a personal creation with love stitched into every round.
Why Crochet Cats and Dogs Make Perfect Gifts
Crochet cats and dogs are wonderful handmade gifts. They’re ideal for birthdays, pet memorials, baby showers, or just to show someone you care. Animal lovers especially appreciate these thoughtful, soft, and safe toys.
You can also use them for home décor—place a cat on a bookshelf or a dog on a couch. Many people crochet these animals to remember beloved pets who have passed away. The process is therapeutic and provides a lasting memory.
If you’re running a craft shop or selling on Etsy, crochet patterns for pets are always in demand. Offering customizable options (like using a photo of someone’s pet) can make your crochet business stand out.
Download the Pattern and Save for Later
If you found this tutorial helpful, bookmark the page or save it to your Pinterest board. You can also copy the written pattern into a notebook or Word doc for easy reference while working.
This crochet project is a blend of structure and creativity, offering enough flexibility for beginners to succeed and advanced crafters to experiment. Don’t be afraid to adapt the pattern to your needs or mix breeds and features.
Many creators also share their versions of crochet cats and dogs on social media. Search by hashtag, post your own work, and connect with fellow yarn lovers. Sharing your project can inspire others—and who knows, you might spark a new trend.
Conclusion
Crafting your own Crochet Cats and Dogs Pattern is both a heartwarming and fulfilling experience. With just some yarn, basic tools, and creativity, you can create loyal dogs, curious cats, or funny cartoon versions that reflect your unique style.
PATTERN HERE
Crochet – Tutorial
FULL PATTERN ACCESS
You will be redirected to another site
This project brings joy not only to the maker but also to everyone who sees or receives the finished piece. With the right materials, a good crochet pattern, and a little time, your collection of handmade pets will quickly grow.
Whether you’re honoring a beloved pet, making a gift, or simply enjoying the art of crochet, these animals are a rewarding way to stitch love into every loop.