
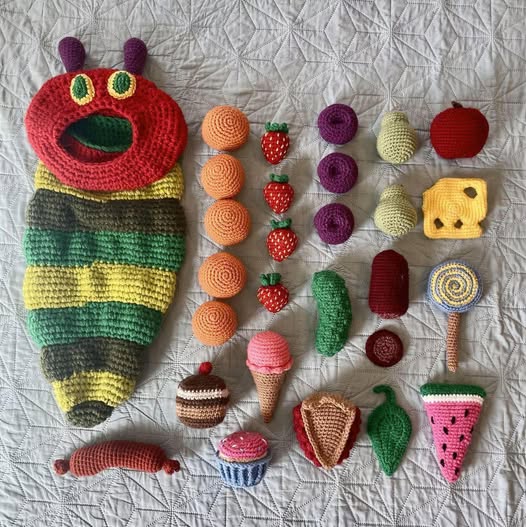
If you love colorful projects that bring smiles to children and adults alike, this Crochet Hungry Caterpillar Pattern is the perfect choice. Not only is it adorable, but it is also beginner-friendly and a wonderful way to practice basic Crochet techniques. Whether you are creating a handmade toy for a child, decorating a nursery, or adding a charming piece to your craft fair table, this Crochet project is sure to become a favorite.
Crochet toys are always popular because they combine creativity, relaxation, and functionality. In addition, handmade plushies have a special emotional value that store-bought items simply cannot match. This Crochet Pattern focuses on simple shapes, basic stitches, and easy assembly, making it ideal for those who are still building confidence in their skills.
Throughout this tutorial, you will learn how to create each section of the caterpillar step by step. Furthermore, you will discover helpful tips, customization ideas, and finishing techniques that will give your project a professional touch. So grab your yarn and hook, and let’s get started.
Materials You Will Need
Before beginning this Crochet Pattern, it is important to gather all the necessary materials. Having everything ready will make the process smoother and more enjoyable. Fortunately, this project uses basic supplies that most crocheters already have at home.
You will need medium-weight yarn in several bright colors, such as green, red, yellow, and blue. Additionally, you will need a 3.5 mm or 4.0 mm crochet hook, polyester fiberfill stuffing, a yarn needle, stitch markers, safety eyes, and scissors. If you prefer, you can also use embroidery thread to create facial details instead of safety eyes.
Choosing soft, high-quality yarn will make your Crochet caterpillar more cuddly and durable. Acrylic yarn works well for beginners, while cotton yarn offers a more structured finish. Whichever you choose, ensure your tension is consistent so your finished toy looks even and polished.
Basic Stitches and Abbreviations
This Crochet Pattern uses beginner-friendly stitches, so you do not need advanced techniques. However, reviewing the basic stitches before starting can help you feel more confident. The key stitches for this project include chain (ch), single crochet (sc), increase (inc), decrease (dec), and slip stitch (sl st).
Most of the caterpillar’s body is worked in continuous rounds, also known as spiral rounds. Therefore, it is helpful to use a stitch marker to mark the beginning of each round. This small detail will prevent mistakes and keep your shape symmetrical.
If you are new to amigurumi-style Crochet, do not worry. Take your time and count your stitches carefully. Additionally, remember that consistent tension is more important than speed. With practice, your hands will naturally become faster and more comfortable.
Step 1: Making the Caterpillar Head
To begin this Crochet Pattern, start with the head using red yarn. Create a magic ring and work 6 single crochet stitches into the ring. Then, pull the ring tight and place your stitch marker to mark the beginning of the round.
In the next round, increase in each stitch around to make 12 stitches. After that, alternate between single crochet and increase in the following round to reach 18 stitches. Continue increasing evenly until you reach approximately 30 stitches, depending on the size you prefer. This gradual increase forms a smooth, round shape.
Once the head reaches the desired width, crochet several rounds without increasing to build height. Then, insert the safety eyes between two middle rounds. Before closing the head, stuff it firmly with fiberfill. Finally, decrease evenly around until the opening closes completely, and fasten off securely.
Step 2: Creating the Colorful Body Segments
The body of the hungry caterpillar is made from multiple round segments in different colors. You can alternate green, yellow, blue, and light green for a vibrant look. Each segment is crocheted separately using the same basic shaping technique as the head but slightly smaller.
Start each segment with a magic ring and 6 single crochet stitches. Gradually increase to about 24 stitches, then crochet several rounds evenly. After that, lightly stuff the segment and close it using decreases. Repeat this process for as many segments as you would like, typically five to seven sections.
Consistency is key in this Crochet Pattern. Make sure each segment is approximately the same size so the caterpillar looks balanced. Moreover, keep your stuffing even but not overly tight, as this helps maintain a soft and flexible toy.
Step 3: Assembling the Caterpillar
After completing all the body parts, it is time to assemble your Crochet creation. Thread a yarn needle with matching yarn and begin attaching the segments together, starting from the head. Align each piece carefully before sewing to ensure straight placement.
Sew each segment securely, going back and forth several times for durability. This is especially important if the toy will be handled by children. Additionally, check that the segments sit snugly together without large gaps.
Once all the pieces are attached, gently adjust the stuffing if needed. At this stage, your caterpillar should have a soft, curved body that looks playful and lively. The assembly process truly brings this Crochet Pattern to life.
Step 4: Adding Details and Personality
Details make a big difference in any Crochet project. To give your caterpillar character, you can embroider a smiling mouth using black thread. Alternatively, you can add rosy cheeks with a small amount of pink yarn or fabric blush.
You may also create tiny antennae by attaching short chains of yarn to the top of the head. For a more whimsical look, add small crocheted leaves or flowers along the body. These small touches elevate the overall appearance.
Personalization allows you to transform a simple Crochet Pattern into something unique. Therefore, feel free to experiment with color combinations, facial expressions, or even themed designs for holidays and birthdays.
Customization Ideas for Every Occasion
One of the best things about this Crochet Pattern is its versatility. For example, you can turn the caterpillar into a baby rattle by inserting a small rattle insert inside the head before stuffing. This makes it both cute and functional.
Another idea is to create a larger version by using bulky yarn and a bigger hook. This results in a giant, huggable caterpillar that works beautifully as nursery decor. Conversely, using thinner yarn will produce a mini version perfect for keychains.
Additionally, you can incorporate educational elements by stitching numbers or letters onto each body segment. This transforms your Crochet project into a playful learning tool that children will enjoy.
Tips for a Professional Finish
Even beginners can achieve polished results by following a few simple tips. First, always weave in your ends securely and hide them inside the body segments. This keeps your Crochet toy looking clean and tidy.
Second, check your stitch count at the end of every round. Small mistakes can affect the final shape, so catching them early saves time. Moreover, use high-quality stuffing to maintain the toy’s shape over time.
Finally, block lightly if needed to smooth out uneven areas. Although amigurumi does not always require blocking, a gentle adjustment can enhance symmetry. Attention to detail makes your Crochet Pattern stand out.
Final Thoughts and Share Your Creation
Creating this Crochet Hungry Caterpillar Pattern is more than just making a toy. It is an opportunity to relax, express creativity, and produce something meaningful by hand. Additionally, it is a fantastic project for building confidence in Crochet skills.
As you practice this Crochet Pattern, you will likely notice improvement in your stitch consistency and shaping techniques. Therefore, do not rush the process. Enjoy every step, from choosing yarn colors to sewing the final segment in place.
Once your caterpillar is complete, share your creation with friends, family, or on social media. Inspire others to try this delightful Crochet project and spread the joy of handmade crafts. I would love to see your finished Hungry Caterpillar, so feel free to tag and share your beautiful work!
PATTERN HERE
Crochet – Tutorial
FULL PATTERN ACCESS
You will be redirected to another site