Creating small crochet butterflies is also a relaxing way to practice basic stitches while making something charming and versatile. In this tutorial, you will learn the full step-by-step process, materials needed, helpful tips, and finishing ideas for your crochet butterflies.
Materials Needed
Before starting your Crochet Little Butterfly Pattern, gather the following supplies:
- Cotton yarn or lightweight acrylic yarn
- Crochet hook (2.5 mm to 4 mm)
- Small scissors
- Yarn needle
- Stitch marker (optional)
- Beads or pearls for decoration (optional)
Recommended Yarn Colors
You can make butterflies in many beautiful color combinations:
- Yellow and white
- Pink and purple
- Blue and turquoise
- Black and gold
- Rainbow multicolor
Using bright colors helps the butterfly details stand out beautifully.
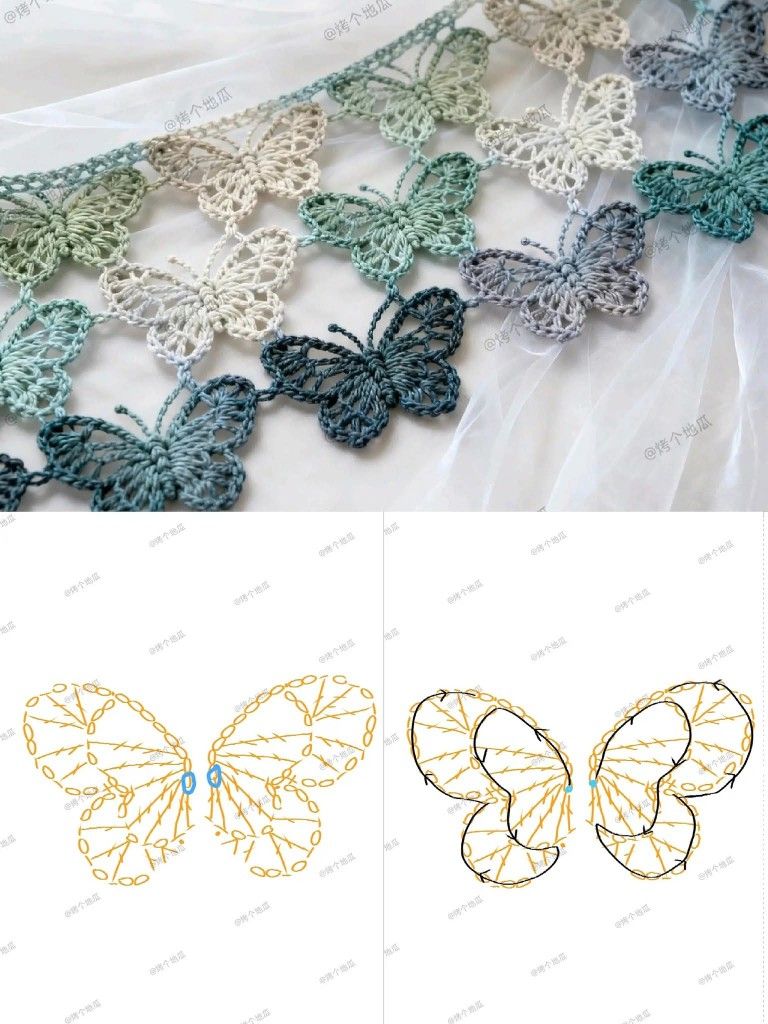
Crochet Abbreviations
This tutorial uses standard US crochet terms:
- ch = chain
- sl st = slip stitch
- sc = single crochet
- dc = double crochet
- tr = treble crochet
- st = stitch
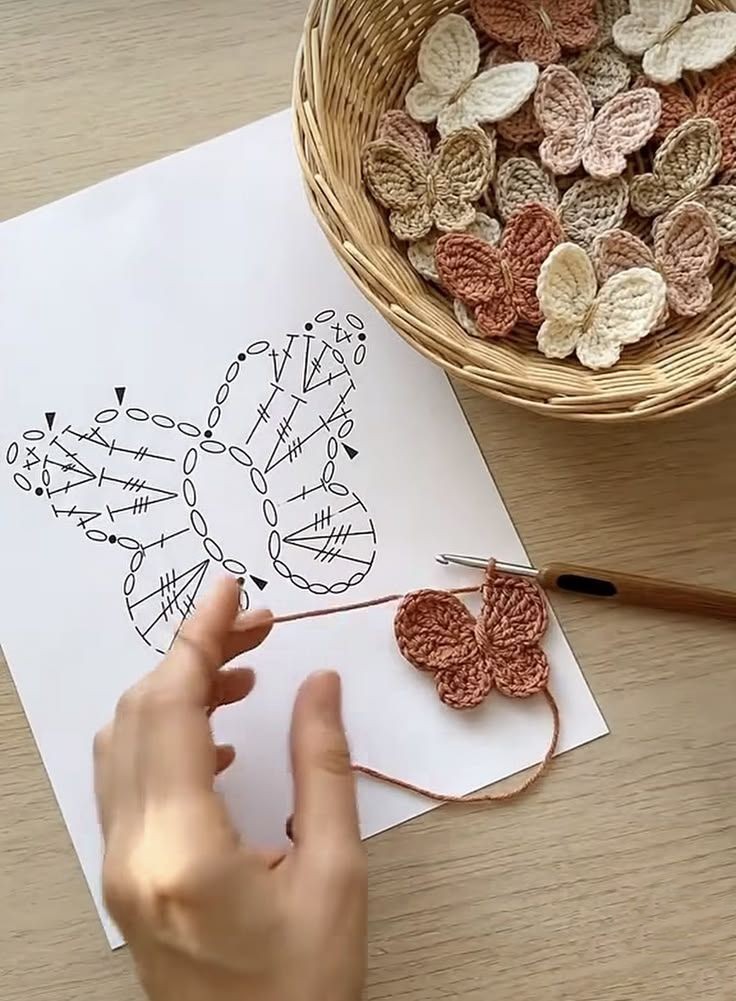
Step 1 – Make the Magic Ring
Start by creating a magic ring.
- Wrap the yarn around your fingers.
- Insert the hook into the ring.
- Pull up a loop.
- Chain 2.
The magic ring creates the center of the butterfly.
If you prefer, you can substitute:
- ch 4
- join with sl st to form a ring
Step 2 – Create the First Upper Wing
Into the magic ring:
- 3 dc
- ch 2
- 3 dc
This forms the first large upper wing of the butterfly.
The chain space creates the curved wing shape and gives the butterfly a soft decorative look.
Step 3 – Create the First Lower Wing
Still inside the magic ring:
- 2 dc
- ch 1
- 2 dc
This forms the smaller lower wing.
The lower wings should look slightly smaller than the upper wings to give the butterfly a realistic appearance.
Step 4 – Repeat for the Other Side
Repeat the same pattern inside the magic ring:
Upper Wing
- 3 dc
- ch 2
- 3 dc
Lower Wing
- 2 dc
- ch 1
- 2 dc
Now your butterfly shape should be visible.
Finish with:
- sl st into the center ring
Pull the magic ring tightly closed.
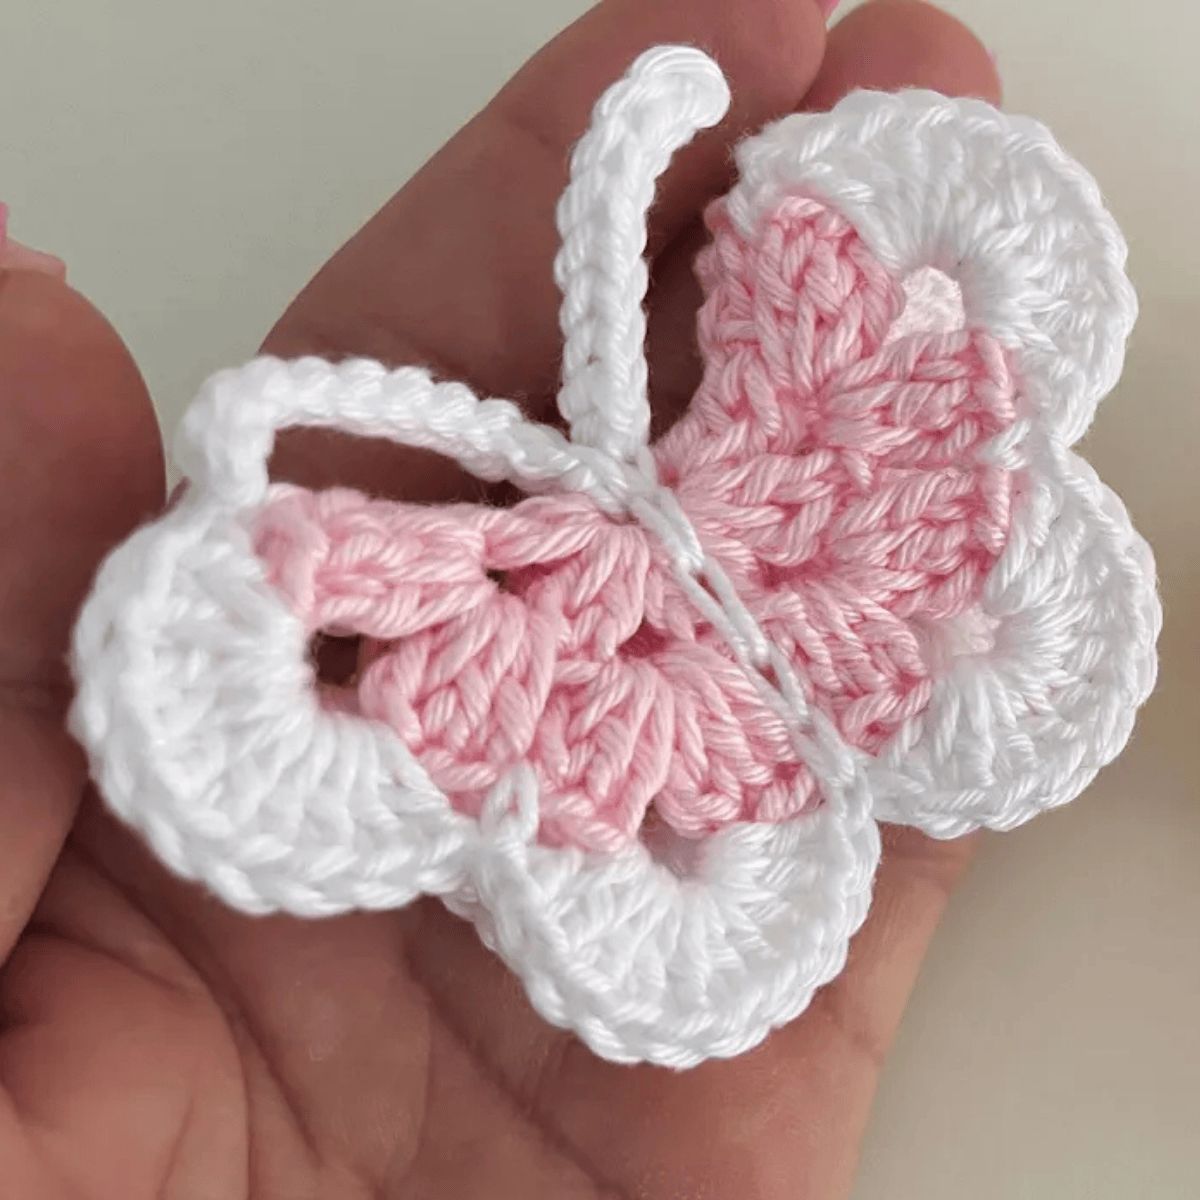
Step 5 – Make the Butterfly Body
To create the body:
- Chain 6.
- Slip stitch back down the chain.
This creates a small raised center body.
Leave a longer yarn tail if you want to attach the butterfly to another project later.
Step 6 – Shape the Antennae
Use the yarn tails to create tiny antennae:
- Tie a small knot at the end of each strand.
- Trim evenly with scissors.
You can also add tiny beads to the antennae for decoration.
Finishing the Butterfly
Weave in all loose ends carefully using a yarn needle.
Lightly shape the wings with your fingers. If desired, you can gently steam block the butterfly so the wings stay open and flat.
Optional Decorative Ideas
Your Crochet Little Butterfly Pattern can be used in many creative ways:
Hair Accessories
Glue or sew butterflies onto:
- Hair clips
- Headbands
- Hair ties
Clothing Decoration
Attach them to:
- Denim jackets
- Baby dresses
- Sweaters
- Scarves
Home Décor
Use butterflies for:
- Garland decorations
- Pillow embellishments
- Wall art
- Curtain tiebacks
Gift Wrapping
Crochet butterflies make beautiful reusable gift toppers.
Helpful Crochet Tips
Keep Tension Even
Consistent tension helps both wings stay symmetrical.
Use Smaller Hooks
Smaller hooks create firmer stitches and better butterfly definition.
Experiment With Thread
Crochet thread creates delicate lace-style butterflies perfect for elegant projects.
Add Sparkle
Metallic yarn or tiny beads can make your butterflies extra decorative.
Beginner-Friendly Adjustments
If you are new to crochet:
- Use thicker yarn for easier handling.
- Practice basic stitches first.
- Make larger butterflies using bulky yarn and bigger hooks.
This project is excellent for improving stitch control and learning crochet shaping techniques.
Final Thoughts
The Crochet Little Butterfly Pattern is a quick, beautiful, and versatile project that adds charm to almost anything. Whether you use them for decorations, accessories, or gifts, these tiny butterflies are fun to make and perfect for using leftover yarn.
With only a few basic stitches, you can create colorful butterflies in endless combinations and styles. Once you make one, it becomes hard to stop creating more for every project imaginable.
PATTERN HERE
CROCHET PATTERNS
FULL PATTERN ACCESS
You will be redirected to another site