
If you’re looking for a charming and satisfying crochet project, the crochet turtle is the perfect pick! This cute and cozy pattern is ideal for gifting, decorating, or simply adding to your collection of handmade animals. Using just a few basic stitches, you can bring this lovable creature to life in a surprisingly short amount of time.
In this tutorial, we’ll walk you through how to create your very own crochet turtle—from shell to tail. Whether you’re a confident beginner or an intermediate crocheter, this project is a great opportunity to expand your skills and experiment with texture, shaping, and color.
Materials You’ll Need
Before you get started, gather the following materials to ensure a smooth and enjoyable crochet experience. Most of these items are easily available at local craft stores or online.
Materials List:
- Worsted weight yarn (2–3 colors: green, brown, and an accent color)
- Crochet hook size 3.5 mm or 4.0 mm (E or G)
- Yarn needle for sewing parts and weaving in ends
- Stuffing (polyester fiberfill or cotton)
- Safety eyes (6mm–10mm) or black yarn to embroider eyes
- Stitch markers (optional but helpful)
- Scissors
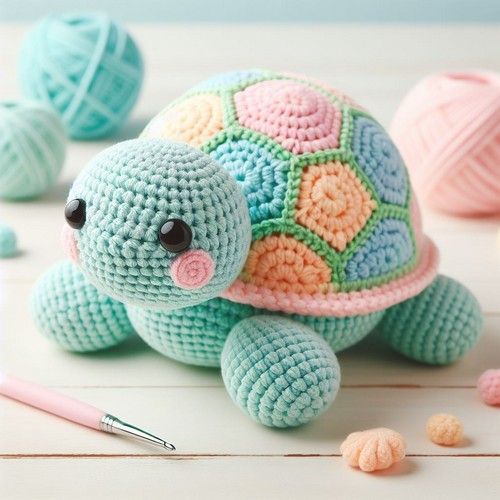
When it comes to choosing yarn, try mixing bold and neutral tones. Don’t forget to experiment with different color combinations—a multicolored shell or pastel limbs can make your turtle even more fun and unique!
What Makes the Crochet Turtle Special?
Turtles are one of the most popular creatures in amigurumi thanks to their adorable design and round, structured body. This particular crochet pattern uses both texture and shape to create a realistic yet cartoon-like version of a turtle that is truly heartwarming.
Whimsical and Customizable
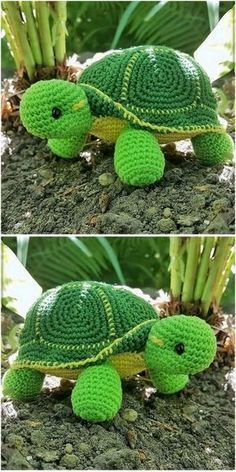
The crochet turtle can be as colorful or as natural as you like. Choose forest greens for a realistic look or soft pinks and purples for a dreamy toy-style turtle. The possibilities are endless.
Fun for All Ages
This project is small enough to be completed in an afternoon and makes a wonderful toy for children or a cute desk companion for adults. It also makes a thoughtful handmade gift.
Perfect for Practice
You’ll practice techniques like working in the round, increasing, and sewing parts together. This is a perfect opportunity to build your confidence before moving on to more complex amigurumi projects.
Step 1: Crochet the Turtle Shell (Top)
The shell is the focal point of the crochet turtle, and it’s built with simple increases in the round. This is a great chance to explore texture by using a rich color or even variegated yarn.
Starting in the Round
Begin with a magic ring and single crochet (sc) 6 stitches into it. Use a stitch marker to mark the first stitch of each round. For the next rounds, increase evenly to form a flat circle.
Building the Dome
As you continue adding stitches in each round, the piece will grow outward and gently start curving into a dome. You can achieve a nice, soft shell by using 6–8 rounds, depending on your desired size.
Customize Your Shell
Feel free to add surface stitches or color changes to create a unique pattern on the shell. Perfect for adding a touch of floral detail to your next project!
Step 2: Crochet the Turtle Belly (Bottom Shell)
The underside of the turtle is worked flat and circular, just like the top shell, but without curving. It should match the top in diameter.
Flat and Simple
Work a magic ring, increase in single crochets each round, and stop when it matches the top shell in size. This piece will remain flat to support the stuffing inside.
Contrasting Color Tip
Use a lighter shade or even a bright color to contrast with the top shell. This gives your turtle more visual appeal and makes the finished piece look well-designed.
Leave a Long Tail for Sewing
When you finish the belly, fasten off but leave a long tail of yarn to sew it to the top shell after stuffing.
Step 3: Make the Turtle’s Head
The turtle’s head is worked in the round and shaped into a soft oval. You can make it larger or smaller depending on your turtle’s personality.
Forming the Head
Start with a magic ring and increase to create a round base. After a few rounds, stop increasing and crochet in a tube to create the length of the head. Slightly taper toward the end for realism.
Adding Eyes and Expression
Insert safety eyes or embroider small eyes using black yarn. Add optional features like a small embroidered mouth or blush for extra cuteness.
Stuff Lightly
Stuff the head lightly so it remains soft and plush. Too much stuffing can make it rigid or distort the shape.
Step 4: Create the Limbs and Tail
Each of the turtle’s legs, arms, and tail is created separately and sewn on later.
Small Tubes for Limbs
Work small tubes in the round—around 5–6 stitches wide—for the front and back legs. Make them 5–6 rounds long. Lightly stuff each before attaching.
Tiny Tail
A little triangle or small cone shape is all you need for the tail. Begin with 3 stitches in a magic ring and work 2–3 rounds to create a stubby tail.
Play with Color
You can match the limb and head color or make them complementary. Don’t be afraid to get creative!
Step 5: Assemble Your Crochet Turtle
Now that all the parts are complete, it’s time to put everything together. This is the most exciting step—seeing your turtle come to life!
Start with the Shell
Place a small amount of stuffing inside the shell. Use a yarn needle to sew the top and bottom together, inserting more stuffing if needed as you go around.
Attach Head and Limbs
Sew the head slightly forward on the underside of the shell. Then evenly space the legs—two in front, two in back—and sew them securely. Finish with the tail at the back.
Final Touches
Check for any loose yarn ends and weave them in. You can add a bow, tiny flower, or embroidered initials for a personal touch.
Helpful Tips for Success
This pattern is designed to be relaxing and creative. Here are a few tips to help ensure success:
- Use a stitch marker to keep track of the beginning of each round.
- Keep your stitches tight to avoid stuffing showing through.
- Choose soft, flexible yarns for a cuddly finish.
- Try color changes mid-round for stripy turtles.
- Block the pieces lightly with steam before assembling if needed.
Crochet Turtle Pattern Recap (Quick Steps)
Here’s a simplified version of the pattern steps:
- Shell (Top) – Magic ring, increase in rounds, shape into a dome.
- Belly (Bottom) – Flat rounds to match the shell’s diameter.
- Head – Oval shape, add eyes, stuff, and finish.
- Limbs – Small tubes or ovals, lightly stuffed.
- Tail – Tiny cone shape.
- Assembly – Sew all parts together and customize as desired.
Conclusion: Keep Crocheting, Keep Creating
PATTERN HERE
Crochet – Tutorial
FULL PATTERN ACCESS
You will be redirected to another site
There’s nothing quite like bringing a soft, handmade creature to life with your own two hands. This crochet turtle project is the perfect way to stretch your creativity while producing something truly adorable. With its customizable features and beginner-friendly stitches, it’s a joy from start to finish.
So go ahead—grab your hook, pick your yarn, and create your very own turtle today. Whether you’re gifting it, keeping it, or adding it to your amigurumi collection, this turtle is sure to bring a smile.
Don’t forget to experiment with combinations of colors and little details like bows, flowers, or even tiny hats. Each turtle you make can have its own personality.
And if you loved this project, there’s more where that came from! Explore our other crochet patterns to discover more animals, accessories, and creative inspiration.
Happy Crocheting!