
Creating a double padded potholder is an excellent way to combine functionality with creativity. Not only will you have a practical kitchen accessory, but you’ll also enjoy working on a small quilting project that helps build your skills. In this tutorial, we’ll guide you through every step of making a quilted potholder that is both beautiful and durable. Whether you are a beginner or an experienced quilter, this project is perfect for a quick and satisfying result.
Why Make a Double Padded Potholder?
A potholder is essential for any kitchen, but a double padded one provides extra protection against heat. This makes it ideal for handling hot pots, pans, and dishes safely. Unlike single-layer potholders, the additional padding ensures that your hands stay protected even with heavy-duty cooking.
Another reason to love this project is that it gives you a chance to experiment with a small quilt pattern. If you’ve always wanted to try quilting but didn’t know where to start, a potholder is a great entry point. It allows you to practice your piecing, quilting, and binding techniques without the commitment of a large quilt.
Plus, double padded potholders make thoughtful and practical gifts. Handmade kitchen accessories are always appreciated, and you can customize them with fabrics that match your recipient’s style. Ready to get started? Let’s go through everything you’ll need!
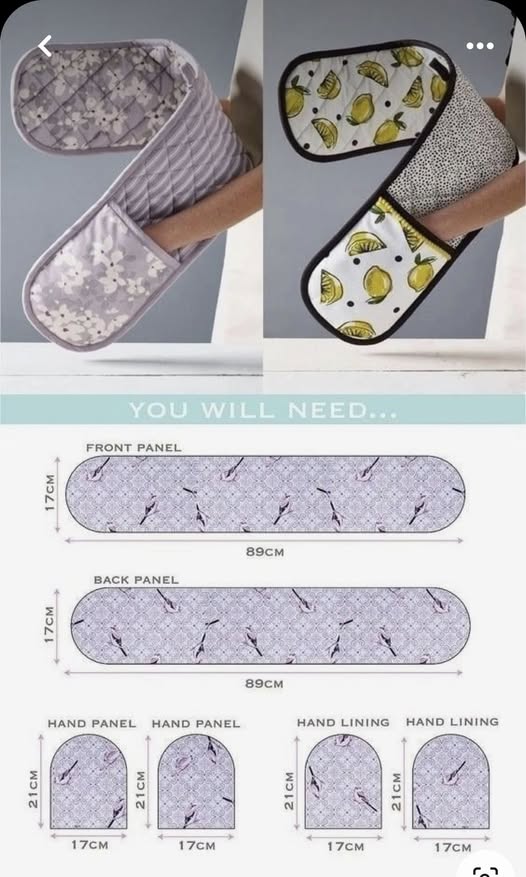
Materials Needed
Before we begin, gather the following materials:
- Fabric: Two coordinating cotton fabrics for the front and back (each about 10″ x 10″)
- Binding fabric: 2.5″ wide strip, approximately 45″ long
- Insulated batting: Two pieces, each 9″ x 9″ (such as Insul-Bright)
- Cotton batting: One piece, 9″ x 9″
- Thread: 100% cotton thread in a matching or contrasting color
- Tools: Rotary cutter, quilting ruler, cutting mat, sewing machine, pins or clips, and an iron
Using the right materials is important for durability and heat resistance. Insulated batting is the key to protecting your hands from heat, so do not skip it. Combining it with cotton batting will give your potholder the double-padded thickness we’re aiming for.
Cutting the Fabrics
Now that you have your supplies, it’s time to cut your pieces to the right size. Cutting accurately ensures that your potholder looks neat and professional. Follow these measurements:
- Front fabric: Cut a 9″ x 9″ square
- Back fabric: Cut a 9″ x 9″ square
- Insulated batting: Two pieces, 9″ x 9″ each
- Cotton batting: One piece, 9″ x 9″
If you want to add a hanging loop to your potholder, cut an additional piece of fabric measuring 2″ x 6″. Fold and press it lengthwise to make a strip that you’ll attach later. Accuracy matters in quilting, so use a rotary cutter and a quilting ruler for the cleanest edges.
Assembling the Layers
To create the quilted potholder, you’ll be making a small quilt sandwich. Lay the layers in this order:
- Back fabric (right side down)
- First insulated batting
- Second insulated batting
- Cotton batting
- Front fabric (right side up)
This stack will create the perfect double padding for your potholder. Smooth out the layers to remove any wrinkles and pin them together to prevent shifting while sewing. You can also use temporary spray adhesive if you prefer.
The key to making a great quilted potholder is securing these layers so they act as one. Next, we’ll quilt the layers together using a simple yet attractive design.
Quilting the Layers
Quilting is what gives your potholder its texture and durability. For beginners, a straight-line quilting design is the easiest to execute. Here’s how to do it:
- Set up your sewing machine with a walking foot if you have one—it helps feed the layers evenly.
- Start by quilting diagonal lines across the potholder, spacing them about 1″ apart.
- Then, quilt perpendicular lines to form a diamond or grid pattern.
Not only does this process hold the layers together, but it also adds a decorative touch to your finished piece. If you want to try something different, consider free-motion quilting or wavy lines for a playful effect. The beauty of quilting is that there’s no one right way—just make sure the layers are securely stitched.
Adding the Binding
Once the quilting is complete, it’s time to add the binding. This step gives your potholder a polished edge and reinforces its durability. Follow these steps:
- Trim the edges of the quilted piece so they’re even and square.
- Take your 2.5″ wide binding strip and fold it in half lengthwise, wrong sides together. Press well.
- Align the raw edges of the binding with the raw edges of the potholder, starting in the middle of one side.
- Sew around the edges with a ¼” seam allowance, mitering the corners as you go.
- Fold the binding over to the back and hand-stitch or machine-stitch it down for a clean finish.
If you want to add a hanging loop, insert the folded strip into one corner before sewing the binding. This small detail makes your potholder easy to store and adds functionality.
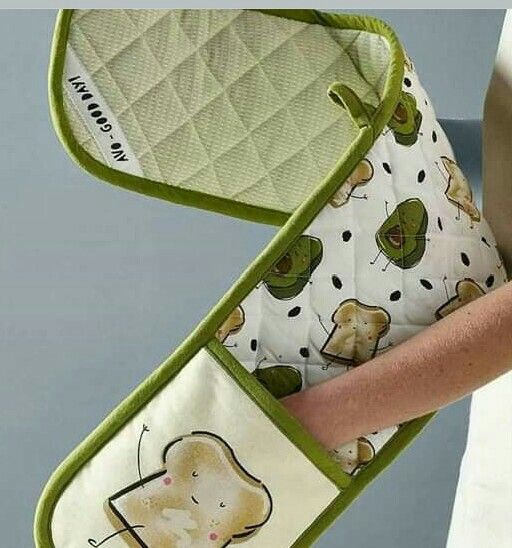
Personalization Ideas
One of the best things about making your own potholders is that you can customize them any way you like. Here are some creative ideas:
- Use bold prints: Bright, colorful fabrics make your potholder stand out and add charm to your kitchen.
- Add applique: A small applique design on the front adds personality and uniqueness to your project.
- Experiment with quilting patterns: Try hearts, spirals, or geometric designs for an artistic touch.
Personalizing your potholder is not only fun but also makes it an excellent handmade gift. Imagine presenting a set of custom potholders at a housewarming party—they’ll be a hit!
Final Touches and Care
After finishing your double padded potholder, give it a final press with a warm iron to smooth out any wrinkles. Your new kitchen accessory is now ready for action! Because it’s made of cotton, it’s machine washable, but always avoid using fabric softener on quilted projects—it can affect the batting’s heat resistance.
The durability of this potholder means it will last for years, protecting your hands from burns and adding beauty to your kitchen. You can even make a matching set or pair it with other quilted kitchen items like placemats and table runners.
Share Your Project!
We’d love to see your creativity! If you try this Double Padded Potholder – Quilt Pattern tutorial, share your finished project on social media. Use hashtags like #QuiltPattern and #QuiltingProjects to inspire others in the quilting community. Whether you make one for yourself or as a gift, this small project is a great way to practice quilting skills and create something useful.
Happy quilting, and don’t forget—the best projects are the ones you enjoy making. So grab your fabric, start stitching, and have fun creating your double padded potholder today!