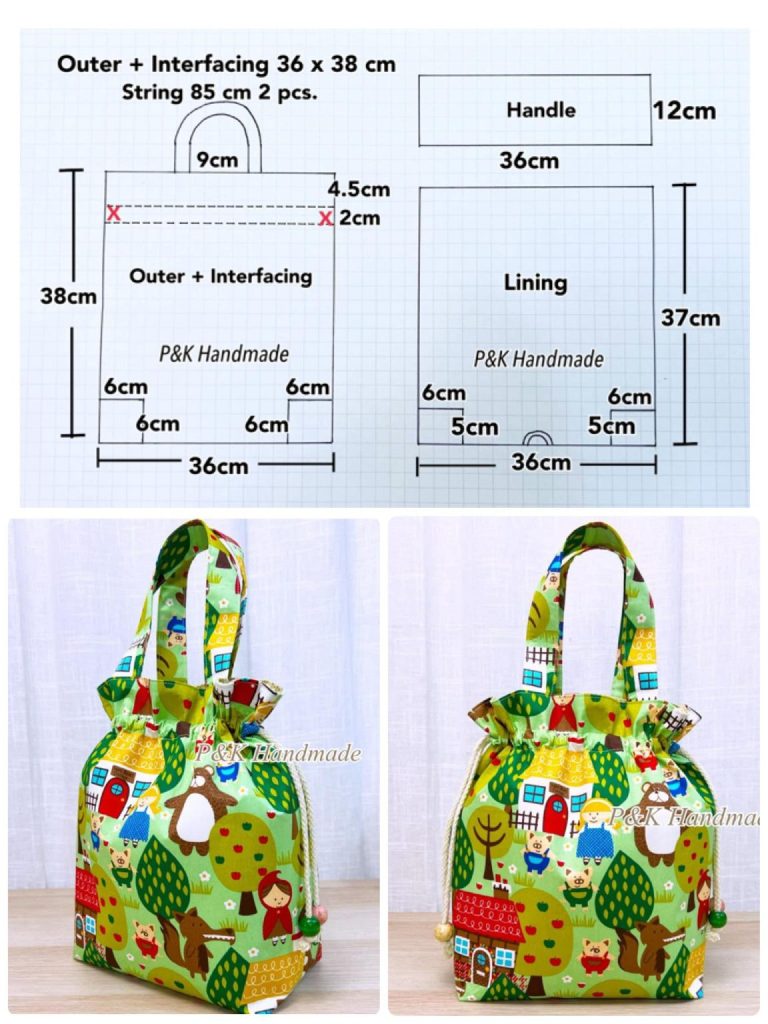
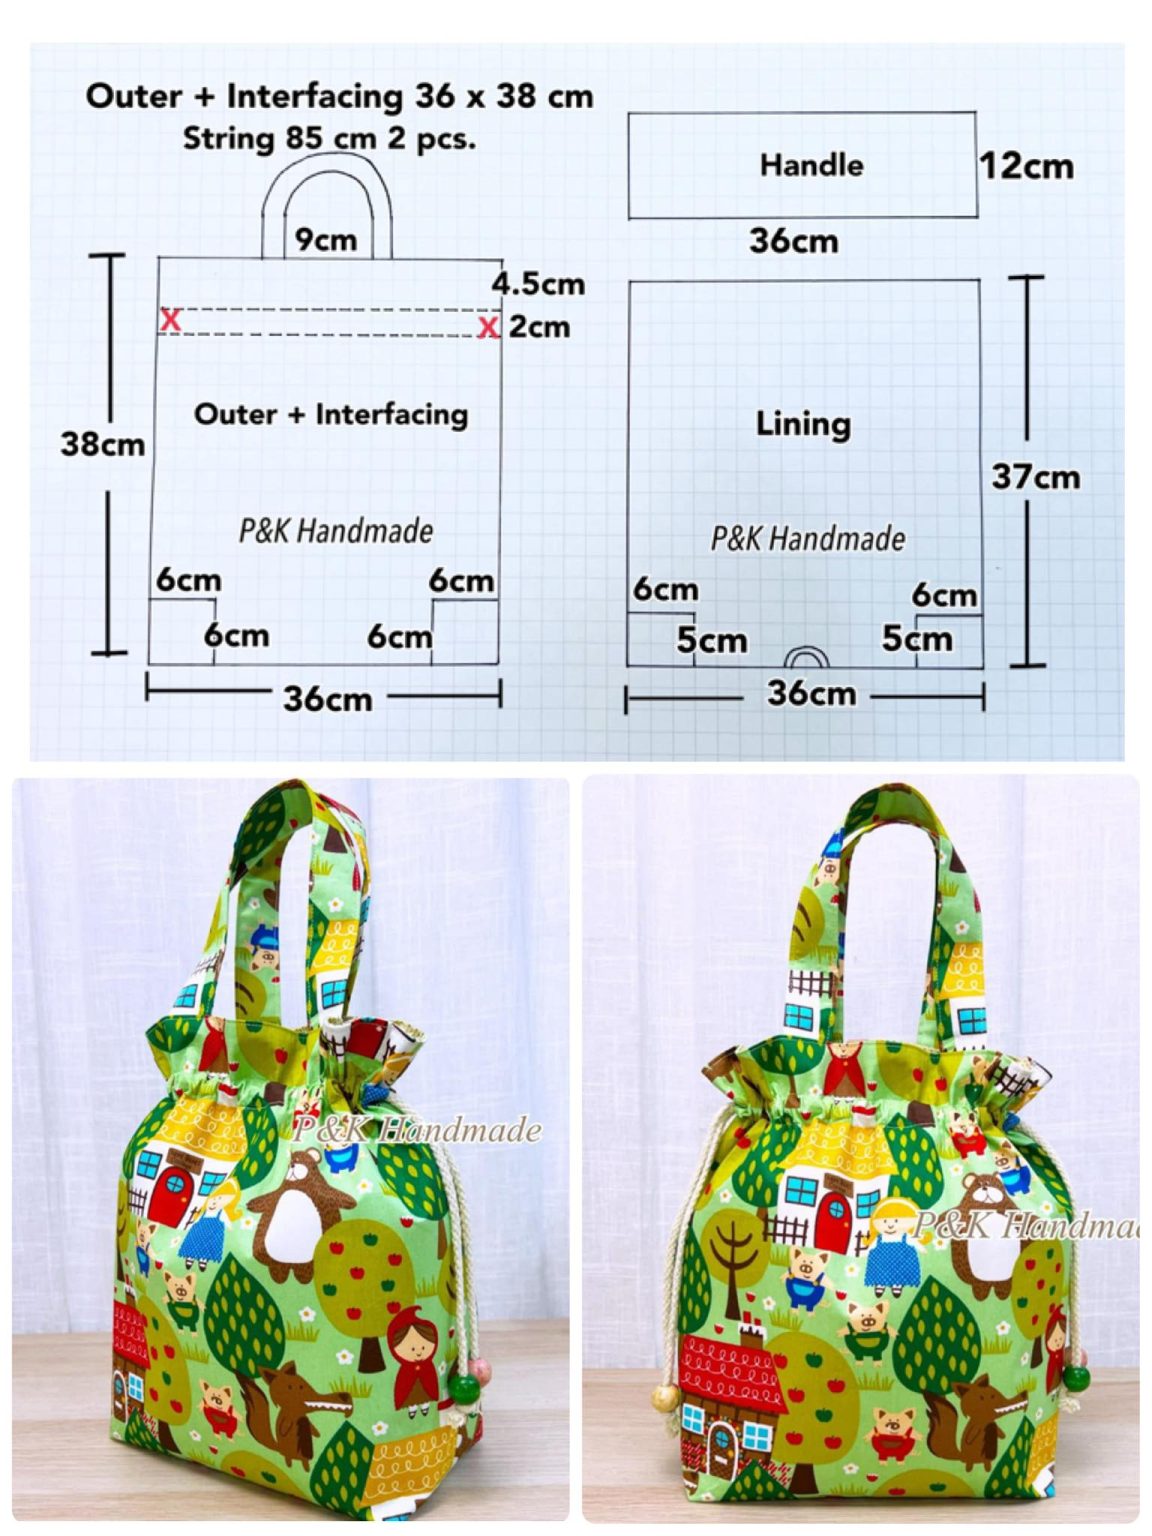
Are you looking for a fun and practical quilting project? A Drawstring Bag Quilt Pattern is the perfect choice! Not only is it an excellent way to use your fabric scraps, but it also gives you a stylish and functional accessory that can be customized for any occasion. Whether you’re a beginner or an experienced quilter, this tutorial will guide you step-by-step through the process of making your very own quilted drawstring bag.
Why Choose a Drawstring Bag Quilt Pattern?
A drawstring bag is a versatile accessory. You can use it for carrying small items, storing craft supplies, or even as a reusable gift bag. When made with a quilted design, it becomes more durable and adds a touch of handmade charm. This project combines functionality with creativity, making it a favorite among quilting enthusiasts.
Creating a quilted drawstring bag also allows you to explore different quilt patterns in a small, manageable format. Unlike a full-sized quilt, this project doesn’t require a large amount of fabric or time, making it ideal for beginners who want to practice their skills without feeling overwhelmed.
Moreover, these bags make excellent gifts! You can customize them with themed fabrics, monograms, or unique quilt blocks. Once you learn the process, you’ll find yourself making these beautiful quilted drawstring bags for friends, family, and even craft fairs.
Materials Needed
Before diving into the tutorial, let’s gather all the materials. Having everything ready ensures a smooth quilting experience and makes the project more enjoyable.
- Fabric for the exterior: Choose 2–3 coordinating prints. Quilting cotton works best.
- Lining fabric: A soft cotton or lightweight fabric.
- Batting: Thin cotton batting for quilting.
- Drawstring cords: Cotton cords or ribbons, about 40–50 inches each.
- Thread: Matching or contrasting, depending on your design.
- Basic quilting tools: Rotary cutter, cutting mat, ruler, pins, and sewing machine.
- Iron: For pressing seams and creating a professional finish.
Feel free to dig into your fabric stash for this project! A Drawstring Bag Quilt Pattern is a fantastic way to use leftover quilting scraps. Mix and match prints to create something truly unique and personalized.
Cutting Instructions
Accurate cutting is crucial for a neat and professional finish. Below are the recommended measurements for a standard-size drawstring bag:
- Exterior fabric:
- Two rectangles, each 12″ x 14″
- Lining fabric:
- Two rectangles, each 12″ x 14″
- Batting:
- Two rectangles, each 12″ x 14″
- Casing strips:
- Two pieces, each 2″ x 12″
- Drawstrings:
- Two cords, each 20–25″
If you’d like a larger or smaller bag, you can adjust the dimensions accordingly. Keep in mind that any size change should apply to both the exterior and lining pieces for a proper fit.

Step-by-Step Instructions
Now comes the exciting part: creating your quilted drawstring bag! Follow these steps carefully to achieve a beautiful and functional bag.
Step 1: Quilting the Exterior Panels
Start by layering each exterior fabric piece with a piece of batting. Pin or baste them together. Using your sewing machine, quilt the layers in your preferred pattern. Straight-line quilting works great for beginners, but feel free to try diagonal lines or a simple grid design. Trim any excess batting after quilting.
Step 2: Preparing the Casing
Take your two casing strips and press the short edges under by ¼ inch, then stitch them down to prevent fraying. Fold each strip in half lengthwise, wrong sides together, and press. These will hold the drawstrings in place later.
Step 3: Assembling the Bag
Place one quilted panel and one lining piece right sides together, and sew along the top edge. Repeat with the other set. Press the seams open, then position the casing strips on the exterior side, aligning them with the top seam. Sew the sides and bottom edges of the bag, leaving a small opening in the lining for turning.
Turning and Finishing the Bag
Once you’ve stitched the sides, turn the bag right side out through the opening in the lining. Press everything neatly, then close the opening with a slip stitch or machine stitch. Push the lining into the bag and give the top edge a final press.
Thread the drawstring cords through the casings using a safety pin or bodkin. Insert one cord from the left side and another from the right side so they overlap inside the casing. Knot the ends of each cord securely.
Your quilted drawstring bag is now ready! Give it a final press, and admire your handiwork. It’s a beautiful combination of quilting skills and practical use.
Customization Ideas
One of the best things about making a drawstring bag quilt pattern is the endless customization options. Here are a few creative ideas to make your bag stand out:
- Patchwork Style: Instead of using solid fabric pieces for the exterior, create a patchwork panel using leftover quilt blocks. This adds personality and helps you use fabric scraps.
- Appliqué Accents: Add shapes, initials, or motifs with appliqué for a personalized touch.
- Seasonal Themes: Use festive fabrics for holidays or bright florals for summer bags. They make great themed gift bags.
You can also experiment with different quilting stitches or add decorative elements like buttons, lace, or embroidery to give your bag a truly unique finish.
Why You’ll Love This Project
This Drawstring Bag Quilt Pattern is a quick and satisfying project that offers a perfect balance between creativity and utility. It’s great for beginners because it covers essential quilting techniques without requiring a large commitment of time or materials. Experienced quilters will also appreciate how customizable and versatile this pattern is.
From choosing fabrics to deciding on your quilting design, every step gives you the opportunity to make the project your own. And once you’ve made one bag, you’ll likely find yourself making several more – they’re that addictive!
Share Your Quilted Drawstring Bag!
Now that you’ve completed your beautiful bag, we’d love to see it! Share your finished project on social media using the hashtag #QuiltedDrawstringBag and inspire other quilting enthusiasts. Whether you followed this tutorial exactly or added your own creative twist, your work deserves to be celebrated.
So, gather your fabrics, pick your favorite quilt pattern, and start sewing. Happy quilting!

