Easter is a time for family, creativity, and, of course, beautiful decorations. If you love sewing and quilting, making fabric Easter eggs is a fun and easy way to bring a handmade touch to your holiday decor. This tutorial is perfect for beginners and will guide you through the process step by step. Using simple quilt patterns and colorful fabrics, you can create charming fabric eggs that can be used for table decorations, garlands, or gifts.
Materials Needed
Before you begin, gather all the necessary materials. Having everything ready will make the sewing process smooth and enjoyable. Here is what you will need:
- Fabric scraps in different colors and patterns (cotton works best)
- Quilt batting or light stuffing for a soft texture
- Sewing machine or a needle for hand stitching
- Matching thread to blend with your fabric choices
- Fabric scissors or a rotary cutter for precise cutting
- Pins or clips to hold fabric in place
- Paper or template plastic for egg-shaped patterns
Choosing fabrics with bright spring colors and floral quilt patterns will enhance the festive look of your Easter eggs. Mixing different patterns adds variety and depth to your design. Be sure to use soft yet durable fabric to ensure the eggs hold their shape.
Creating the Pattern
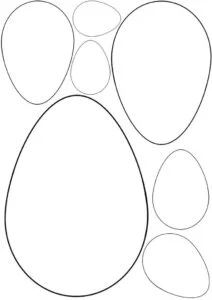
The first step in this tutorial is to create an egg-shaped template. This pattern will serve as a guide for cutting your fabric pieces evenly. You can either draw your own or find a free printable template online.
- Draw an egg shape on a piece of paper or template plastic, about 4-5 inches tall. If you want smaller or larger eggs, adjust the size accordingly.
- Cut out the template carefully using scissors, making sure the edges are smooth for accurate tracing.
- Trace the template onto the fabric, ensuring you mark at least two fabric pieces per egg.
For a quilted effect, consider using fabric scraps with existing quilt patterns. This will give your eggs a unique and decorative touch without requiring additional quilting steps.
Cutting the Fabric Pieces
Now that you have your template ready, it’s time to cut the fabric pieces. Accuracy in cutting ensures a professional-looking finished product.
- Lay your fabric flat and place the egg template on top.
- Trace around the template using a fabric pen or chalk, making sure to leave enough space for multiple cutouts.
- Cut two identical fabric pieces for each egg using fabric scissors or a rotary cutter.
If you want a quilted look, cut your fabric pieces from quilt patterns that have intricate designs. This will add visual interest and texture to your finished Easter eggs.
Sewing the Fabric Pieces Together
Once you have all your fabric pieces cut, it’s time to sew them together. This step is simple and requires only basic sewing skills.
- Place two fabric pieces right sides together so that the printed sides face inward.
- Pin around the edges to hold the fabric in place while sewing.
- Sew around the edge using a ¼-inch seam allowance, leaving a small opening at the bottom for stuffing.
If you are using a sewing machine, set it to a straight stitch with a small stitch length for durability. If sewing by hand, use a tight backstitch to prevent the fabric from fraying.
Stuffing the Fabric Eggs
After sewing, it’s time to stuff the eggs and give them their shape. Stuffing them correctly ensures they look full and maintain a soft, plush texture.
- Turn the fabric right side out through the opening you left unstitched.
- Fill the egg with quilt batting or fiberfill, adding small amounts at a time to create an even texture.
- Adjust the stuffing to ensure the egg has a smooth, rounded shape without lumps.
Avoid overstuffing, as this can make it difficult to sew the opening shut neatly. Instead, fill just enough to create a firm but squeezable egg.
Closing the Opening
Once the egg is stuffed to your liking, the final step is to close the opening. This step requires a bit of hand-sewing for a seamless finish.
- Tuck the raw edges inward and hold them together neatly.
- Use a ladder stitch or whipstitch to close the opening, making sure the stitches are small and secure.
- Knot the thread and trim any excess to keep the finish neat and professional.
If you prefer, you can use a small amount of fabric glue for added security, though hand-stitching is the best option for durability.


Decorating and Customizing
Now that your fabric Easter eggs are complete, it’s time to add decorative details! Customizing your eggs will make them even more special and unique.
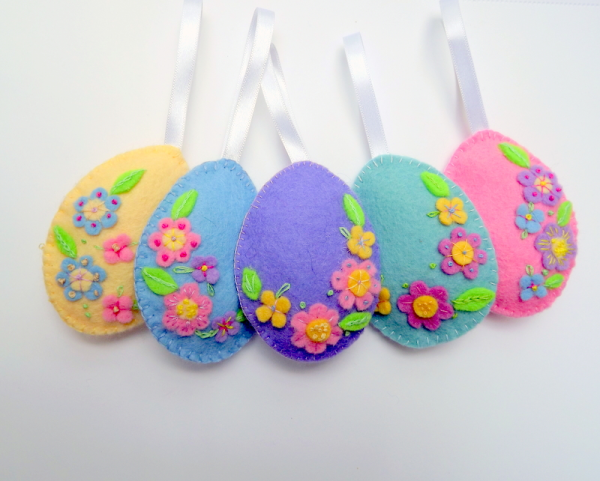
- Embroider simple designs like flowers, initials, or patterns onto the fabric.
- Attach ribbons or bows around the eggs to create a more festive look.
- Use fabric paint or buttons to enhance the design further.
Experiment with different quilt patterns and embellishments to make your eggs stand out. This is a great way to personalize them for gifts or home decor.
Displaying Your Fabric Easter Eggs
There are many creative ways to display your handmade fabric Easter eggs. Whether you want a centerpiece for your dining table or a festive arrangement, here are some ideas:
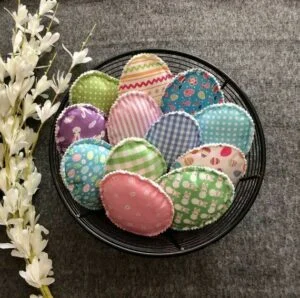
- Place them in a decorative basket with shredded fabric or faux grass for a charming centerpiece.
- String them together to create a beautiful Easter garland to hang on a mantel or wall.
- Use them as gifts by placing them in small bags or tying them with ribbons for a thoughtful handmade present.
Because these fabric eggs are soft and lightweight, they are safe for children and can be used year after year as part of your Easter decor.
Final Thoughts
Sewing fabric Easter eggs is a simple yet creative way to celebrate the season. Whether you are a beginner or an experienced sewist, this project is a great way to use up fabric scraps and incorporate quilt patterns into a festive craft. With just a few materials and basic sewing techniques, you can create beautiful Easter decorations that will be cherished for years to come.
So gather your fabrics, start sewing, and enjoy the joy of making handmade Easter crafts!

