
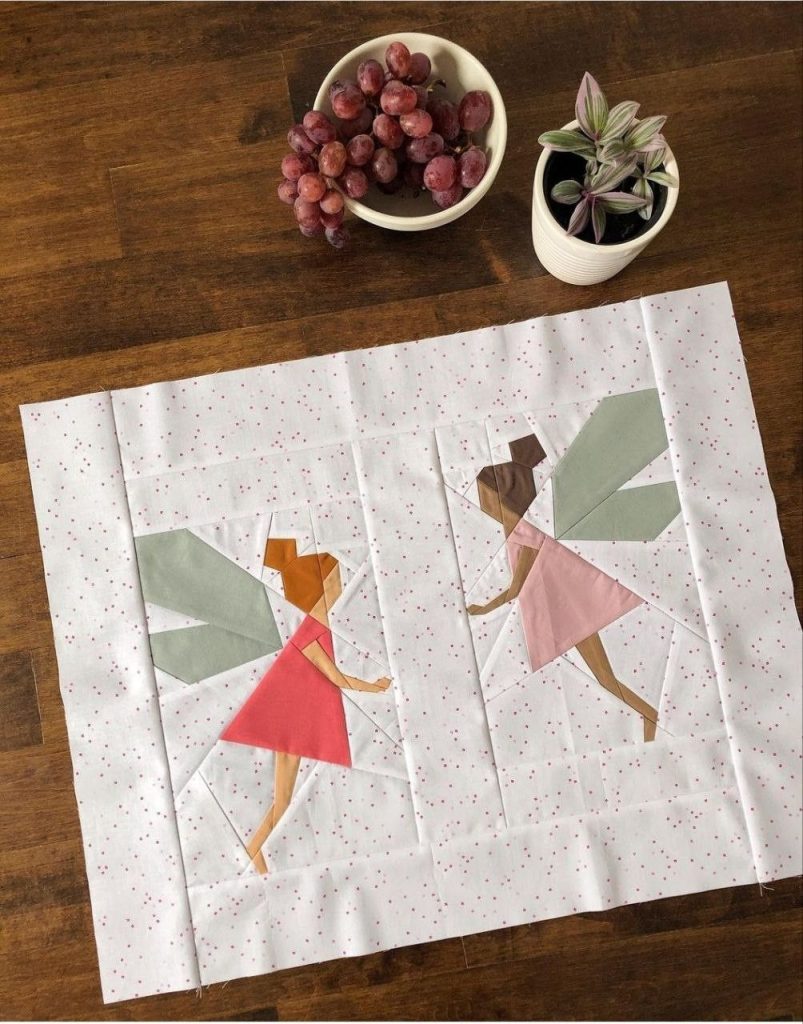
If you’ve ever dreamed of adding a touch of whimsy and wonder to your next quilt, the Fairy Sisters Block might be the perfect quilt pattern to begin with. With its enchanting design and approachable structure, this block offers beginners a delightful project that’s both rewarding and creative. Whether you’re crafting for a child’s room, a fairy-tale themed quilt, or simply want to play with color and fantasy, this block is pure magic.
In this tutorial, we’ll walk you through every step of making the Fairy Sisters Block, including a list of materials, fabric cutting instructions, sewing guidance, and personalization ideas. By the end of this guide, you’ll not only have a charming quilt block in hand—you’ll also feel confident and inspired to keep stitching!
Materials You Will Need
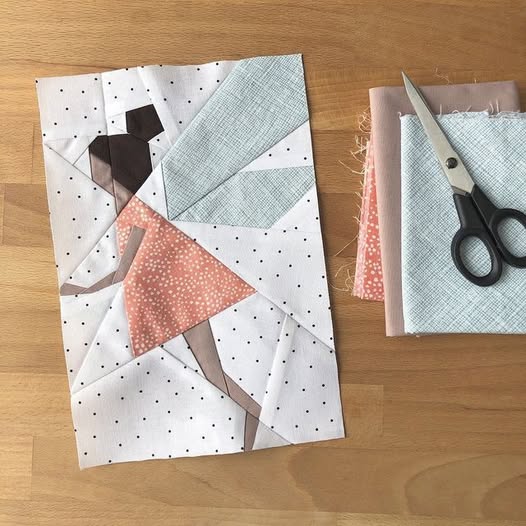
Before diving into the sewing process, let’s gather all the necessary supplies. The beauty of this quilt pattern is that it uses basic tools and fabric scraps you may already have in your stash. Here’s what you’ll need:
- Fabric Pieces – Choose at least 3 coordinating prints: one for the fairy dresses, one for the background, and one for the hair or wings. Consider soft pastels, floral prints, or shimmery fabric for a fairy-like vibe.
- Cutting Tools – A rotary cutter, quilting ruler, and cutting mat are essential for precise cuts.
- Basic Sewing Tools – Thread (neutral or matching), pins or clips, an iron, and your sewing machine set with a ¼ inch foot for consistent seams.
Optional but fun extras include small embroidery floss for facial features, beads for embellishment, or metallic thread for shimmer. These little touches can make your quilt truly stand out.
Cutting the Fabric Pieces
Once your materials are ready, it’s time to cut out the pieces for your Fairy Sisters Block. This block typically measures 12.5″ x 12.5″ unfinished, but you can adjust the size to fit your quilt layout.
Here’s a standard cutting guide for one block:
- Background Fabric:
- (2) 3.5″ x 3.5″ squares (top corners)
- (2) 2.5″ x 6.5″ rectangles (sides)
- (1) 6.5″ x 2.5″ rectangle (bottom)
- Fairy Dress Fabric:
- (1) 4″ x 4″ triangle (cut square on the diagonal)
- (1) 2.5″ x 3.5″ rectangle
- Hair/Wing Fabric:
- (2) 2.5″ x 2.5″ squares
- Face (neutral skin tone or desired color):
- (1) 2.5″ x 2.5″ square
These measurements are designed for a basic silhouette-style fairy block. For more elaborate versions, you may want to add extra cuts for details like arms, hands, or even a crown!
Step-by-Step Assembly Instructions
Now for the fun part—bringing your Fairy Sisters Block to life! Follow this step-by-step guide to assemble your block with ease.
- Start with the Fairy’s Body – Sew the dress pieces together first. Attach the small rectangle to the triangle base to form the dress shape. Press seams open or to one side.
- Add the Face and Hair/Wings – Sew the hair/wings fabric pieces on each side of the face square to form the head unit. Attach this unit to the top of the dress.
- Complete the Block – Add the background pieces to frame the fairy. First, attach the side rectangles, then the top squares, and finish by sewing on the bottom rectangle.
As you sew each seam, press carefully and check for alignment. Take your time—accuracy is key to achieving a polished look in your quilt blocks.
Ideas for Personalization
One of the most delightful things about the Fairy Sisters Block is how easily it can be personalized. You’re not just following a quilt pattern—you’re creating characters with personality and charm!
- Change Hairstyles and Skin Tones – Use different fabric colors for the face and hair to reflect diversity. Curly hair, buns, or long flowing styles can all be represented with clever fabric choices.
- Add Embroidery or Appliqué – Stitch eyes, smiles, or stars around your fairy to give her more life. You can even appliqué wings in organza or lace for a 3D effect.
- Use Themed Fabrics – Fairy-themed prints, floral patterns, or even celestial motifs make excellent choices for dresses and backgrounds. Let your imagination soar!
By creating a variety of fairy blocks, you can give each one a different expression or style, making your quilt unique and full of story.
Making a Full Quilt with Fairy Sisters Blocks
Now that you’ve mastered a single Fairy Sisters Block, imagine the possibilities of a full quilt! Repeating this quilt pattern in a variety of color palettes can create a stunning fairy parade across your bed, wall, or couch.
To make a throw-size quilt, consider using:
- 20 Fairy Sisters Blocks (each 12.5″ x 12.5″ unfinished)
- Sashing and Borders to frame each block (use white or pale colors to let the fairies pop)
- Backing Fabric – Something cozy like flannel or soft cotton, perhaps with stars or forest motifs
Arrange your blocks in rows or scatter them with alternating patchwork or solid blocks. Add names, messages, or quotes beneath each fairy using embroidery or printable fabric labels.
Beginner-Friendly Tips and Troubleshooting
This quilt pattern is beginner-friendly, but here are a few tips to keep your project smooth and stress-free:
- Test a Block First – Try making one block with scrap fabric before using your favorite prints. It helps you understand construction and fix any errors early on.
- Use Chain Piecing – When making multiple blocks, sew similar pieces in a chain without cutting the thread. It saves time and keeps things organized.
- Don’t Stress About Perfection – Quilting is about joy and creativity. Slight misalignments are natural—especially in whimsical designs like this!
And remember, every quilt block you make improves your skills and brings a new story into your quilting journey.
Share Your Fairy Sisters Quilt with Us!
We hope this tutorial on the Fairy Sisters Block inspires you to create a quilt full of love, magic, and personality. Whether you make just one block or a whole quilt, your creation is a beautiful expression of your imagination and craftsmanship.
We’d love to see your version of the Fairy Sisters Block! Share your work on social media and tag us, or leave a comment below with your experience. You can also upload photos to quilting groups and inspire fellow creators. Every quilt tells a story—and we can’t wait to see yours.
So grab your favorite fabrics, turn on some fairy-tale music, and let the magic of quilting begin!