Nothing captures the magic of winter quite like a cozy quilt. A Festive Frosty Quilt combines the warmth of handmade stitching with cheerful seasonal designs that brighten any home during the holidays. Whether you’re looking to create a new decoration for your living room, a thoughtful gift for a loved one, or just a fun project to practice your sewing skills, this quilt is an excellent choice for beginners and experienced quilters alike.
One of the best things about quilting is the creativity it encourages. With the right quilt pattern, you can transform basic fabric pieces into something truly festive. The Festive Frosty Quilt is inspired by snowflakes, frosty nights, and joyful holiday traditions, making it both timeless and heartwarming. Its simple structure allows beginners to follow along, while its design flexibility lets more advanced crafters explore customization.
In this tutorial, we’ll go step by step through the process of making your own Festive Frosty Quilt. You’ll find a detailed materials list, easy-to-follow instructions, and helpful ideas for personalization. By the end, you’ll have not only a beautiful quilt but also the satisfaction of completing a handmade holiday project.
Materials You’ll Need
Before we dive into the cutting and stitching, it’s important to gather all the materials in advance. Having everything ready will make the process smoother and more enjoyable. For this quilt, you’ll need cotton fabric in festive colors such as deep red, forest green, snowy white, and icy blue. If you want to add a whimsical touch, you can also choose fabric with snowman or snowflake prints.
In addition to fabric, you’ll need batting for the quilt’s middle layer and backing fabric to complete the piece. A rotary cutter, self-healing cutting mat, and quilting ruler are essential tools for precise fabric cuts. Don’t forget thread in coordinating or contrasting colors, safety pins for basting, and sewing machine needles designed for quilting. If you don’t have a sewing machine, this project can also be completed by hand, though it will take more time.
Here’s a quick checklist:
- Cotton fabrics in festive colors
- Backing fabric (1 ½ yards)
- Batting (same size as quilt top)
- Rotary cutter and ruler
- Cutting mat
- Thread and needles
- Safety pins or basting spray
- Iron and ironing board
Cutting Your Fabric Pieces
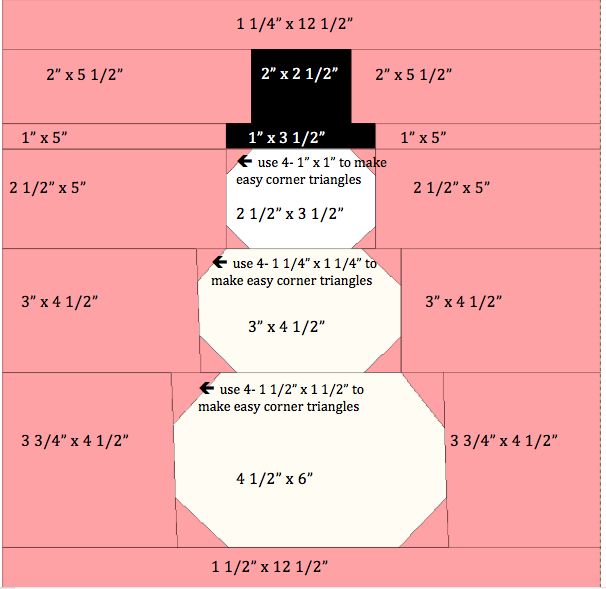
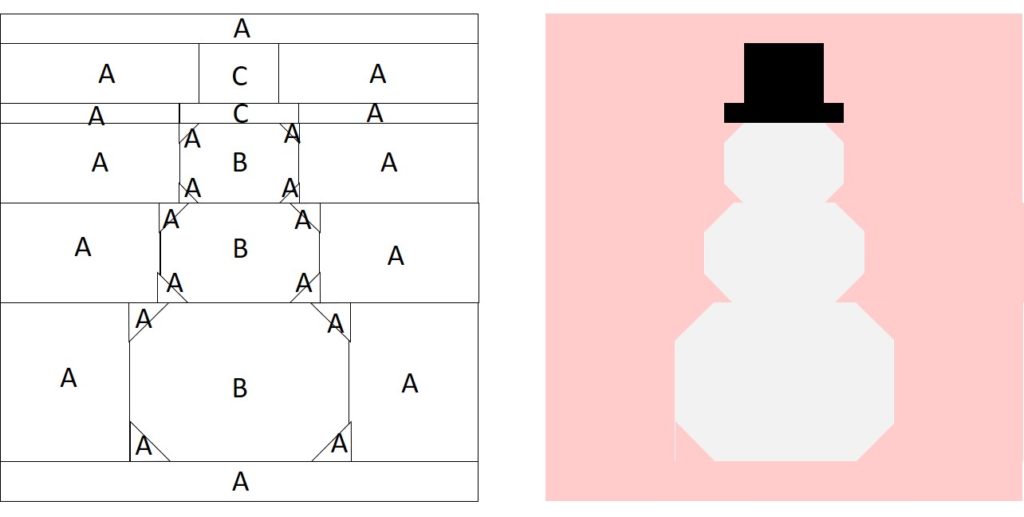
The foundation of any quilt is accurate cutting. For the Festive Frosty Quilt, we’ll work with a simple block-based design that creates a frosty, snowflake-inspired pattern. Each block will measure 10” x 10” when finished, and you’ll need about 20 blocks to make a throw-size quilt measuring approximately 40” x 50”.
Begin by cutting 40 squares of 10 ½” x 10 ½” (20 for the patterned fabrics and 20 for the solid background fabrics). This half-inch allowance will give you room for seams. Once you have your squares, divide the patterned and solid fabrics into pairs. You’ll be creating half-square triangles (HSTs), which are an essential component in many classic quilt patterns.
To create HSTs, place one patterned square on top of a solid square, right sides together. Draw a diagonal line from one corner to the other, sew ¼” away on each side of the line, and then cut along the drawn line. This will give you two triangle blocks, each with a frosty star-like look. Repeat until you have all your HSTs ready for layout.

Arranging Your Quilt Blocks
Once all your HSTs are complete, it’s time to play with layout. This is one of the most exciting parts of quilting, as you can see how your design comes to life. Lay the blocks out on the floor or a large table to experiment with different arrangements. A snowflake or starburst design works beautifully for the Festive Frosty Quilt, but don’t be afraid to try other ideas.
Make sure to balance the colors so that no one section feels too heavy with reds or blues. By alternating solid and patterned blocks, you’ll create a festive rhythm that gives your quilt a cozy holiday feel. If you’re unsure about the arrangement, take a photo with your phone and review it—sometimes seeing it from a different perspective helps.
Once you’ve chosen a layout, carefully stack the rows in order, labeling them with sticky notes or fabric clips. This will make the sewing process more organized and ensure that your quilt pattern stays consistent.
Sewing the Quilt Top
Now that your blocks are cut and arranged, it’s time to sew them into rows. Begin by joining two blocks together with a ¼” seam allowance. Continue until the row is complete, and then press the seams flat with an iron. For best results, press seams in alternating directions from row to row, which helps them nest neatly together when you join the rows.
After pressing, join the rows together to complete the quilt top. Work slowly and check that points and corners match up as closely as possible. Don’t stress if everything isn’t perfect—quilting is a handmade art, and small imperfections only add to the charm. Once the quilt top is assembled, give it a final press to smooth out any wrinkles.
At this stage, you’ll see the frosty snowflake pattern come together. Your quilt is now ready to be layered with batting and backing for the quilting step. Take a moment to admire your work—it’s amazing to see how simple fabric squares transform into a festive design.
Layering and Quilting
Layering the quilt is often called making the “quilt sandwich.” Start by laying your backing fabric wrong side up, then place the batting on top, and finally the quilt top right side up. Smooth out any wrinkles and use safety pins or basting spray to hold everything in place. This step ensures that your layers don’t shift while quilting.
For quilting designs, you can keep it simple with straight-line quilting. Using your sewing machine’s walking foot, sew vertical or diagonal lines across the quilt. This method is beginner-friendly and gives a modern look. If you want to add more detail, try free-motion quilting with loops, swirls, or even snowflake motifs to match the theme.
Remember to work from the center outwards to avoid fabric bunching. Once quilting is complete, trim the excess batting and backing fabric so that everything aligns with the quilt top. You’ll now be ready for the final step—binding.
Binding the Quilt
Binding gives your quilt a finished, polished look. Cut strips of fabric 2 ½” wide and long enough to go around the entire quilt. Sew the strips together end to end, press them in half lengthwise, and then attach them to the quilt edges. Sew the binding to the front of the quilt first, then fold it over to the back and stitch it down by hand or machine.
If you’re a beginner, machine binding is faster and more forgiving. Hand binding, on the other hand, offers a softer finish that feels extra special. Choose whichever method suits your time and comfort level. Either way, this step seals your quilt and makes it ready to enjoy.
Once the binding is finished, give your Festive Frosty Quilt a gentle press. Congratulations—you’ve completed a beautiful handmade quilt just in time for the holiday season!
Personalization Ideas
The Festive Frosty Quilt is versatile, and part of the fun is making it your own. Consider adding appliqué snowmen, embroidered snowflakes, or even small festive motifs like candy canes or holly leaves. These little touches turn your quilt into a truly personal creation that reflects your style.
Another idea is to play with fabric textures. Adding flannel or fleece squares can make the quilt extra warm and snuggly, perfect for cozy winter evenings. You can also use metallic thread for quilting, which catches the light and adds a magical sparkle to your design.
Don’t be afraid to mix modern and traditional elements. While the snowflake quilt pattern is classic, bold fabrics or unexpected color palettes can give it a fresh, contemporary twist. This is your opportunity to let creativity shine.
Share Your Festive Frosty Quilt
One of the greatest joys of quilting is sharing your work with others. Whether you’re giving your Festive Frosty Quilt as a gift, using it as part of your holiday décor, or posting it on social media, your handmade creation will surely bring joy. Sharing your progress online can also connect you with quilting communities that offer inspiration, encouragement, and new ideas.
If you’re new to quilting, don’t be shy about showing off your first attempts. Every quilter starts somewhere, and your Festive Frosty Quilt is a wonderful milestone in your creative journey. Plus, your work might inspire someone else to try quilting for the first time.
So, grab your fabrics, follow this tutorial, and create a quilt that will bring warmth and holiday cheer for years to come. And when you’re done, don’t forget to share your Festive Frosty Quilt—you’ll be surprised how much happiness a handmade quilt can spread.

