
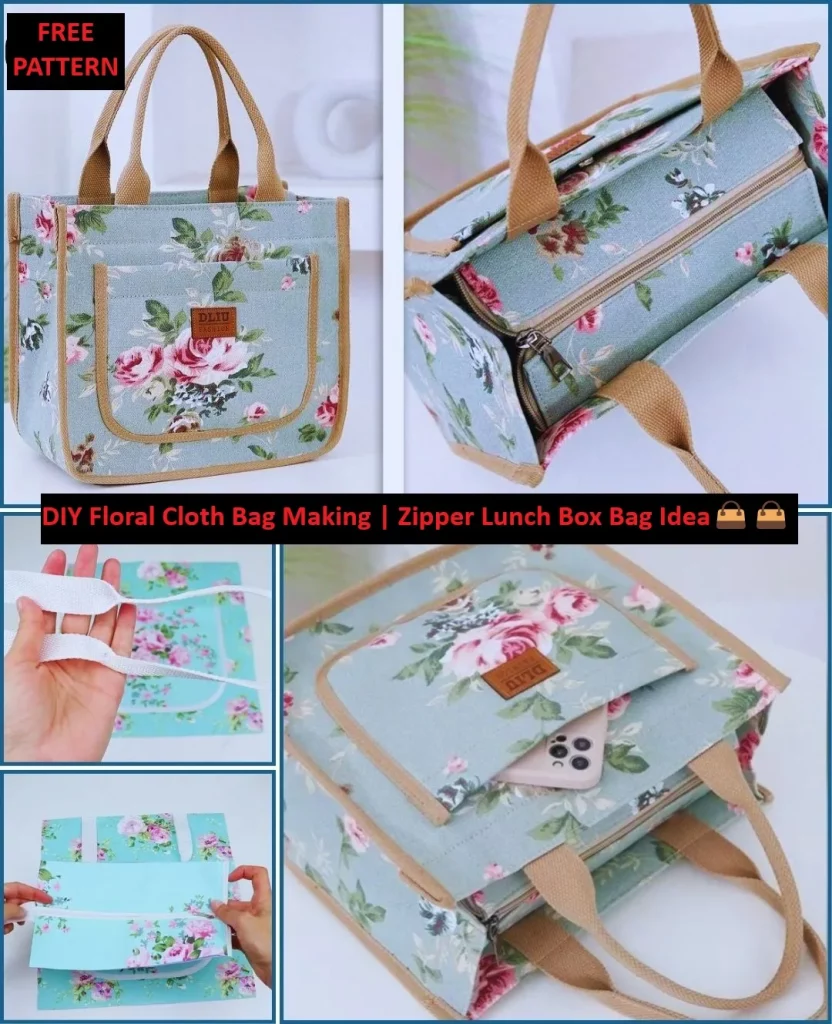
Creating a floral cloth bag is not only a delightful sewing project but also a chance to explore your creativity while producing something functional and beautiful. Whether you’re a beginner or an experienced crafter, this tutorial will guide you step-by-step through making a charming, eco-friendly bag using a quilt pattern as your base design. This project combines the elegance of floral fabrics with the practicality of a cloth bag, making it perfect for shopping, casual outings, or even gifting to someone special.
Using quilt techniques for bag-making opens a world of possibilities, allowing you to incorporate intricate designs, patchwork styles, and even leftover fabric scraps. The beauty of this approach is that you can use vibrant floral prints to create something unique, personal, and entirely your own. This tutorial will cover everything from the materials list to the final stitch, so you can confidently start your own floral cloth bag journey.
By the end, you’ll have a sturdy, stylish bag that reflects your personality and creativity. So, gather your favorite floral fabrics, sharpen your scissors, and let’s dive into this fun, beginner-friendly sewing adventure.
Materials You Will Need
Before you begin, having all your supplies ready will make the process smooth and enjoyable. The most important part is selecting a floral fabric you love—this will be the star of your bag. Look for cotton or canvas fabrics, as they are sturdy yet easy to work with, especially if you’re new to sewing. If you want to incorporate quilting techniques, choose at least two or three floral prints to create a quilt pattern effect.
Essential Materials:
- Floral cotton or canvas fabric (main body)
- Contrasting fabric for lining
- Fusible interfacing for structure
- Matching thread
- Sewing machine
- Fabric scissors or rotary cutter
- Ruler and fabric chalk
- Pins or clips
- Iron and ironing board
Optional materials include decorative lace, ribbon, buttons, or fabric paint for extra personalization. Using quilting tools like a cutting mat and quilting ruler will make the process even easier and give your bag a professional finish.
Investing time in preparing your materials will help you avoid interruptions once you start sewing. Think of this step as laying the groundwork for your project’s success. Just as with any quilt, precise preparation is the key to a polished final piece.
Cutting the Fabric Pieces
Cutting your fabric correctly ensures your bag comes together seamlessly. Start by deciding on the size of your floral cloth bag. For this tutorial, we’ll aim for a medium-sized tote: about 16 inches wide by 14 inches tall. You will need two main floral fabric rectangles for the exterior and two lining pieces in the same size.
If you’re using a quilt pattern design, cut smaller squares or strips from your floral fabrics and arrange them into a patchwork panel measuring the final bag size. This extra step adds charm and makes your bag unique. It’s also a great way to use fabric scraps left over from previous quilt projects.
Don’t forget to cut two straps—each about 24 inches long and 4 inches wide. You can make them from matching floral fabric or opt for a contrasting solid color to frame the design. If you want your bag to stand upright better, cut fusible interfacing pieces to match the exterior panels and straps.
Assembling the Bag Exterior
If you’re working with a patchwork quilt design, begin by sewing your smaller fabric pieces together following your chosen pattern. Press the seams open for a smooth finish. Once your patchwork panel is complete, apply interfacing to the back using an iron to give it stability.
Next, place the two main exterior pieces right sides together and pin along the sides and bottom. Sew with a ½-inch seam allowance, leaving the top open. To create a boxed bottom for your bag, pinch each bottom corner so the side seam aligns with the bottom seam, forming a triangle. Measure 2 inches from the tip and sew straight across. Trim the excess fabric.
Adding quilting stitches at this stage can give your floral cloth bag extra texture and style. You can do simple straight-line quilting or even free-motion quilting for a more artistic touch. Not only will this enhance the look, but it will also strengthen the bag’s structure.
Making and Attaching the Straps
The straps are the part of your floral cloth bag that will take the most wear, so making them sturdy is essential. Take each strap piece, fold it in half lengthwise (right sides together), and sew along the long edge. Turn the strap right side out and press flat. If you want extra durability, add a strip of interfacing inside before sewing.
Topstitch along both edges of the straps for a neat finish. This not only looks professional but also reinforces the fabric. You can even add decorative stitching in a contrasting thread for a fun touch that ties into your floral theme.
Once the straps are ready, pin them to the top edges of your exterior bag piece, positioning them about 4 inches from each side seam. Make sure they are not twisted. Baste them in place with a short stitch to hold them securely until you attach the lining.
Sewing the Lining
For the lining, place your two lining fabric pieces right sides together and sew along the sides and bottom, leaving a 4-inch gap in the bottom seam for turning the bag later. If you want to add interior pockets, sew them onto the lining pieces before this step. Pockets are a fantastic way to organize your bag and add more custom features.
Just like with the exterior, you can box the lining’s bottom corners to give it shape. This ensures that the lining fits neatly inside the bag without bunching up. Remember to keep the lining slightly smaller than the exterior for a smooth finish.
If you want to get creative, you can quilt the lining as well—though it’s optional. A quilted lining can make the bag sturdier and add a luxurious touch, especially if you’re planning to gift it.
Putting It All Together
With both the exterior and lining complete, it’s time to join them. Place the exterior bag inside the lining, right sides facing each other, and align the top edges. The straps should be sandwiched between the layers, pointing downward. Pin all around the top edge to secure everything in place.
Sew around the top edge with a ½-inch seam allowance, making sure to backstitch over the straps for extra strength. Once done, pull the bag right side out through the gap you left in the lining. Push the lining into the bag and press the top edge flat.
Topstitch around the top edge to give the bag a polished look and secure the lining in place. Finally, close the gap in the lining by sewing it shut with a small seam or hand-stitching it for a seamless finish.
Personalization Ideas
One of the joys of making your own floral cloth bag is the endless personalization possibilities. You can mix different floral prints to create a vibrant, patchwork quilt pattern design. Alternatively, choose a subtle, single floral fabric and embellish it with embroidery, fabric appliqué, or hand-painted details.
Consider adding a decorative button or magnetic snap closure for functionality. You can also sew a lace trim along the top edge for a romantic touch or use bold, geometric quilting lines to contrast with the softness of the floral print.
Seasonal variations are another fun idea—make a spring bag with pastel florals, a summer version with bright tropical prints, or an autumn bag in warm, earthy tones. The versatility of this project means you can adapt it for any occasion or mood.
Finishing Touches and Care Tips
After all your sewing is complete, give your floral cloth bag a final press to smooth out any wrinkles and set the stitches. If you’ve used cotton fabric, a light steam will help your quilt stitches settle beautifully. For canvas, use a medium heat setting to avoid damage.
To keep your bag looking fresh, wash it gently in cold water and air-dry. Avoid harsh detergents, as they may fade the floral print over time. Iron when necessary to maintain a crisp, professional look.
With proper care, your handmade floral cloth bag will last for years, becoming a cherished accessory or even a treasured gift. Each stitch tells a story, and every time you use it, you’ll be reminded of the joy of creating something with your own hands.
Share Your Creation!
Now that you’ve completed your floral cloth bag, we’d love to see your work! Whether you followed this tutorial exactly or added your own creative twists, sharing your finished bag can inspire others to start sewing too. Post photos on social media using hashtags related to sewing, quilt patterns, and handmade accessories.

You can also join online quilting and sewing communities to exchange tips, show off your bag, and discover new techniques for future projects. Every maker has a unique style, and yours might be just what someone else needs to start their own sewing journey.
So grab your favorite fabrics, fire up your sewing machine, and start crafting your own floral cloth bag today. Happy sewing—and happy quilting!