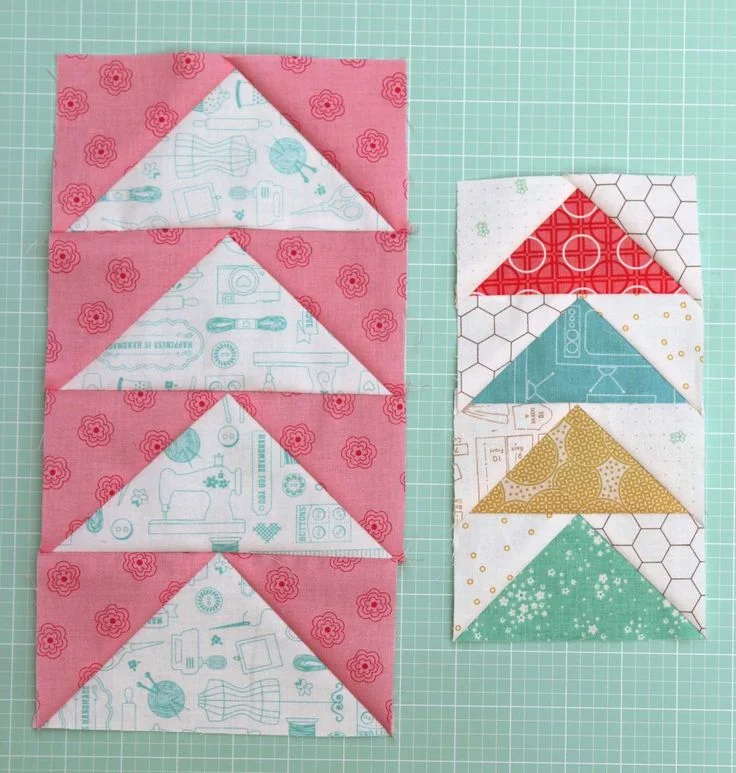
The Flying Geese quilt pattern is a timeless and versatile design that has been a favorite among quilters for centuries. Its distinctive triangular shapes create a dynamic visual effect, making it perfect for both traditional and modern quilt projects. Whether you are a beginner or an experienced quilter, mastering this pattern is a rewarding experience. In this guide, we will explore the history of the Flying Geese quilt pattern, the best techniques for creating it, and a step-by-step tutorial to help you make your own stunning quilt.
The History of Flying Geese Quilt Pattern
The Flying Geese quilt pattern has deep historical roots, dating back to early American quilting traditions. The design is inspired by the migratory patterns of geese, with triangles symbolizing birds in flight. This pattern was not only decorative but also held cultural significance for many communities.
During the 19th century, this pattern was commonly used in quilts made by pioneers and settlers. It provided warmth and comfort, while also showcasing the quilter’s artistic skills. Many variations of the Flying Geese quilt pattern emerged, each reflecting regional styles and influences.
Today, quilters continue to innovate with this pattern, incorporating modern fabrics, colors, and layouts. The adaptability of the design makes it a staple in the world of quilt patterns, allowing for endless creative possibilities.
Materials Needed for a Flying Geese Quilt
Before starting your Flying Geese quilt pattern, gather the necessary materials. Having the right tools will ensure accuracy and ease during the quilting process. Here are the essentials:
- Fabric: Choose coordinating fabrics for the geese and background triangles.
- Rotary Cutter and Ruler: For precise cutting of fabric pieces.
- Sewing Machine and Thread: A reliable sewing machine with matching thread colors.
- Iron and Ironing Board: Pressing seams is crucial for a polished look.
Selecting high-quality cotton fabric will make the process smoother and enhance the durability of your quilt. Experimenting with different color combinations can also give your quilt a unique touch.
Cutting the Fabric for Flying Geese Blocks
The Flying Geese quilt pattern consists of a series of triangular blocks. The most common method for making these blocks is the no-waste technique, which minimizes fabric waste and ensures uniformity. Follow these cutting instructions:
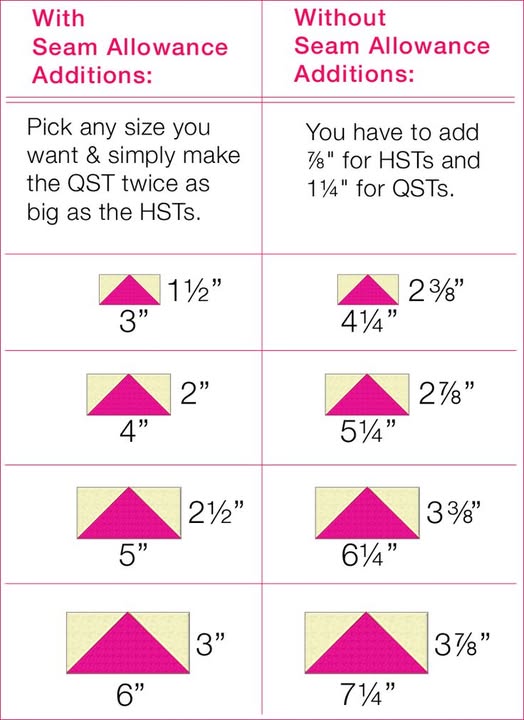
- Large Squares (Goose Fabric): Cut 1 square measuring 5 1/4 inches.
- Small Squares (Background Fabric): Cut 4 squares measuring 2 7/8 inches each.
These measurements will create four identical Flying Geese units. Adjusting the sizes will allow you to make larger or smaller blocks, depending on your quilt design.
Step-by-Step Tutorial: Sewing the Flying Geese Blocks
Now that your fabric pieces are ready, follow these steps to assemble your Flying Geese quilt pattern:
- Mark and Position: Draw a diagonal line on the back of each small square. Place two small squares on opposite corners of the large square, right sides together.
- Sew and Cut: Stitch 1/4 inch on both sides of the drawn line, then cut along the center line. This will create two triangle units.
- Final Assembly: Attach another small square to each triangle unit, stitch, cut, and press open. This results in four identical Flying Geese blocks.
This method ensures accurate sizing and consistent seams, making it one of the best techniques for quilting beginners.
Arranging and Stitching the Quilt Top
Once you have assembled multiple Flying Geese blocks, it’s time to arrange them into your desired layout. You can opt for a traditional straight-row formation or experiment with zigzag and diamond arrangements for a modern look.
Lay out your blocks on a design board or floor to visualize the final quilt layout. Play with color contrasts and align the blocks carefully to maintain symmetry. Taking photos during this stage can help you make design adjustments before sewing.
When satisfied with the layout, sew the blocks into rows, pressing the seams after each addition. Then, stitch the rows together, making sure all points align for a crisp, professional finish.
Adding Borders and Quilting
To give your Flying Geese quilt pattern a framed look, consider adding borders. You can choose a simple solid border or a pieced border that complements the design.
After adding borders, it’s time to quilt. There are several quilting techniques to choose from:
- Straight-line quilting for a minimalist look.
- Free-motion quilting for intricate designs.
- Hand quilting for a traditional feel.
Choose a quilting method that matches your skill level and complements the pattern. Once quilted, trim excess fabric and attach a binding to finish the edges.
Tips for a Perfect Flying Geese Quilt

Creating a flawless Flying Geese quilt pattern requires practice and attention to detail. Here are some expert tips to ensure success:
- Use starch spray to keep fabric stable during cutting and sewing.
- Chain piece to speed up the process and maintain consistency.
- Double-check measurements before cutting to avoid mistakes.
By following these tips, your quilt patterns will look sharp and professional, making your finished quilt a masterpiece.
Conclusion
The Flying Geese quilt pattern is a timeless design that adds elegance and movement to any quilt. With careful fabric selection, precise cutting, and proper sewing techniques, you can create a stunning quilt that showcases this classic pattern.
Whether making a full-size bed quilt or a small wall hanging, this pattern offers endless possibilities. Now that you have mastered the steps, it’s time to gather your materials and start quilting. Happy quilting!

