
If you’re looking for a fun, colorful, and beginner-friendly quilting project, this Ghost Quilt Pattern is the perfect idea for your next creation. It combines playful ghost shapes, charming pastel tones, and simple patchwork blocks that make it both relaxing and rewarding to sew. Inspired by the friendly ghosts we see in Halloween crafts, this quilt is a cheerful design you can enjoy all year long.
In this tutorial, you’ll learn how to create your very own Ghost Quilt step-by-step — from cutting the fabric to stitching your ghosts together. Even if you’re new to quilting, don’t worry! Each section includes clear explanations and helpful tips so you can follow along easily. By the end, you’ll have a soft, adorable quilt that’s sure to impress your friends and family.
Let’s dive into this quilting pattern and bring some cute ghostly charm into your sewing room!
1. Materials and Tools You’ll Need
Before we begin sewing, it’s important to gather all your materials. You won’t need anything too fancy — most of these items can be found in any fabric or craft store.
Fabric:
- Nine solid or pastel-colored fabrics for the ghosts (such as lavender, sky blue, mint green, peach, yellow, red, pink, and orange).
- A mix of low-volume prints and neutral fabrics for the background (beige, cream, or light gray).
- Black fabric for the ghost eyes and mouths.
- Optional: small patterned scraps for stars or spiderweb accents like in the sample quilt.
Other Supplies:
- Rotary cutter and cutting mat
- Quilting ruler
- Sewing machine or hand-sewing tools
- Iron and ironing board
- Pins or clips
- Batting and backing fabric
- Matching thread
- Binding fabric for the edges
Taking a few minutes to prepare your workspace and materials helps you work faster and more accurately. If you pre-wash your fabrics and iron them before cutting, your quilt will stay smooth and crisp from start to finish.
2. Cutting the Fabric
Now it’s time to start cutting! This step might seem tedious, but it’s the foundation of every great quilt. For this Ghost Quilt Pattern, precision is key since each block fits together like a puzzle.
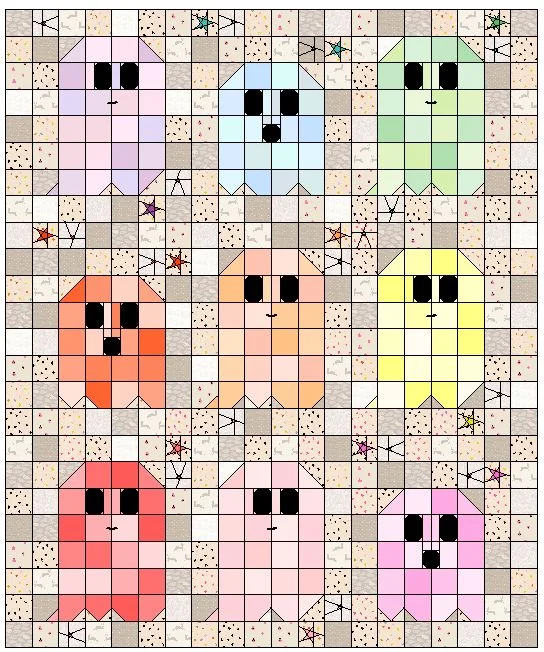
Each ghost block is made from small squares and rectangles that form the body, eyes, and base curves. Start by cutting your fabric into 2½” squares and 2½” x 4½” rectangles for the ghost body. You’ll also need a few 1½” squares for the eye sections and corners. If you’re following the exact layout of the sample quilt, make nine ghost blocks — each in a different pastel color.
Next, cut your background fabric into the same size squares and rectangles to fill the space around your ghosts. You can mix different light tones and subtle prints to add visual texture. Don’t forget to cut some extra small pieces if you want to add decorative stars or spiderwebs in between the ghost blocks.
3. Assembling the Ghost Blocks
Once all your pieces are ready, it’s time to sew the ghost blocks! This is where your quilting pattern starts to come to life.
Begin by laying out the ghost pieces on a flat surface or design wall so you can see the overall shape. The ghosts are built row by row, using simple straight seams. Stitch the squares and rectangles together with a ¼” seam allowance, pressing each seam open or to one side as you go.
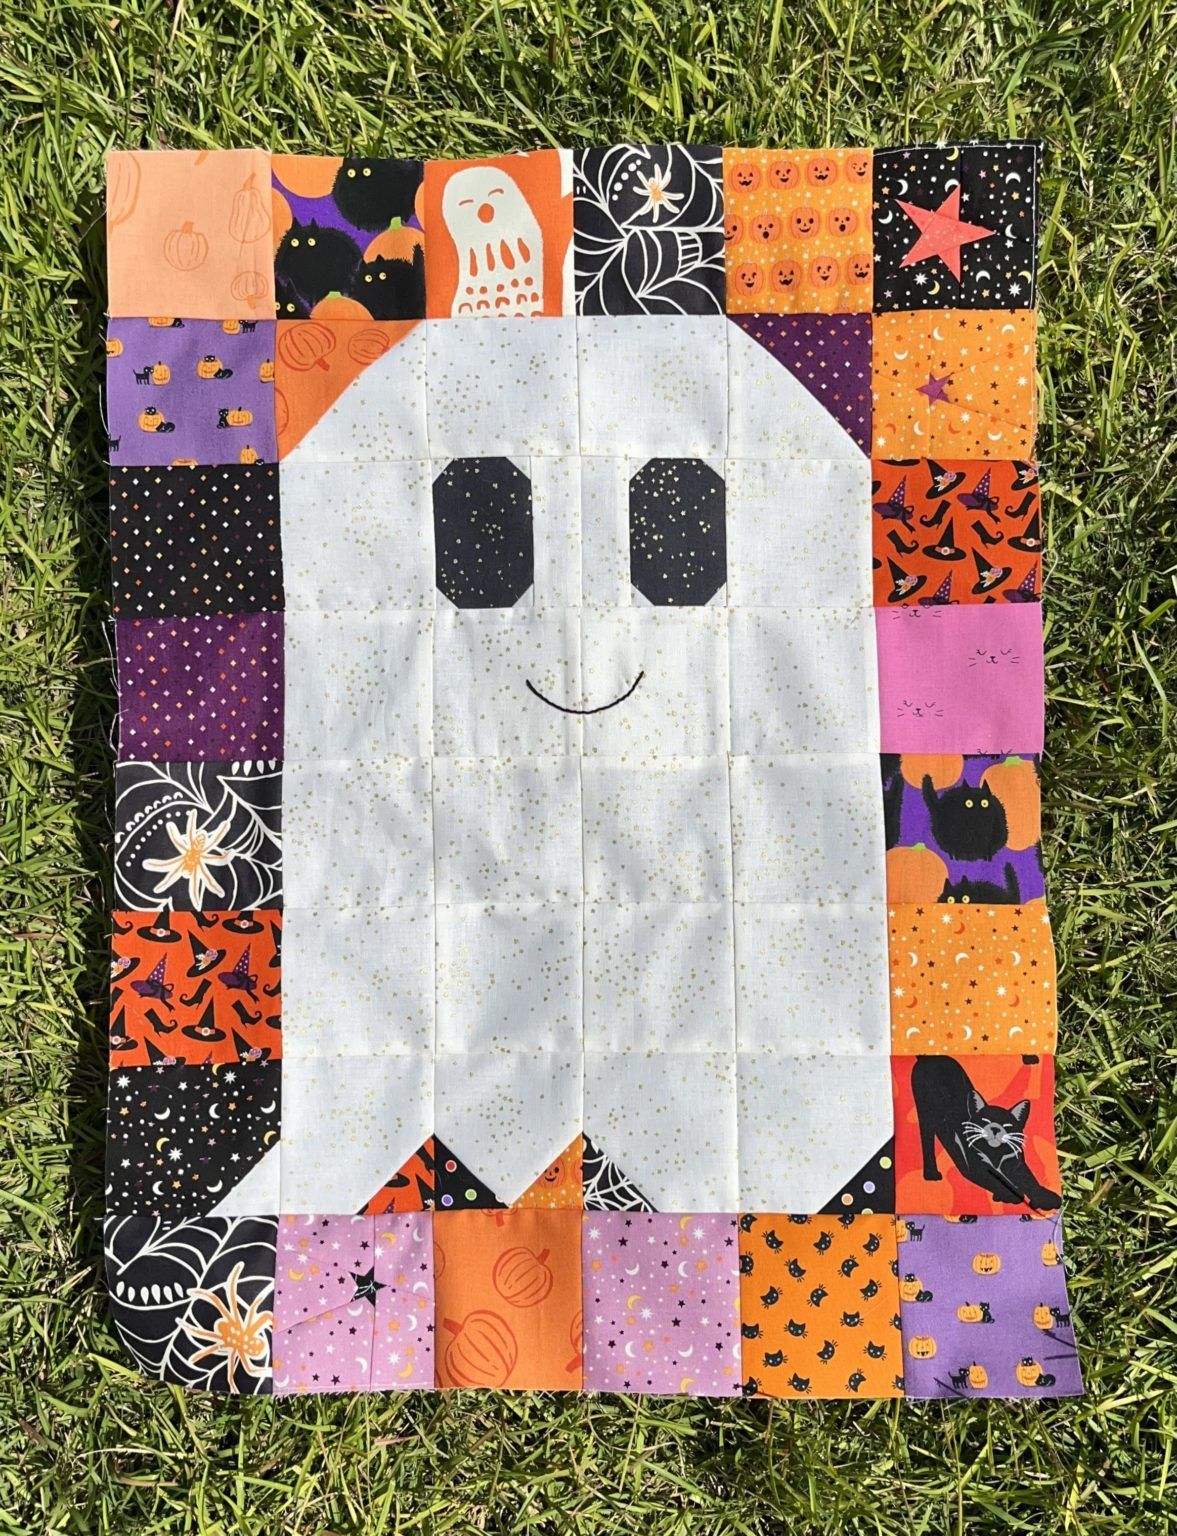
To create the curved or zigzag bottom of the ghost, use diagonal seams on the lower squares — this gives the ghost its classic wavy edge. For the eyes, sew two black squares side by side on a light background strip, and then attach them near the top center of the ghost’s face. The mouth is optional, but a tiny black rectangle adds a cute touch!
4. Adding Background and Decorative Details
After you finish all nine ghost blocks, it’s time to join them with the background squares. This step transforms your individual ghosts into a cohesive quilt design.
Arrange the blocks in a 3×3 grid, alternating the colors so that no two similar shades are next to each other. Place the neutral background squares between and around each ghost block. Sew the rows together carefully, matching the seams where the blocks meet.
To recreate the playful details in the example quilt, you can applique or embroider tiny spiderwebs and stars onto the background squares. These small touches give your Ghost Quilt a unique, handmade look and a dash of Halloween spirit without being scary. It’s a wonderful way to practice small decorative stitches and make your quilt one of a kind.
5. Quilting and Finishing
Once your quilt top is complete, it’s time to layer and quilt it. This is where everything comes together beautifully.
First, lay your backing fabric face down, then place the batting on top, followed by your quilt top (right side up). Smooth out any wrinkles and pin all layers together using safety pins or quilting clips. You can quilt by hand or machine — both work great for this pattern. Straight-line quilting along the seams is easy and gives a clean, modern finish.
When the quilting is done, trim the excess batting and backing. Then, bind the edges with a coordinating or contrasting fabric. Binding gives your quilt that final polished edge and helps protect it from wear. Once finished, give your quilt a gentle press with the iron — and admire your work!
6. Customization Ideas
One of the best things about this quilting pattern is how easily you can customize it. Each ghost can have its own personality and color scheme, making it a fun project for all ages.
If you prefer a more classic Halloween theme, use bold colors like black, purple, orange, and lime green. For a softer look, stick to the pastel shades shown in the sample — they create a cozy and modern vibe that fits any room. You can even use patterned fabrics with small dots or stripes to give your ghosts extra character.
To make your Ghost Quilt even more special, consider adding embroidery details like smiles, bow ties, or tiny hearts on each ghost. You could also personalize it with initials, names, or small appliqué shapes to turn it into a thoughtful gift for a child or loved one.
7. Displaying and Caring for Your Ghost Quilt
After all that work, you deserve to show off your masterpiece! This quilt looks adorable draped over a couch, folded at the end of a bed, or hung on the wall as seasonal decor.
Because the design is lighthearted and colorful, it’s perfect not just for Halloween but also as a playful accent in a kid’s bedroom or craft studio. The pastel ghosts bring a touch of whimsy that brightens any space year-round.
To care for your quilt, wash it gently in cold water on a delicate cycle and air dry if possible. This will help preserve the colors and keep your fabric soft. Over time, your quilt will gain that beautiful, cozy texture that only handmade quilts have.
8. Final Thoughts – Share Your Ghost Quilt!
Congratulations — you’ve completed your Ghost Quilt! Whether this is your first quilt or your fiftieth, there’s nothing quite like finishing a handmade piece full of love and creativity. Every stitch tells a story, and your friendly ghosts are ready to bring smiles wherever they go.
If you enjoyed making this quilting pattern, don’t keep it to yourself! Share your finished quilt on social media or in quilting groups online. Use hashtags like #GhostQuilt, #QuiltingPattern, or #QuiltForBeginners to connect with other makers and inspire them to try it too.
Quilting is all about community, creativity, and fun — and this Ghost Quilt captures all of that perfectly. So grab your fabric, thread your needle, and start stitching today. You’ll soon have a spooky-cute quilt that’s sure to become a favorite in your handmade collection.