Introduction to Hidden Wells Quilt Block
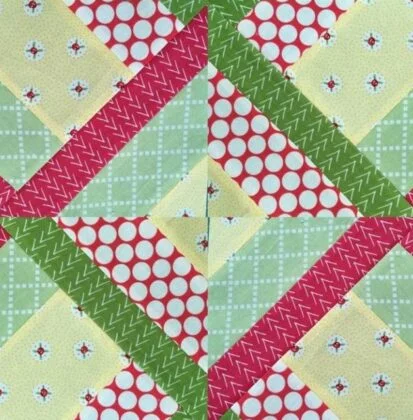
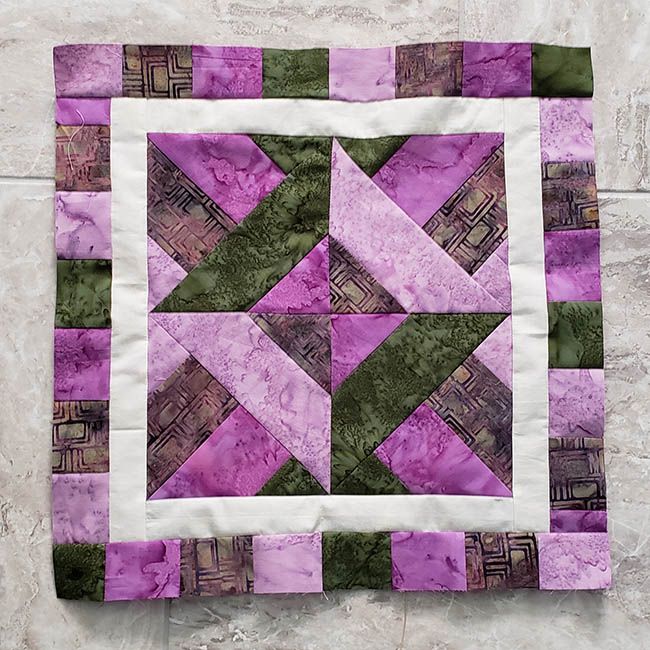
Quilting is an art that blends tradition with creativity, and the Hidden Wells quilt block is a stunning example of this. This intricate pattern appears complex but is surprisingly achievable with simple strip piecing techniques. If you love working with unique quilt patterns, the Hidden Wells block is a must-try.
The charm of the Hidden Wells quilt block lies in its illusion of depth and movement. While it may seem like a difficult design, the trick is in carefully selecting and arranging fabrics to achieve a seamless look. Whether you’re a beginner or an experienced quilter, this tutorial will guide you through the entire process.
By the end of this tutorial, you will have a beautiful quilt block that can be incorporated into larger projects. Follow along step by step to learn how to cut, sew, and assemble the Hidden Wells quilt block efficiently and precisely.
Materials and Fabric Selection
Choosing the right fabric is essential to achieving the mesmerizing effect of the Hidden Wells quilt pattern. Opt for contrasting colors to enhance the illusion of depth and movement in the design. Typically, quilters use at least four different fabrics for the best results.
To create a single Hidden Wells quilt block, you will need:
- Four different fabric strips, each measuring 2.5 inches by WOF (width of fabric)
- Rotary cutter and cutting mat
- Quilting ruler for precise measurements
- Sewing machine and coordinating thread
Before cutting, press your fabric to remove any wrinkles. Starching the fabric lightly can help with accuracy when cutting and sewing. Well-prepared fabric ensures your quilt blocks align perfectly without stretching or distortion.
Step 1: Cutting and Arranging the Strips
The Hidden Wells technique starts with strip piecing, which saves time and ensures consistency. Begin by selecting four fabric strips that contrast yet complement each other.
- Cut four strips, each measuring 2.5 inches by WOF. Arrange them in a pleasing sequence, alternating between light and dark shades.
- Sew the strips together along the long edges, using a 1/4-inch seam allowance. Press the seams open or to one side to reduce bulk.
- Once sewn together, sub-cut the fabric into squares. Each square should measure 8.5 inches x 8.5 inches, depending on the final block size you want to achieve.
By carefully arranging the strips, you create a strong visual effect that will shine in the final quilt block. Double-check your measurements to ensure each square is cut evenly.
Step 2: Creating the Hidden Wells Pattern

Now that your fabric squares are ready, it’s time to transform them into the Hidden Wells quilt block. The magic happens in this step, where we rearrange and sew the pieces together.
- Take each 8.5-inch square and cut them diagonally twice, forming four equal triangles from each square.
- Rotate and rearrange these triangles to create the Hidden Wells effect, aligning similar colors for a continuous pattern.
- Sew the triangles back together in pairs using a 1/4-inch seam allowance, pressing seams open for a flat finish.
At this stage, you will see the intricate design come to life. Adjust the placement if necessary to achieve a balanced and symmetrical look before sewing the final seams.
Step 3: Assembling the Quilt Block
Once all the triangle units are prepared, you will start piecing them together to form the final Hidden Wells quilt block. Pay attention to fabric orientation to maintain the dynamic effect.
- Join two triangle units to form a larger square, pressing the seams open.
- Sew these squares together, aligning points carefully for precision.
- Trim the final block to the desired size, ensuring all edges are even.
Precision is key in this step. A properly squared quilt block will ensure that your finished quilt looks polished and professional.
Tips for Perfect Hidden Wells Quilt Blocks
Achieving a flawless Hidden Wells quilt pattern requires attention to detail. Here are some expert tips to enhance your quilting experience:
- Choose fabrics with strong contrast to enhance the geometric illusion.
- Press seams consistently to reduce bulk and ensure smooth assembly.
- Use a rotary cutter and quilting ruler for precise cuts, minimizing errors.
Following these best practices will help you create a clean and visually striking quilt block. Small adjustments in fabric choice and pressing techniques can make a significant difference.
Incorporating Hidden Wells Blocks into Quilts
The Hidden Wells quilt block can be used in various projects, from bedspreads to wall hangings. Depending on your arrangement, it can create different visual effects.
- Repeating the block across a quilt creates a mesmerizing interwoven pattern.
- Alternating block orientations can add even more complexity and uniqueness to the design.
- Pairing it with solid blocks can highlight its intricate details without overwhelming the quilt.
Experimenting with layout variations allows you to customize your quilt to suit your style. The versatility of this quilt pattern makes it a great choice for creative quilting projects.
Conclusion
The Hidden Wells quilt block is a fantastic project that blends simplicity with visual complexity. By mastering the strip piecing and diagonal cuts, you can create stunning quilt blocks that add depth and dimension to your quilting projects.
With a bit of patience and precision, you can turn fabric strips into intricate quilt patterns that will impress anyone who sees your work. Whether making a single block or an entire quilt, this technique is an excellent addition to any quilter’s repertoire.
We hope this tutorial inspires you to try your hand at the Hidden Wells quilt block. Happy quilting!

