
Creating a coin purse from fabric scraps is a fun and rewarding project that’s perfect for beginners. Not only does it allow you to repurpose leftover materials, but it’s also a great way to explore your creativity through colors, textures, and quilt patterns. In this tutorial, you’ll learn step-by-step how to make a charming quilted coin purse using basic sewing techniques. Whether you’re new to quilting or already love working with quilt patterns, this guide will walk you through the process with ease and inspiration.
Why Make a Coin Purse with Fabric Scraps?
If you’re like most quilters or sewists, chances are you have a collection of leftover fabric scraps just waiting to be transformed. A coin purse is a simple, practical item that makes excellent use of these smaller pieces. It’s a great way to reduce waste and breathe new life into fabric that might otherwise go unused.
The compact size of a coin purse makes it an ideal project for testing out new quilt patterns or practicing quilting techniques. You don’t need a large workspace or expensive tools—just a few scraps, some basic supplies, and your imagination. Plus, once you’ve made one, you’ll find they make fantastic handmade gifts for friends and family.
Another perk? You’ll gain hands-on experience with quilting basics in a project that can be completed in just a few hours. If you’ve been intimidated by larger quilts, this small-scale quilted purse is a perfect entry point into the world of fabric crafting.
Materials You’ll Need
Before you start sewing, gather your materials. Most of these can be found in your craft room or purchased inexpensively.
- Fabric scraps (cotton is ideal)
- Quilting batting or felt (for structure)
- Lining fabric (cotton or satin)
- Zipper (5 to 7 inches long)
- Sewing machine or needle and thread
- Rotary cutter or fabric scissors
- Ruler or measuring tape
- Pins or fabric clips
- Iron and ironing board
- Optional: quilt pattern template or fabric marking pen
Using a quilt pattern is optional but highly recommended. A small log cabin or flying geese quilt pattern works beautifully on mini-projects like this. Choose fabrics in coordinating colors or go bold with contrasting pieces—there’s no wrong way to design your own quilted look.
Preparing and Assembling Your Fabric Pieces
Start by choosing your fabric scraps and deciding on a layout. If you’re following a quilt pattern, cut each piece accordingly. For a simple layout, you can stitch together a few strips or squares into a patchwork design. Aim for a finished quilt panel of about 6×8 inches—this will be trimmed later.
Next, place your quilt top (the patchwork piece) on top of the batting, right side up. Use your iron to press everything flat. Then, using a basic straight stitch or your preferred quilting stitch, sew through all layers to secure them. You can stitch along the seams for a traditional quilted effect or try a decorative design.
Trim your quilted panel to a clean 6×8-inch rectangle. Cut a matching piece of lining fabric to the same size. Repeat for the second side of your coin purse—this gives you two panels: one for the front and one for the back.
Attaching the Zipper
Now comes the zipper! Lay one quilted panel face-up. Place the zipper face-down along the top edge, aligning it with the raw edge. Place the lining fabric face-down on top of the zipper. Pin or clip in place.
Using your zipper foot on the sewing machine, stitch along the top edge through all three layers. Open the fabrics and press them away from the zipper. Repeat the process with the other quilted panel and the other side of the zipper.
Once both sides are attached, open the zipper halfway (important!). Fold the purse so the quilted pieces are right sides together and the linings are also right sides together. Clip or pin around the edges, leaving a 2-inch gap at the bottom of the lining for turning the purse right side out later.
Stitching It All Together
Using a ¼-inch seam allowance, sew around the entire edge, starting at one side of the lining and working your way around the purse. Be sure not to sew over the zipper teeth; go slowly over the zipper area if needed.
When you reach the beginning, backstitch and stop. Trim the corners to reduce bulk. Then, turn your purse right side out through the opening in the lining. Push out the corners using a chopstick or blunt tool. Press the edges flat.
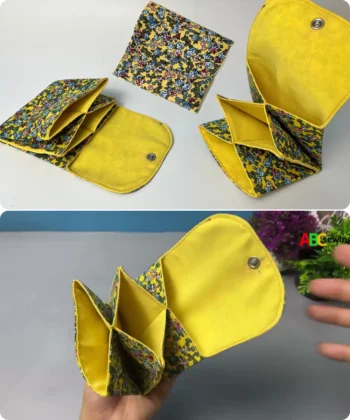
Sew the opening in the lining closed using a small hand stitch or a machine topstitch. Tuck the lining inside, zip it up, and admire your brand-new quilted coin purse!
Personalization Ideas
Personalizing your coin purse is where the fun really begins! Start by experimenting with different quilt patterns—like the classic nine-patch, pinwheel, or half-square triangles—to give each purse a unique look. You can also embroider initials, add small buttons, or use fabric paint for added flair.
Switch up the lining with a vibrant print or silky fabric for a delightful surprise when you open the purse. Using metallic zippers or decorative pulls can also elevate the design. You might even add a wrist strap or keyring for added function.
If you’re making several purses, consider creating a color theme for different seasons or holidays. For example, pastels for spring, rich tones for fall, or festive red and green for a holiday gift collection. With fabric scraps and quilt patterns, the possibilities are endless.
Tips for Beginners
If this is your first time quilting or sewing a zipper, don’t worry! Start slowly and don’t be afraid to make mistakes. Every purse you make will help you gain confidence and improve your sewing skills. Use a walking foot on your sewing machine if your fabric layers are shifting—it helps feed the quilt sandwich evenly.
Practice on scrap fabric before sewing the final project, especially for attaching the zipper. Once you get the hang of it, you’ll be able to sew a coin purse in under an hour.
And most importantly, enjoy the process. Quilting is about expressing yourself, connecting with tradition, and having fun. Even the smallest project like this can carry big joy.
Share Your Creations!
Congratulations! You’ve just made a beautiful quilted coin purse from fabric scraps. Whether you followed a classic quilt pattern or came up with your own design, you now have a one-of-a-kind accessory to show off or give as a gift.
We’d love to see your finished purse and hear about your experience! Share your creations on social media using the hashtag #QuiltedCoinPurse or tag us in your posts. Inspire others to give fabric scraps a second life and explore the joy of quilting through small, achievable projects.
Happy quilting!