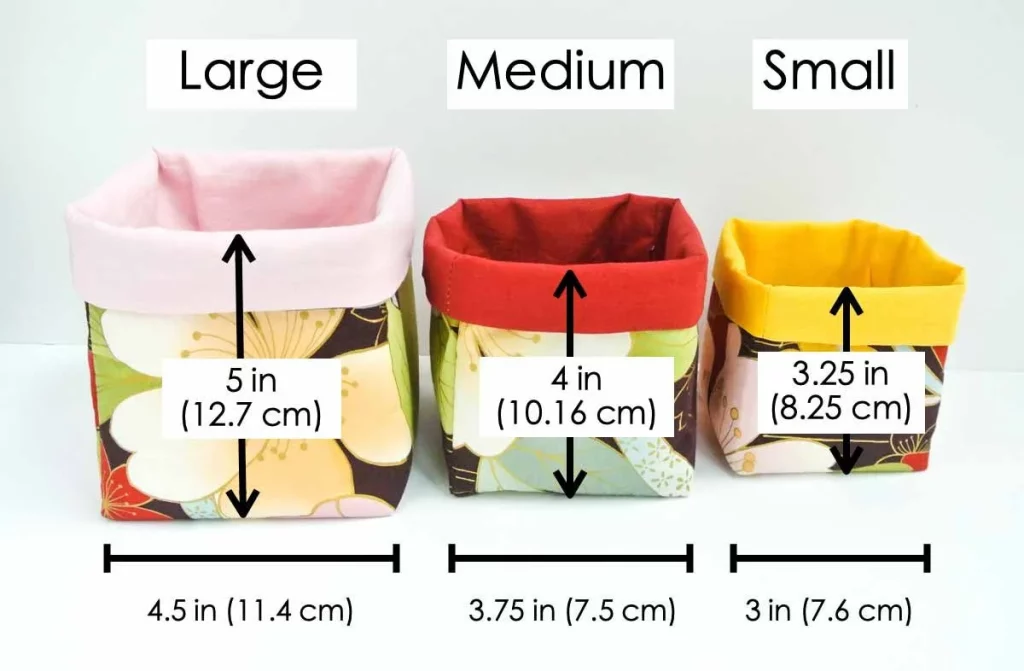
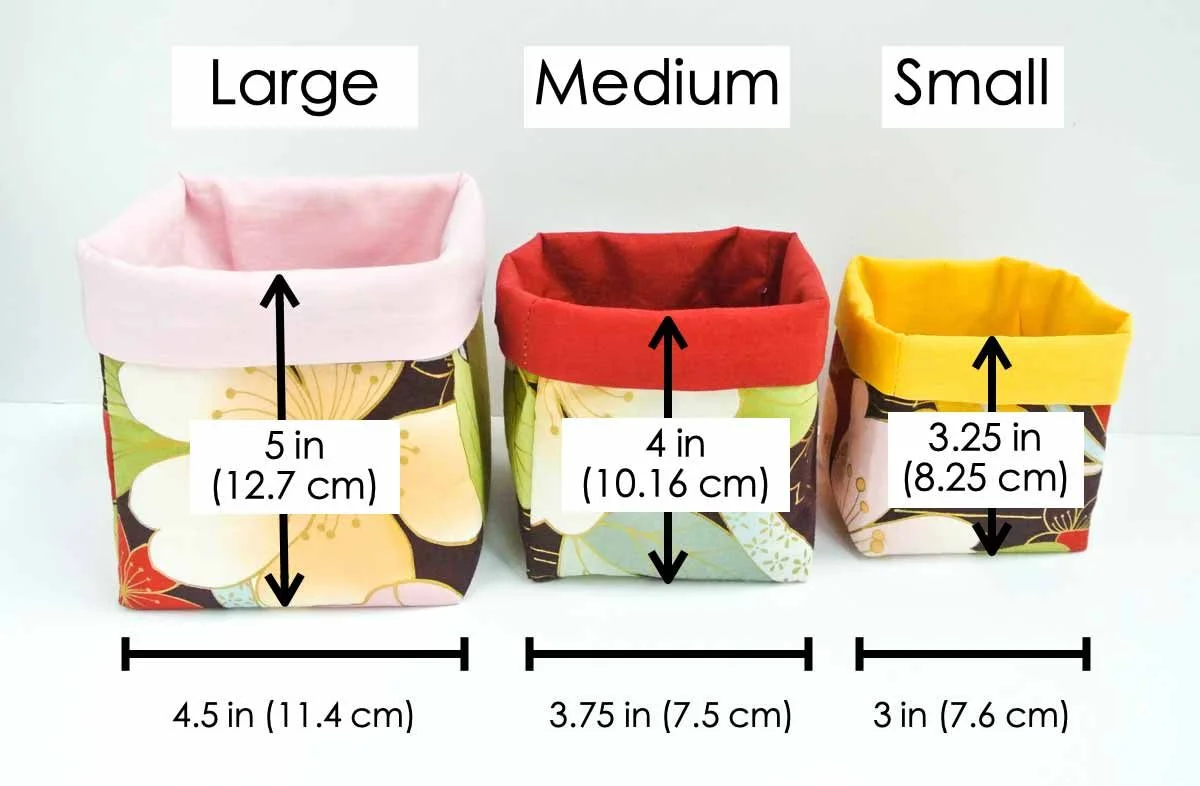
A fabric basket is one of those sewing projects that looks impressive but is surprisingly simple to make. It is a practical item that can be used to organize craft supplies, store small toys, or even act as a decorative piece around the home. Beginners often find this project very rewarding because it teaches the basics of cutting, sewing straight seams, and adding structure to fabric.
The best part about creating a fabric basket is that it can be completed in a single afternoon. You don’t need advanced sewing skills or expensive materials to get started. If you enjoy quilting or working with fabric scraps, this tutorial will also give you an opportunity to repurpose leftover pieces from a quilt pattern.
By the end of this guide, you will have a beautiful and functional fabric basket, plus the confidence to tackle more sewing projects. This tutorial provides a free pattern, step-by-step instructions, and ideas for customization so you can truly make the basket your own.
Materials You Will Need
Before starting, gather all your materials to ensure the sewing process goes smoothly. For this project, you’ll need cotton fabric in two coordinating prints—one for the exterior and one for the lining. Choose fabrics that are sturdy enough to hold shape but still soft to sew. If you love quilting, you can even piece together a simple quilt pattern for the exterior panel to add texture and personality.
You will also need interfacing or fusible fleece to provide structure to your basket. Without it, the basket will be too floppy to hold items. A lightweight to medium-weight fusible interfacing works best for beginners. You’ll also need thread that matches or contrasts your fabric, depending on the look you want.
Finally, make sure you have the essential sewing tools: fabric scissors, rotary cutter, cutting mat, sewing pins or clips, ruler, and your sewing machine. With these materials ready, you’re all set to begin creating your fabric basket.
Cutting the Fabric Pieces
The first step is to cut the fabric into the required pieces. For a medium-sized basket, you’ll need two 15” x 15” squares for the outer fabric, two 15” x 15” squares for the lining, and two 15” x 15” squares of interfacing. Adjust these dimensions to make a larger or smaller basket, depending on your needs.
Once the squares are cut, you will also need to cut 3” squares from each corner. This creates the base of the basket and allows the fabric to form a box shape when sewn together. Repeat this step for both the outer fabric and the lining.
Take your time during the cutting process. Precise cuts are essential to ensure that all the sides match up when you start sewing. If you’re using a quilt pattern for the exterior panels, pay attention to the fabric placement so the design is centered.
Sewing the Outer Basket
Begin by fusing the interfacing to the wrong side of the outer fabric pieces. This step provides the structure needed for your basket to stand upright. Make sure to press evenly so there are no wrinkles between the fabric and interfacing.
Next, place the two outer fabric squares right sides together and sew along the side and bottom edges using a ½” seam allowance. Do not sew the cut-out corners yet. After sewing, press the seams open to reduce bulk.
Now, pinch each corner cut-out together so the side and bottom seams align, forming a box shape. Sew across each corner with a ½” seam allowance. Repeat for the other corner. Once done, you will see the basket beginning to take form.
Sewing the Lining
The lining follows the same process as the outer basket. Place the lining squares right sides together and sew along the sides and bottom, again leaving the corners unsewn. Press the seams open carefully.
Just like before, align and pinch the corners to form a box shape. Sew across each corner with a ½” seam allowance. At this point, you should have two separate fabric “boxes”—one for the outer fabric and one for the lining.
For turning later, leave a 3” opening along the bottom of the lining. This small gap will allow you to pull the basket right side out once the layers are sewn together.
Joining the Basket and Lining
With both sections complete, it’s time to join them together. Place the outer basket inside the lining with right sides facing each other. Make sure the seams line up neatly and clip them in place.
Sew all the way around the top edge with a ½” seam allowance. Take your time with this step, as the top edge will be visible and affects the overall finish of your basket. After sewing, trim away any excess fabric to reduce bulk.
Now, carefully turn the basket right side out through the opening in the lining. Once it’s fully turned, press the top seam flat. Topstitch around the top edge of the basket for extra durability and a polished look. Finally, close the opening in the lining by sewing it shut.

Adding Handles (Optional)
If you’d like your fabric basket to be more versatile, consider adding handles. Cut two fabric strips measuring 12” x 3” each. Fold the strips in half lengthwise, press, then fold the edges to the center and press again. Sew along both sides to create sturdy straps.
Pin the handles to the top edge of the basket before topstitching. Place them evenly on each side and sew securely. Handles make it easier to carry the basket around and add a stylish touch to the design.
You can also experiment with leather straps, rope, or quilted fabric handles. This is a great way to personalize the basket while practicing different sewing techniques.
Ideas for Personalization
One of the joys of sewing a fabric basket is how customizable it is. You can use bright, cheerful prints for a child’s room, or stick with neutral tones for a more sophisticated look. Mixing fabric scraps from a quilt pattern also adds a patchwork effect that makes each basket unique.
Consider embellishing your basket with appliqué, embroidery, or even fabric paint. These details give the basket personality and can make it a thoughtful handmade gift. You can also adjust the size—make smaller baskets for jewelry or larger ones for storing quilts and blankets.
Personalization allows you to match the basket with your home décor. Whether rustic, modern, or playful, the fabric choices and details will make your basket truly one-of-a-kind.
Final Thoughts and Invitation
Making a fabric basket is a wonderful sewing project for beginners and seasoned quilters alike. It’s quick, practical, and offers endless opportunities for customization. With just a few fabric pieces and some simple sewing, you can create something that is both beautiful and useful.
This tutorial showed you how to cut, sew, and assemble a fabric basket using a free pattern. You also learned how to personalize your basket with handles and embellishments, making it a versatile project to repeat in different styles.
Now it’s your turn! Gather your materials, pick a favorite quilt pattern for inspiration, and create your own fabric basket. Once finished, share your project with friends, family, or online sewing groups. Handmade crafts are best when shared, and your basket will surely inspire others to start sewing too.

